Recording periodic time

Record time
-
Create or open an existing Timesheet. Make sure you are viewing it in Periodic Entry mode.
-
Select the TimeUnit appropriate to the task carried out.
-
Select the Client from the drop down list in the Client/Assignment column.
-
Press the [Tab] key to automatically display information in the A/Code and C/R columns.
-
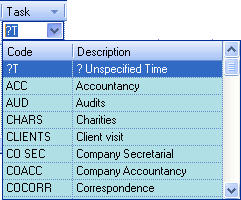
Select the Task from the drop down list in the Task column.
Your practice will have included tasks that are appropriate to the work carried out. Select one from the drop down list.
-
Type the number of time units spent on the task into the appropriate Day Date column.
Press [Enter] or [Tab] to move to another Day Date column to record other time units.
The amount in the Total column is propagated from the time units in the Day Date columns. -
Type supporting information that might be needed about the task you completed into the Comments column.
-
To enter additional time units for another Client or Assignment, press the [Enter] key until the cursor appears in a blank line just below the headings across the Timesheet.
-
Repeat Steps 4 to 9. Otherwise, click OK.
-
If there are:
-
more entries to add later, click the Draft
 button.
The Entry Status window does not change (from Draft).
-
no more entries to add, click the Submit
 button.
The Entry Status window will change to show Submitted.
-
Close the Timesheet.
Note: if you cannot see all the days you expect to see in the periodic entry mode, move the scroll bar at the foot of the timesheet to the right to reveal the missing days. You can also move a Day, Total or the Comments column by clicking on the heading and dragging it to another position.