CCH Trust Accounts Transaction Import – Special Program setup

The special program option is used to import standing data into CCH Trust Accounts. The system uses a program file called NOMIMP5.wgx which is typically located in the program directory X:\WTRUMP (or C:\WTRUMP). The program uses a Record Type field at the start of each line to indicate what data is expected to be contained on each line.
A macro enabled spreadsheet is available which will automate the creation of the import csv files and enable the structure of the files to be consistent.
Please note that unlike data imported using the Transaction Import option when you use the Special Program there is no Delete option to remove incorrectly imported data. Please check carefully before importing large amounts of data using the Special Program.
Data which can currently be imported is as follows:
- Master nominals – I.e. the existing chart of accounts for all clients. This could allow additional codes to be added to the CCH Master Chart or a completely new chart to be imported in place of the default CCH chart which is imported during the set up process from S6TRUST.imp using the File>Import option.
- Securities – These are the securities used by all clients. This is not generally required if a data feed is available, but can be invaluable if one is not being used.
- Clients – Clients can be set up using an import file, however they will subsequently need to be linked to the Central database entry for the client to enable connectivity to the Personal Tax system and the Accounts Formatter.
- Funds – The funds linked to any client can be automatically set up using the funds import option.
- Client nominals – Client nominals are often not required as the system will create them on the fly from the master nominals by importing transactions. However if client nominals have tailored descriptions that are required then they can be imported.
- Security prices – This will import the prices to be used in the market valuation computation for each security.
The price per unit or share is added to the master security record at a particular date (e.g. 5Th April 2021) which can be used to arrive at the market value of a client’s portfolio at that date. It will therefore be necessary to import all prices for all securities in use at any date for which a valuation is required.
In practice this will usually be a 5th April date but can be any date for which an accounting period is required. If a data feed is being used then the prices should be automatically imported so this option would not be required.
- Exchange rates – this will import the rates for a source currency to a destination currency on a specific date. The import will not overwrite any rates already uploaded from the external source, nor will it overwrite any rates previously imported.
Considerable care needs to be taken when using this import option. If an error on importing does exist then all currencies affected would need to be manually updated for each day containing incorrect rates.
For transactional data use the Transaction Import option in Activities > Global Operations > Transaction Import. See the Transaction Import guide here for more information.
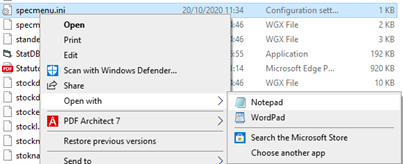
- Before the Special Program can be used browse to the WTRUMP folder:

- Right click on the specmenu.ini file (or create a text file with the name specmenu.ini, if doing this, ensure that the file has a .ini extension with a configuration settings file type rather than a hidden text file type).

- Choose Edit or Open with > Notepad
- Create an entry in the specmenu.ini file for the import.
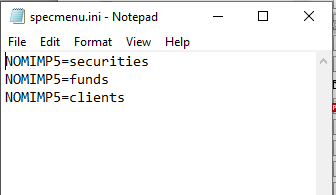
Note: You only need to add one row to enable the Special Programs import process to operate.
- Once this is saved and CCH Trust Accounts closed and reopened, the Special programs option in Tools should no longer be greyed out.

- Clicking on Special Programs will display the Special programs selection screen.
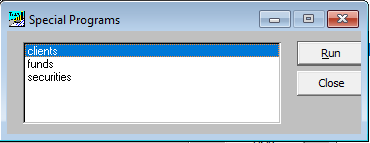
- Choose an option and click Run.

- Click on Browse to find the File to import and choose the appropriate Client Class and click Import.
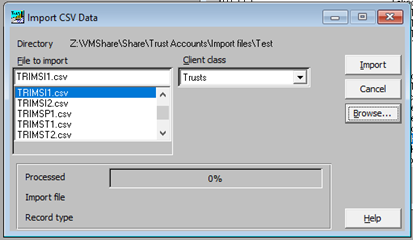
A message will confirm whether the import was successful and how many records were imported.