Tests and Work Programme

You may record details of tests and checklist completion, create audit working papers and enter audit notes and journals, as the audit progresses. Audit Automation keeps track of the audit progress and can list the current state of the audit and the number of tests and questions outstanding.
A colour coding system is used for user created documents. Any document that was present on a balance forward and has not been accessed during the current year’s audit will be shown in the outstanding colour (default red). This is to alert you to the fact that this document still contains last year’s data. Once the document has been loaded, it is assumed you have made the changes required to reflect the current year end date, etc. and prepared the document for the current year. From that point on it will be shown in the standard list colour.
You may then select an audit programme or checklist for completion by highlighting it and clicking on [Edit], or by double clicking on its name. You may also view and print a lead schedule or working paper in the same way.
From this window you may:
* Enter details of completion of tests and checklists
* View lead schedules
* View and edit user created working papers
* Access the calculators
* View the audit objectives for an area
* View and edit the index for an area
* Enter a note to manager or partner in relation to a particular audit area
* Sign off an audit area
* Use the right mouse button to display a list of options
If anything is done that may affect the contents of the checklists, e.g. changes to books and record, journal entries, etc., the system displays the following warning at the top of the completion dialog:
“The checklists need updating. Run "Planning | Update checklist question exclusion..."
Once the update routine has been processed, the warning will disappear.
Audit programmes
When the system displays the current year audit file for completion, it generates entries in the list for each active standard audit programme that has been defined in the master and any work programmes that you have designed for identified audit risks and area/assertion reliance and risk. Up to 4 designed programmes will appear:
• Risk mitigation tests
• Tests of control
• Non-sampling substantive tests
• Other substantive work
In addition, a single programme will appear called Combined audit programme, containing all pool tests selected for the area. The reason for including both is that the combine programmes will contain each test only once and is therefore presented in the best format for completing the audit work, however, the other view presented the tests showing the areas on which they are providing evidence and in a format the review needs to see them to reach a conclusion on each risk and area.
Reason for test
Audit tests from the pool can be included in the audit pack for a number of reasons, they could be mandatory tests or be activated by being linked to reliance, a risk or a control. The display of the combined audit programme will show why the tests have been included, listed below the text of the tests. This takes the format:
[Audit procedure for]
Mandatory procedure Name_of_procedure_programme
CCH Audit Automation™ Reference M anual Version 2019.1
Key control 99: First_50_characters_of_txt + …..
Identified risk 99: First_50_characters_of_text + ….
Control reliance for [Name_of_assertion] – [Level_of_reliance] reliance [(Audit_Area)]
Non-sampling reliance for [Name_of_assertion] – [Level_of_reliance] reliance [(Audit_Area)]
Residual for [Name_of_assertion] – [Level_of_risk] risk [(Audit_Area)]
Note that the audit area will only be shown if it is not the audit area to which the test belongs.
This additional information will only be displayed when the checkbox Show comments and notes is ticked.
Updating audit test exclusion during completion
The option exists to allow you to run the routine to update audit test exclusion for a single audit area. To run this, select the area and click the right mouse button. Select Update audit test exclusion for area from the pop-up menu and the routine will be executed. The purpose of this option is to allow you to request that Audit Automation reviews an individual section to reconsider if the audit tests should be active or inactive.
The main use will be for sections that were not active at planning but have become active during completion, either by the entry of journals, or by an override. This will activate the section but not the programmes within it. To activate the programmes, highlight the area folder, click the right mouse button and select the option.
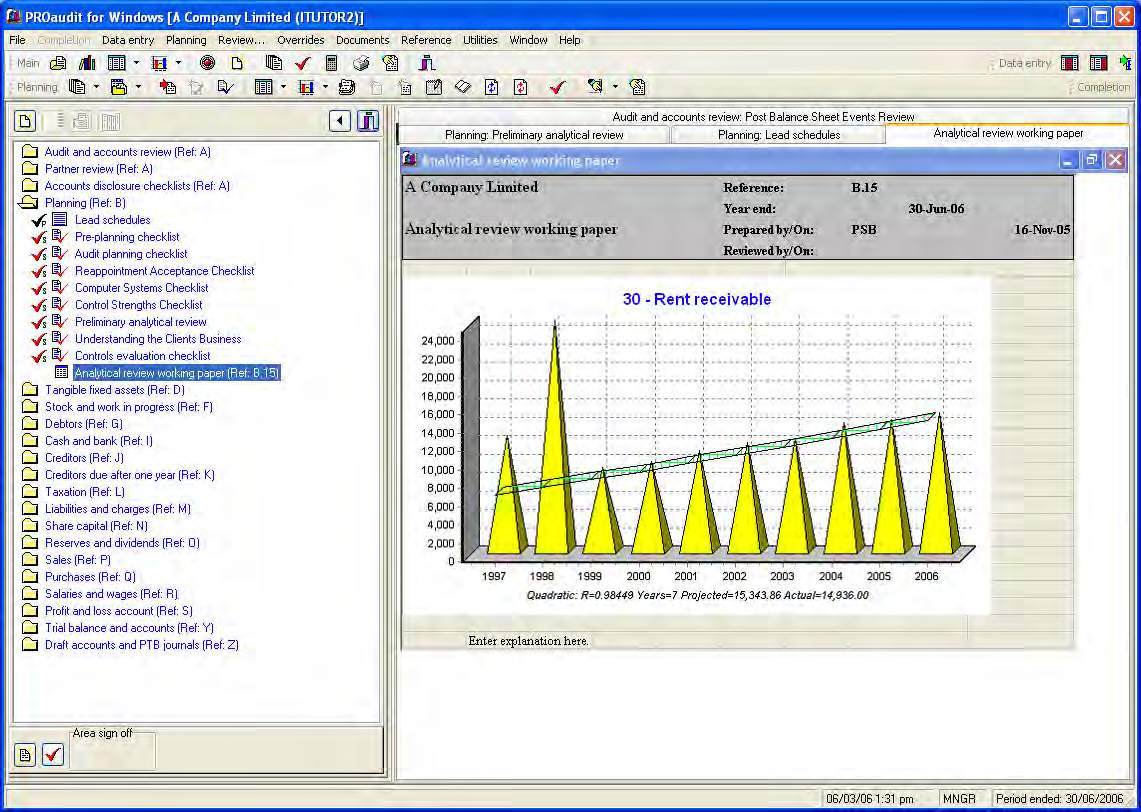
Full screen audit file
In this mode, the current year audit file is displayed in split screen mode, with the index in the left window and the working papers in a tabbed work area in the right window. This provides significantly improved navigation around the file. When no working papers are open, the system displays status information about the section of the file currently selected in the index. The index on the left displays the same information as the Audit documentation completion dialog described above and operates in much the same way.
As indicated, the system displays the audit file in a split window:
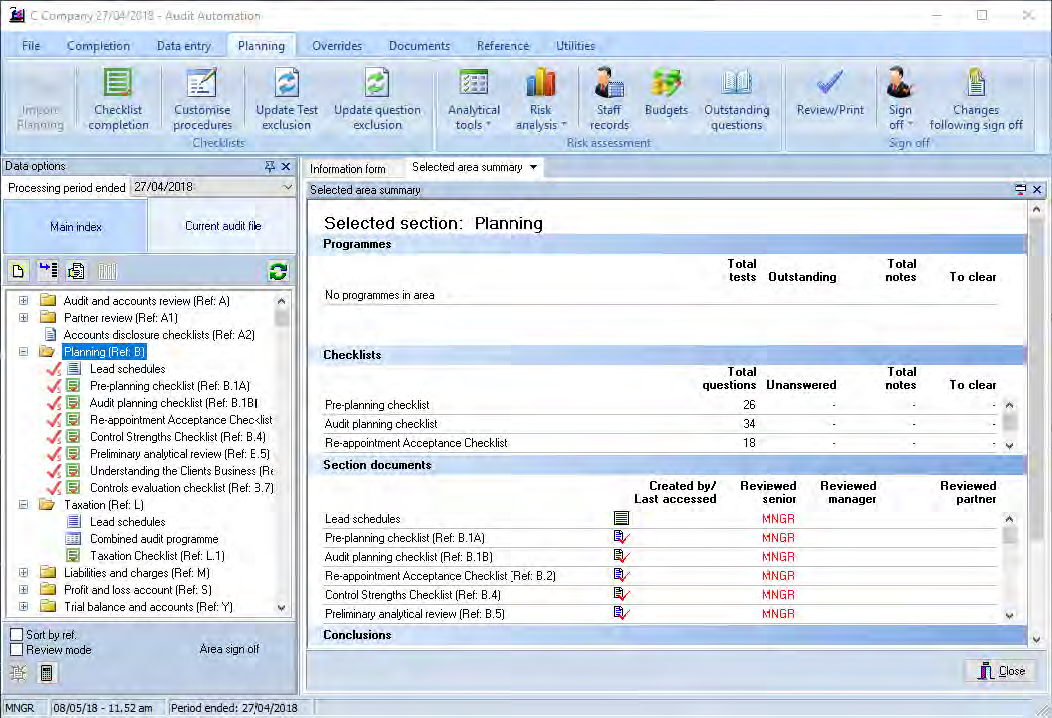
When the file is first displayed, the main index will be visible on the left and the status of the selected section will be displayed in the work area to the right.
By default, the documents within each section are displayed in the following order:
• Lead schedule
• Programmes
• Perennial checklists
• Sub folders
• User added document
If you click on the Sort by ref checkbox at the foot of the index the contents of each audit area are resorted into the following order:
• Lead schedule
• Pool test programmes
• All other items in reference order.
• Sub folders
If you click on a different section, or a working paper within a different section, the status display will change to reflect the section selected.
The status display shows the following:
| Area | Displayed | Actions recognised |
| Programmes | All programmes in the section, showing the following for each: • Name. • Total number of tests. • Number of tests which have not yet been completed. • Total number of completion notes raised in respect of the programme. • Number of notes that have not been cleared |
Double click anywhere on a line to open the programme for completion. |
| Checklists | All checklists in the section, showing the following for each: • Name. • Total number of questions. • Number of questions which have not yet been answered. • Total number of completion notes raised in respect of the checklist. • Number of notes that have not been cleared. |
Double click anywhere on a line to open the checklist for completion. |
| Section documents | All documents in the section, including lead schedules, programmes and checklists, showing the following: • Name. • Created by/Last accessed. This is only displayed in respect of user created documents. • If the document has been reviewed by the senior, the reviewer’s initials. • If the document has been reviewed by the manager, the reviewer’s initials. • If the document has been reviewed by the partner, the reviewer’s initials. |
Double click on the name of the document to open it. Single click in the review area by a document to open the Review history dialog for completion. See below regarding the new facility for recording the review of working papers. |
| Conclusions | Details of any conclusions entered in respect of the area. | You may copy text to the windows clipboard by highlighting all or part of the text displayed, pressing the right mouse button and selecting Copy. To highlight text, drag the mouse over it, or use the standard keyboard sequence of <Shift> + <Arrow key>. You may also use <Ctrl> + <C> to copy the highlighted text. |
As you select standard Audit Automation working papers, by double clicking on them in the index or in the status area, they will appear in the work area on a new tabbed page. If you open a working paper in an unknown format, i.e. an imported file, it will be opened using the associated program in a separate window. The following is a screen shot of an audit file with 4 documents open:
As you can see, there are 4 tabs in the work area and clicking on one of them will bring the relevant working paper to the front.
Completion of the audit file is the same for both modes and is described below.
The position of the divider between the index and the work area can be adjusted by dragging it to the left or right. If you change its position, this will be remembered for future accesses of the file.
Word and Excel documents
If you open a Word or an Excel document by selecting it from the index on the left, the first page of the document will be displayed on a tab in the same way as other internal documents. However, this is a non-editable display of the document.
The system will also open Word or Excel to offer the document for editing. When you close the program opened to edit the document, the tab will remain showing the first page. You can double click on the page displayed and the document will be opened for edit in the appropriate program. If you make any changes to the first page, these will be visible in the preview as soon as the changes are saved.
All Word and Excel documents will be shown in this way, irrespective of the way they were placed in the file, i.e. created from a template or imported. The display of the first page in the “Container tab” is optional and can be turned off via System settings.
Enter completion of audit tests
To enter details of audit test completion, open a file section and double click on the programme containing the test. The system will display the Programme completion dialog listing all outstanding tests.

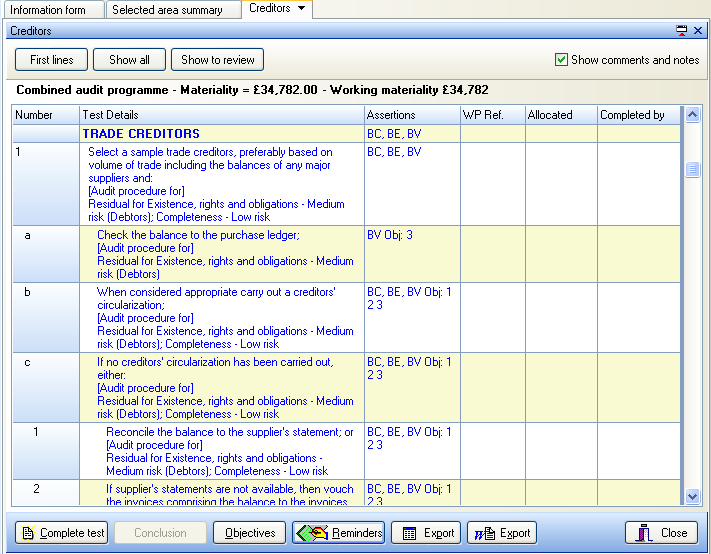
Programme completion dialog
Any test where the wording has been customised for the client, and all tests added for the client, will be highlighted with a blue dot.
The WP Ref column displays the references of any working papers linked to the test. If you hover the mouse over a reference, the title of the working paper appears on the prompt line at the bottom of the window. If you double click on the reference and only a single reference exists, the working paper is opened automatically. If more than one working paper is referenced, a list of the documents appears and you and choose the document you wish to view.
You may scroll through the programme, using the scroll bar, to display the test that has been completed. Either double click on the test to be completed, or highlight it and click on [Complete test] and the Audit test completion dialog will be displayed.
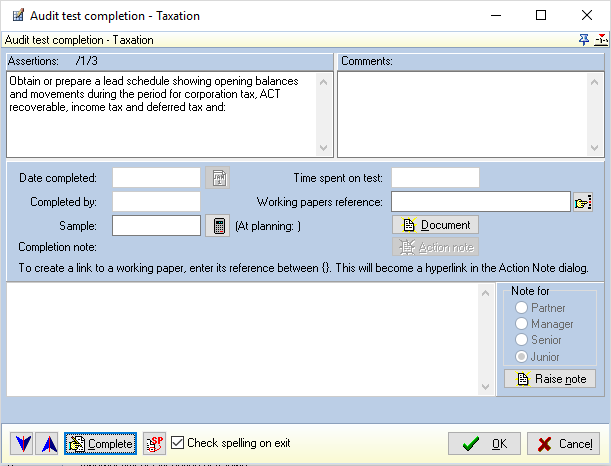
Audit test completion dialog
At any time prior to signing the test off as complete, you can enter or edit a comment, change or calculate a sample size, enter a working paper reference and create a working paper.
Completion details
You enter details of completion by clicking on the [Complete] button. On clicking this button, the system will insert the current date and your initials. You may change the date as you could be recording the completion of the test after the event, however, you cannot change the initials as you are the one signing off the work. You may also now enter the time spent on the test and, if there was a problem, a note describing the position and flag it as being for senior's, manager’s or partner’s attention. The time entered for the test is in the format hours and minutes, HH.MM.
On completing the entries click on [OK] to save the details. If you have accessed the test in error, click on [Cancel] to exit without recording details of completion.
Audit test completion
Within audit test completion, users can reverse the completion state if they have an equal or higher access level than the person that completed the test.
When a user, with the same or higher access level, opens a completed audit test, the [Reinstate] button will be made available for use. When the test is reinstated the following information will be written to the audit trail:
• Test text
• Original completion date
• Original member of staff who completed the test
• Original sample size
• Comments recorded by original completer
• Completed notes
• Working paper references
Changing to another test
To move to the next or preceding test without closing the Audit test completion dialog, use the blue up and down buttons. You may also click another test in the Audit programme completion dialog and the details relating to it will be displayed. Prior to displaying the new details, the system will save the current test completion dialog as though you had pressed [OK].
On returning to the audit programme, or moving to another test, a number of things will have happened:
- If you have entered a note or a comment to the test, a memo icon will appear to show that you have done this. If you entered a note, the text will turn red to indicate that the note is uncleared. Once the note has been cleared, the test will not be shown in the list of outstanding tests, but it will be included in this state until the note is cleared.
- If the sample size was changed, a red dot will appear by the test to indicate this was done.
- If you calculated a sample size using the sample stratification calculator, a calculator icon will appear by the test number.
- The completion details will appear in the appropriate columns.
If you have entered completion details and no note has been entered, the test text will turn grey to indicate that the test is now complete.
It is possible for the person who entered a note to edit it at any time prior to it being cleared, and also edit the comment or reverse the completion of an audit test if it has been recorded as completed in error. To do this, double click on the test in question and the Audit test completion dialog will be displayed, completed with the test details. To edit the text of the note or comment, click in the edit box and change the text. To reverse the completion of the test, click on [Reinstate test].
It is also possible for another member of the team to add to the comments on a test that has been completed by someone else. When someone who is not the person who signed the test off displays the Audit test completion dialog for a completed test, an [Add to comment] button appears. Clicking on this button allows you to add to the comments attached to the test and your comment appears following a line indicating that you added the text. More than one person can add to comments and the system identifies each. If you add to a comment and later return to the test and click on the button the system extracts your comments from the text and offers it for edit. After you have changed it and saved it again it is added back to the comment text. Note that the last person’s comments will always appear at the end of the text even if they had commented earlier. I.e. editing a comment moves it to the end of the text.
A number of programmes are structured so that tests have parts identified by a letter. In these cases, it is only necessary to sign off the completion of the parts and as soon as the last part has been signed off, the system will record the whole test as complete. Similarly, if a part of a test has sub parts, as soon as the last sub part is signed off the whole of that part will be recorded as completed.
On accessing the completion window, completed test are not shown. However, if you wish to review the full programme including completed tests, click on [Show all]. Tests which have been excluded for the client, either by the system or by the planner, can be shown by clicking on [Show excluded]. To gain an overview of the situation relating to an audit programme it is also possible to restrict the display to the first line of the test by clicking [First lines].
Show comments
A checkbox called Show comments and notes appears above the [Close] button. Placing a tick in the checkbox will cause the system to append any comments and notes to the text of each test.
The tick in this checkbox is persistent and your last setting will become the default mode for all programmes subsequently opened.
Analazing the audit programme
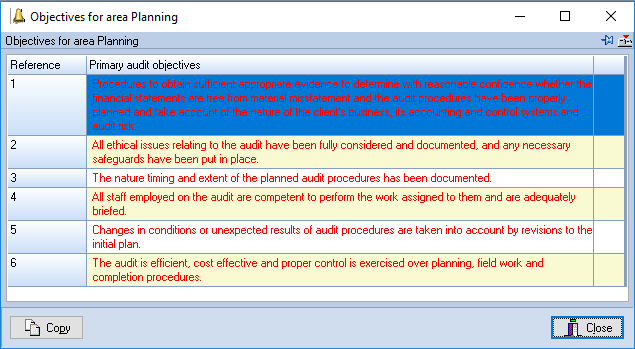
Clicking on the [Objectives] button from the Audit programme completion dialog, will cause the system to analyse the programme and list all tests which satisfy each objective defined for the area. Please note that the ability to carry out this summary may only be active in some master packs. This enables you to confirm that there are tests active satisfying all audit objectives and that you are not over auditing.
The Objectives dialog also contains a button that allows you to copy the text of an objective to the Windows clipboard so that you can insert it in your working papers. Simply highlight the objective to be copied and click on [Copy].
Creating a working paper via the audit test completion dialog
To create a new working paper, which can be done prior to recording test completion, enter the reference to be allocated to the schedule in the Working papers reference edit box and click on the [Document] button. Note that the reference you enter should not include the audit area identification as Audit Automation will prefix this for you. When you click [Document] the system will ask you if you wish to create a new document and when you confirm this it will display the Client document dialog. You may now create a working paper based on a template, start with a blank document or scan a document as required. See click here for details of using the Client document dialog.
It is possible to create cross references to more than one working paper. To do this, enter references separated by commas and the system will then know to consider each one separately. When you click on the [Document] button, if more than one reference is found the system will present a popup menu listing the references together with the title of the document if one exists for the reference given. Click on the menu item to load, or create, the document. The system will present such references with no icons in the Programme completion dialog. E.g. “10,B.5,20” would refer to working papers 10 and 20 in the current area and working paper 5 in section B.
Linking to an existing working paper or document via the audit test completion dialog
To link to an existing working paper or internal Audit Automation document, you can either enter its reference in the Working papers reference edit box and click on the [Document] button, or click on the Pick button , and the following pick list dialog will appear:

The default list of documents presented will be the user created documents. From this you can find a working paper and double click on it to select it. However, you may also change the contents of the list using the drop-down list. Click on this and you will be presented with the following:
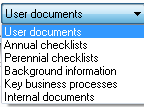
From this you can select the type of document or record that you wish to link to and the list will be updated to reflect your choice. You may now select one of these to return the reference to the Working Paper Reference field.
As you can see, this facility allows you to link to more than just user created documents, providing the facility to drill down to internal documents such as the General Panning Menu or a Checklist direct from a question or test.
If you are entering the reference in manually, you may either enter the reference of a working paper within the audit area to which the test relates, by simply entering its reference without a prefix, or you can refer to a working paper within another audit area by entering the reference that identifies the area, followed by a “.” and the reference of the document within that area. For example, “D.23” would link to the working paper 23 within section D. When you link to another area in this way, a folder icon will be displayed by the schedule reference in the Audit programme completion dialog to indicate that it is a reference to another area.
The system will find the existing record of the document and present the Client document dialog displaying its details. Click on [Document] and the working paper will be loaded and offered for edit within the program used to generate it.
Calculating samples sizes via the audit test completion dialog
If you wish to calculate a sample size using the stratification calculator, or use one of the other calculators when the Audit test completion dialog is displayed, click on the [Calculator] button and the Calculator dialog will be displayed. As you called the calculators from the Audit test completion dialog, the Stratification calculator will be shown and the details for materiality and risk factor completed with those relevant to the audit area. You may now fill in the other fields on the calculator with the information relevant to the test, see page 156 for details, and link the calculation to the test by clicking on the [Use] button. On selecting this button, the calculator will be closed and the sample size inserted in the Sample edit box and the icon on the [Calculator] button will turn white to indicate that the sample is a stratified calculation. The details of the calculation are stored with the test and may be recalled and edited at any time, prior to test completion, by clicking on the [Calculator] button. The details of the calculation are also shown on the face of the audit programme when it is printed.
Manual edit of sample size
If you manually change the sample size, a documentation prompt will be displayed asking you to enter your reasons. The first line of the comment will be completed with the following text:
[Comment made by AAA on change of sample size from 99 to 99]
Enter the reason why the change has been made and click on [OK]. The text entered will then be appended to any existing comments made in respect of the test.
Clearing a note via the audit test completion dialog
If you access the Audit test completion dialog of a completed test where there is an outstanding note and you are recorded as a staff member with a level to which the note is aimed, the [Action note] button will be active. You may click on this button to display the Note action form dialog and clear the note, or elevate it to the next level. See page 218 for details of the options available in this dialog.
Adding a review note via the audit test completion dialog
You may add a review note from the Audit test completion dialog at any time, before or after the test has been marked as completed. Any number of review notes can be created in respect of a test, and they are referenced to the test by the system completing the first 2 lines of the text of the note with the following:
Note in respect of:
‘X’: ‘Area name’: ‘Programme Title’ – Test ‘Test number’
To create a review note, click on the [Raise note] button and the Review note dialog will appear with the first 2 lines completed.
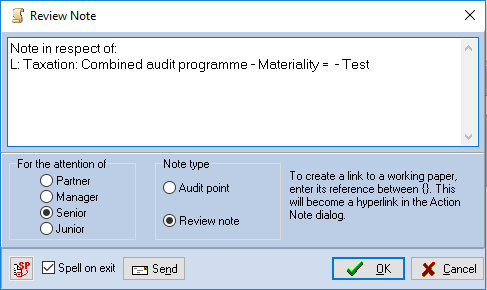
Review note dialog
The note will be marked for the attention of the senior and you can change this by clicking on another option in the For the attention of dialog. You can also convert the note into an audit point by clicking on the Audit point radio button. Enter the text of your note and click on [OK].
Clicking on [Send] will result in an email being composed based on the information displayed, for sending to all staff recorded in the staff file at the level to which the note is addressed. This will be displayed on the screen for you to edit before sending. If you are using Outlook, the Outlook send dialog will be used, if not then the internal email dialog will be used.
Adding tests during completion
During completion it is possible that you may decide to carry out further audit tests. You may enter these by clicking on [Add new test]. The Customise test dialog will be displayed to allow you to add the details of the new test.
You may edit the text of a test that has been added during completion. To do this, select the user added test in the Audit programme completion dialog and an [Edit test] button appears. Click on the button and the Edit test dialog will be displayed allowing you to edit the text and other data associated therewith. You can only edit the text of the test if you were the person who added the test.
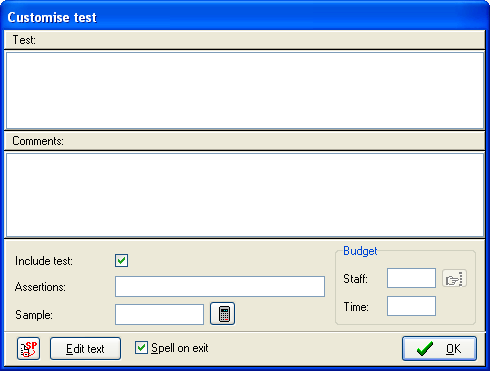
Customise test dialog
Enter details in each of the fields, see click here describing customising the audit programmes for details on how to use this dialog, and click on [OK]. The test will be added at the end of the programme and "{Add}" will appear by the test number to show that it was added during the completion stage of the audit.
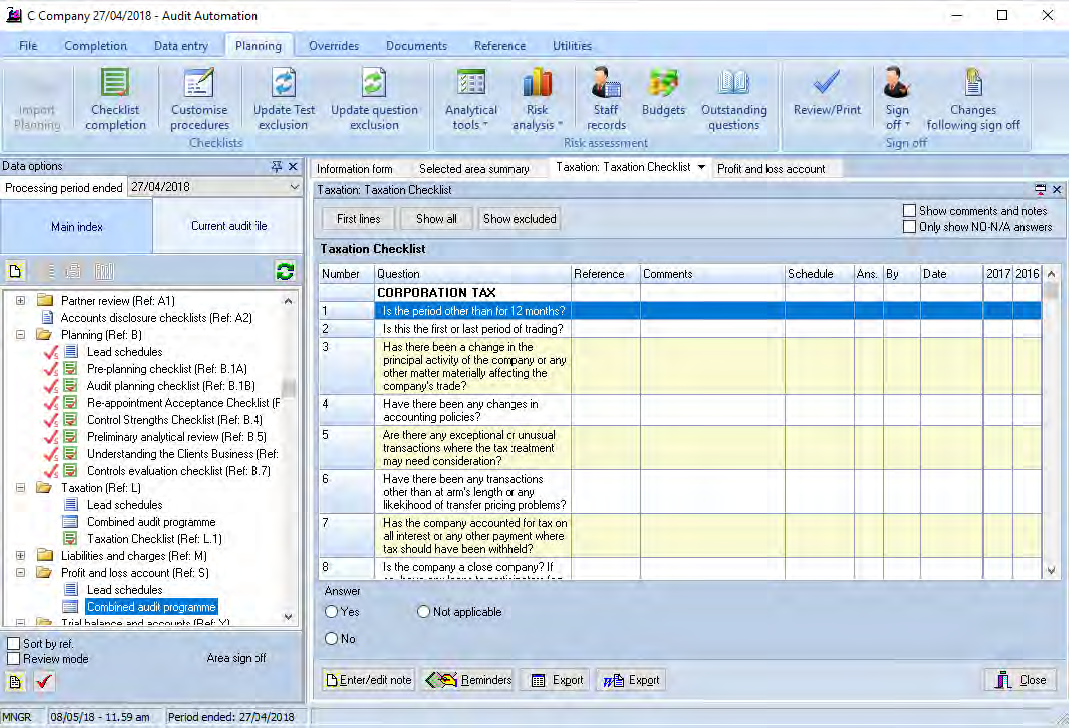
Perennial checklist completion
Checklists may be answered at any stage during the completion of the audit.
To complete checklists, open the audit area and double click on the name of the checklist. The system will display the Checklist completion window listing all outstanding questions.
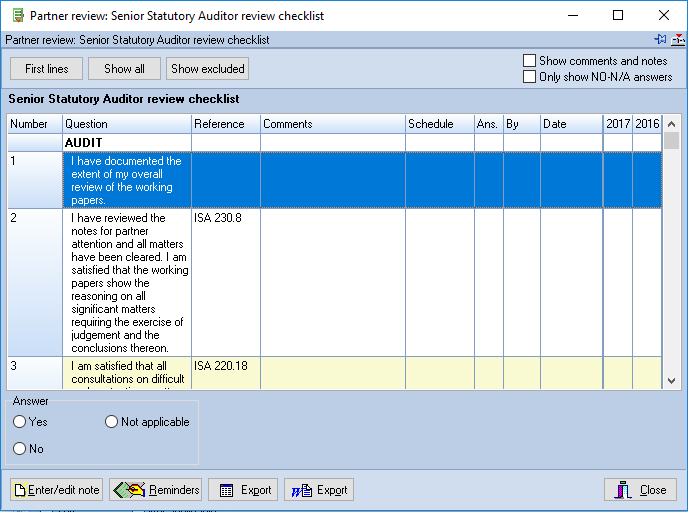
Checklist completion screen
You may scroll through the checklist, using the scroll bar, to display the questions to be answered.
The Schedule column displays the references to any working papers that have been linked to a question. If you hover the mouse over a reference number here, the title of the working paper appears on the prompt line at the bottom of the window. If you double click on the reference and only a single reference exists, the working paper is opened automatically. If more than one working paper is referenced, a list of the documents appears and you and choose the document you wish to view.
The system shows the answers for the prior 2 periods in the completion dialog, and, if you choose to show comments (see below), it displays these for both the current and prior periods and allows you to copy a previous period’s comment to the current year.
As you will see, the window includes a number of buttons to allow you to complete the checklist on screen. All of these buttons relate to the highlighted question.
Choosing and amending answers
When you select an unanswered question, the list of possible answers for the question appear as radio buttons in a panel at the foot of the dialog. The answers can vary per question and may include:
• Yes
• No
• Done
• Not applicable
• A number from 0 to 9
The answer options appear at the bottom of the checklist when you click on a question. They also appear in the Answer section of the Checklist Notes dialog which appears if you double click on a question. The example below accepts the answers Yes, No or Not applicable only.
To select an answer, either click on the appropriate radio button, or press the first letter of the answer (A for Not applicable) or a number on the keyboard.
If you answer No or Not applicable to a heading, or to a question with sub questions, then all items within the heading or questions will be marked Not applicable by the system.
After accepting your answer, the question is greyed and the next unanswered question is selected automatically.

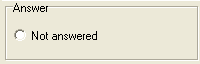
If you select a question that has been answered, a single radio button appears with the caption “Not answered”. You can select this, or press *, to remove this answer.
When you access the completion screen, any completed questions are not shown. However, if you wish to review the full checklist, including the completed questions, click on [Show all].
Similarly, tests that have been excluded for the client can be shown by clicking on [Show excluded].
To gain an overview of the situation relating to a checklist, you can restrict the display to the first line of the questions by clicking [First lines].
Entering & Editing Notes
If any questions are answered adversely, they should be supported by a comment or note, which can be entered by selecting the [Enter/edit note] button. You can also use this option to create working papers and attach them to a question.
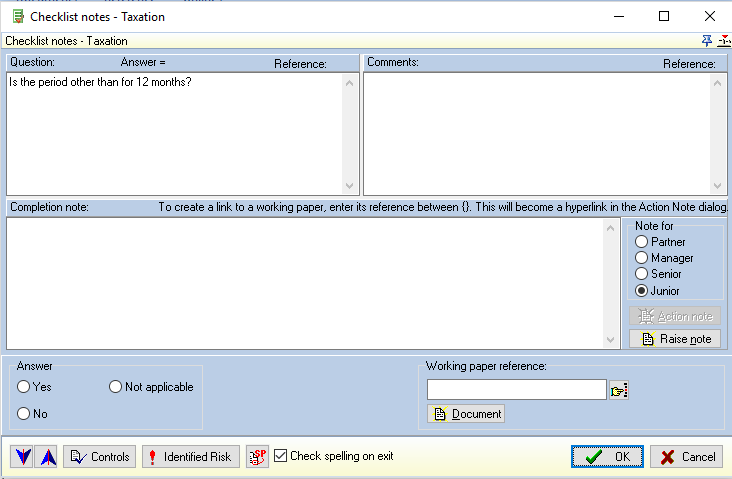
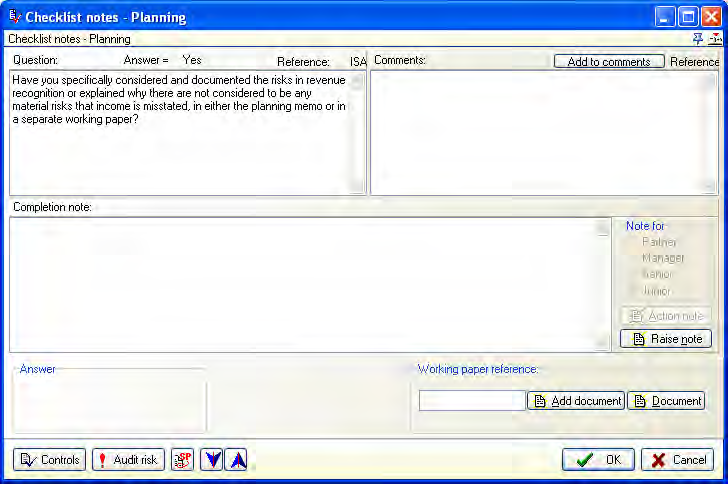
To enter a comment, note or attach a working paper, highlight the question and click on [Enter/edit note], or double click on a question and the Checklist note dialog will appear.
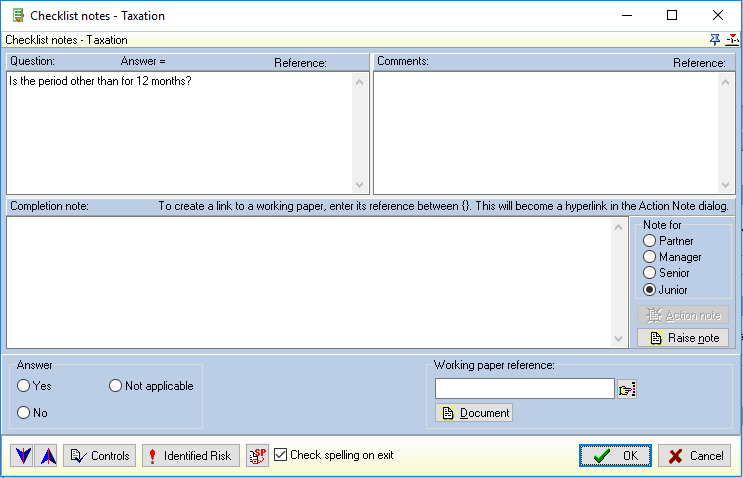
Checklist notes dialog
From this dialog you may enter a comment on the question, enter a note and create a working paper. These options, together with the [Action note] button and the prior and next buttons, operate in exactly the same way as the corresponding options in the Audit test completion dialog described earlier. See also the Audit Notes section on click here.
As with audit tests, any questions with uncleared notes associated with them will be shown in red. All questions with comments or notes attached to them will have the memo icon shown by them.

Checklist showing question with notes
Show comments
A checkbox called Show comments and notes appears in the top right corner. Placing a tick in the checkbox will cause the system to append any comments and notes to the text of each question.
The tick in this checkbox is persistent and your last setting will become the default mode for all checklists subsequently opened.
Review No and N/A answers in checklists
The second checkbox called Only show NO – N/A answers allows you to restrict the display to only show those items that have been answered No or N/A. This option overrides all other settings in the dialog, other than Show comments.
Understanding Conditional Questions
A conditional question only appears in the checklist if you have answered a previous question with a particular answer. If conditional questions are included, the contents of the checklist will change as you work through it, depending on the answers you provide. This makes the checklist easier to use because you will not be asked to answer irrelevant questions.
Conditional questions can be defined in Perennial Checklists because each question can have a unique identifier and a condition can be attached to a question that references the result of a previous question.
The following example shows the definition of a Perennial Checklist. In it, question 21 has an identifier of FRSA_INTANASS, while question 22 has a condition that tests the answer to question 21.
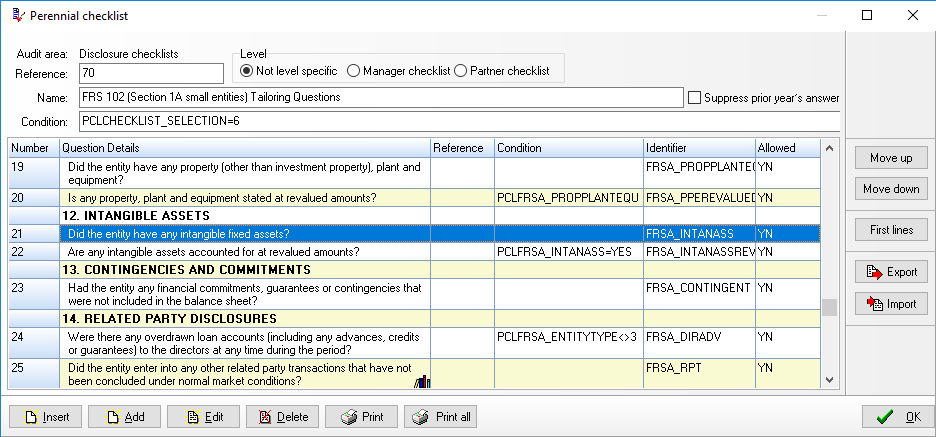
So, when the checklist is first displayed, if question 21 has not yet been answered, question 22 will not be displayed as the condition will fail. As soon as question 21 is answered, if the answer is Yes, question 22 will appear, if it is No then question 23 will appear.
In addition, if you have answered any question that has been allocated an identifier, when you close the checklist you will be asked:
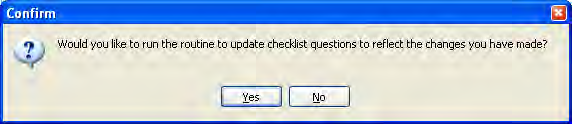
If you click on [Yes] then the system will reconsider all conditions in all areas to take account of any changed answers.
Context sensitive links to CCH Online
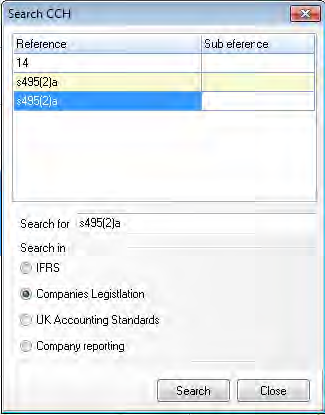
It is possible to search CCH Online from the audit software when using a disclosure checklist. Right click the highlighted question on either the question or the reference and select Search CCH information to open the screen. Highlight the required text or reference you wish to search on and this will populate the search for box. Select the area you with to search and click search this will then open up your browser. This will require an active subscription to CCH Online.
Checklist completion – adding working papers after sign off
There is a button on the Question completion dialog for perennial checklist questions, called [Add document]. This button appears if you open a question that has been answered by another member of staff. It allows audit team members to add working papers to a question that has been signed off by someone else.
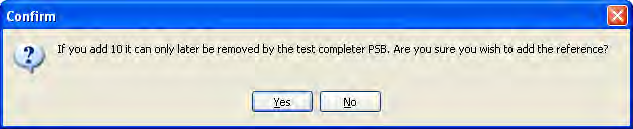
Click the button to add a new document and the following dialog will appear:
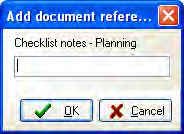
Enter the working paper reference to add to the question. On selecting [OK] the system will follow the standard document procedures to create a new document or link an existing document to the question. As you only have the facility to add working paper references and not remove them, you will be reminded of this and provided with the opportunity to abort the process.
Transferring comments and notes to documents
There may be occasions where you wish to repeat the details that you have entered in a comment or a note on one of the planning memo, points forward memo, opinion summary or management schedules. Audit Automation allows you to do this without the need to retype the details using the pop-up menu which appears when you press the right mouse button when the comment or note box has focus.
Enter the comment or note and click on the right mouse button. The pop-up menu will contain items that allow you to copy the text to appropriate documents.
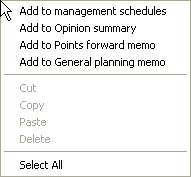
Select the item required and either the internal word processor will be launched, or Word, and the text inserted or appended to the document. The item will be headed with an indication of the source and, provided you do not amend this heading, any future items that you transfer from a similar place, e.g. inherent risk questions, will appear in the same place in the document.
Opinion summary
There may be occasions where you wish to record your thoughts on the opinion that has been reached on the accounts, or communicate other comments to the partner in the format of free typing text and not as notes that need clearing. The opinion summary is the document provided to allow you to do this. It is not a compulsory document but can be used when appropriate.
To access the opinion summary, select [Opinion summary] from the Documents menu.
If the master pack to which the client is attached is set for textual opinion summaries, the document will load and be displayed either using Word or the internal word processor as directed by your system’s setting.
You may now edit the information displayed, or delete it and retype that which is relevant to the current year. If you are using the internal word processor, to save the document and return from the Internal Word Processor, click on the [Exit] button and confirm that you would like your amendments saved. Full instructions on how to use the Internal Word Processor are set out from page 264. If you are using Word, use the functions of that program to save the document and either close or minimise it to carry on processing in Audit Automation. If you intend using text documents later in the current session then you should minimise Word so that it will take less time to load the next document that you wish to work on.
If you wish to obtain a printout of the document, load the document as described above and click on the [Print] button. This will print the document exactly as it appears on the screen, with no heading or border.
If the master pack is set to use opinion notes, the Notes dialog will be displayed with any outstanding opinion notes directed at your level of access listed. See page 215 for details of how to use this dialog.
Access the calculators from the Audit Documentation Completion dialog
To access the audit calculators, highlight the area for which calculations are to be carried out and click on [Sample]. The calculators will appear and the settings for the sample interval, materiality and factor will be that relevant to the area chosen. The audit area will also be preset as the headings for calculator listings. See page 156 for details of how to use the calculators.
View the Audit Objectives for an area
To view the primary audit objectives in respect of an audit area, highlight the area and click on the view objectives icon.

The Objectives window will appear and you may review the objectives, resizing the window or scrolling through them if there are too many to show on the screen.
View and edit the index for an area
Audit Automation allows you to maintain an index to the client’s audit working papers and this is carried forward from year to year. To view or edit the index, highlight the area and click on the index icon.

The Index list will appear.

Index list
If there are more entries than will fit on the list, you may scroll through the list using the scroll bar or resize the window. As you create working papers and documents using Audit Automation they are automatically added to the index for the area. If you wish to add entries to the index, either to reflect manually prepared documents or to create generic working papers that are not linked to a particular test or questions, click on the [Add] button. A dialog will appear inviting you to enter the working paper reference and name.

New index entry dialog
The reference may be up to 10 characters, alphanumeric, and should be unique for each entry. Click on [Save] to store your entries.
To edit an entry which does not represent a working paper, see below, highlight it and click on the [Edit] button. The same dialog will appear to allow you to change either the reference or the name. To delete an entry, highlight it and click on [Delete]. You will be asked to confirm your wish before the item is removed.
Importing entries is for use when designing master packs and is covered in the System Manager's Manual.
To create a working paper from the area, enter the reference to be allocated to it and click on the [New document] button. Note that the reference you enter should not include the audit area identification as Audit Automation will prefix this for you. The system will ask you if you wish to create a new document and when you confirm this it will display the Client document dialog. You may now create a working paper based on a template, start with a blank document or scan a document as required. See page 35 for details of using the Client document dialog.
Entries in the index which represent working papers that have been created on the system will be identified by an icon representing the nature of the document. These are the same as shown on the Audit programme completion and Checklist completion dialog. If you select an entry which represents a working paper for edit, the system will jump straight to the Client document dialog to allow you to edit or delete the entry.
Enter a note to Manager or Partner in relation to a particular audit area
You may enter a note relating to an audit area, by highlighting the area and clicking the first icon under the main index.  A dialog box will appear allowing you to enter your note and indicate if it is for Junior, Senior, Manager or Partner attention, and indicate if it is an audit point or a review note. Details of how to complete the Note for area dialog are set out on Click here.
Review bookmarks
The review bookmark facility allows you to indicate the progress of the review process for audit tests. They are temporary flags that you can set while you are reviewing, which are cleared once you have signed off the area.
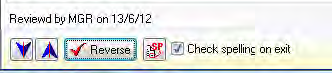
When you access a test as a person other than the completer and it has not yet been reviewed, the dialog includes a  button at the foot of the Audit test completion dialog. Click on this to indicate that you have reviewed the test and the system will record your initials and the date of review. Once reviewed the caption on the button will show Reverse if you are the person who last reviewed the test. The review history will be shown in a panel above the button and a red tick will also appear by the test number in the Audit programme completion window.
If another person, not the completer or reviewer, accesses the test they will also see the Reviewed button and can also mark that they have reviewed the test. Once they have done this their details will be added to the review history.

Only the person who last reviewed the test can reverse the review.
A test that has been reviewed twice will be identified with a double review tick:

At the foot of the Audit programme completion dialog is a button called [Show to review]. Clicking on this switches the display to just show tests which have yet to be reviewed, or to include those which have been reviewed, and the caption on the button will change accordingly.
Note that it is only necessary to record your review on the main test as the system will treat the whole test, including all sub tests and parts thereof as reviewed. You are however, free to mark sub tests and parts as reviewed if you wish.
Removing bookmarks set in error
You may remove the review bookmarks from items that have been marked in error. Once an item has been reviewed the [Review] button remains active and acts as a review toggle. To remove a review tick, highlight the item and click the button. Provided you were the person who set the bookmark, you will be asked to confirm that you wish it removed.
Review of working papers
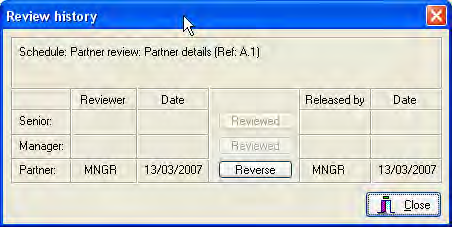
You can record a permanent record of the review of working papers, programmes, checklists and lead schedules at senior, manager, partner and second partner level. You can also mark a working paper as complete and ready for review. You may also record similar review details on documents in the permanent file. To record your review, select the item from the index and either click on the review button at the foot of the index, , or press the right mouse button and select Working paper review from the pop-up menu, and the Review history dialog will be displayed:
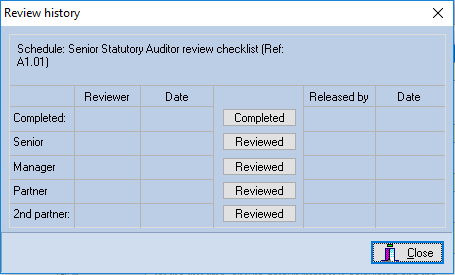
If there are no current reviews recorded, all buttons up to your access level will be active. To record the review or that it is completed and ready to review, simply click on the relevant button. The review process is not hierarchal so a manager can record their review without a senior review being evidenced.
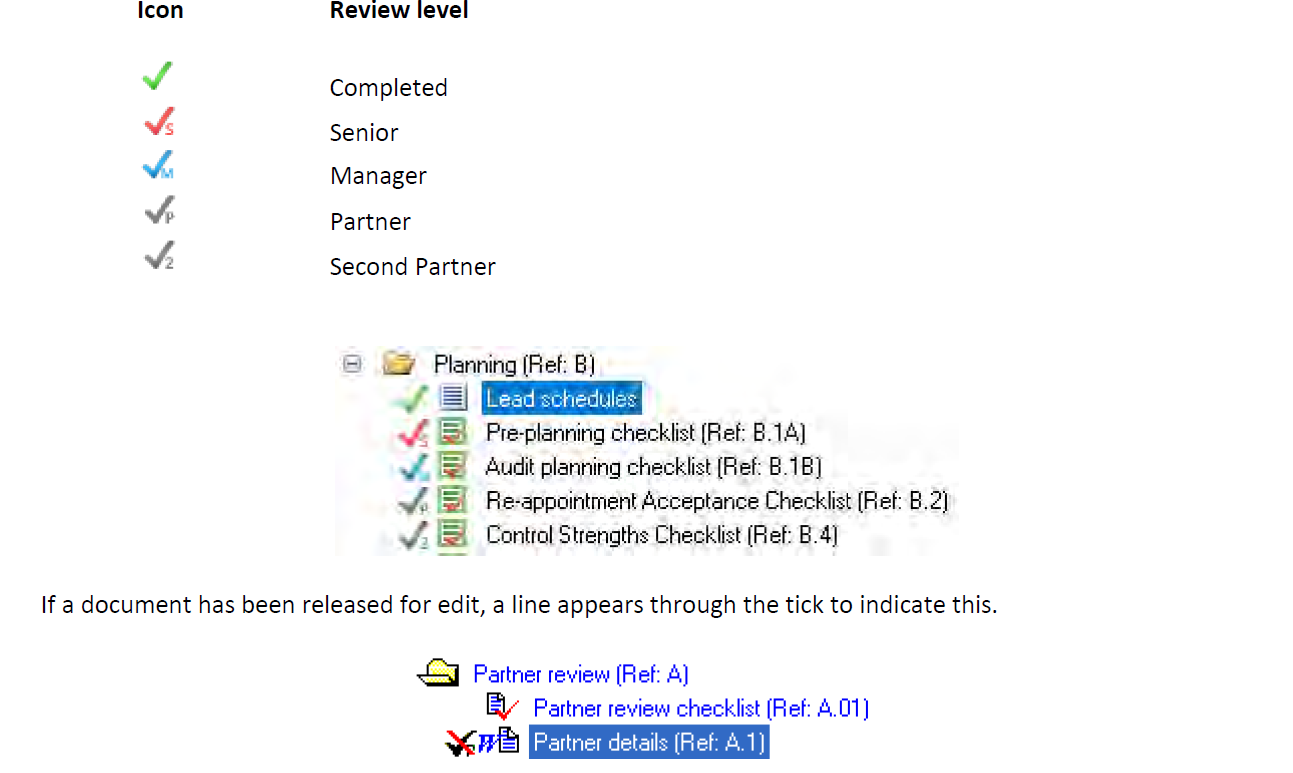
Working papers marked as Completed are identified with a green icon in the current audit file, , and are shown as “Completed” in the Selected Area Summary. Documents that have been reviewed by a second partner are identified with a black tick with a small “2” by it,
  .
.
When you mark a document as having been reviewed, the system sets the underlying file to be read only. This means that you can, from this point, load the document to view it, but you will not be able to change or save the document.
There is no system obligation to record a review of working papers in this way, the system will allow you to sign off an audit area without your level having recorded a review of the individual working papers, however, it will warn you when you access the area sign off if there are any working papers where at least one level has not indicated that they have carried out a review.
When the above dialog is displayed for a working paper that has already been reviewed, the review details are displayed and the caption on the button will read [Reverse]. The button will be active if the user is the person who recorded the review and no review at a higher level has been recorded.
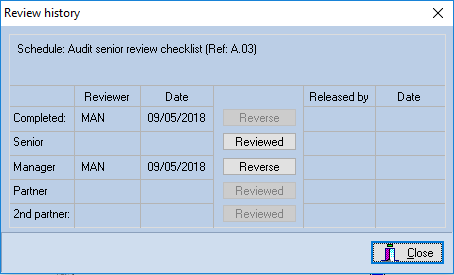
To reverse your review, click on the [Reverse] button.
To reduce the number of keystrokes required to simply indicate review at the level of your log in, there is an option on the right click popup menu. This is called “Mark working paper reviewed by …” where “…” is replaced with the description of the level at which you are logged in. This option will be available if you have selected a document that can be marked as reviewed and it is not already marked as reviewed. Selecting this option will mark the document as reviewed, as long as the document can be marked as reviewed, e.g. all tests have been completed.
Releasing Documents for Edit
There may be occasions where you will need to edit a document after it has been reviewed. To facilitate this, a “Release a document for edit” option is available on the pop up menu in the following dialogs:
• Permanent file
• Current year’s audit file
• User documents
The option is only active when a document is selected that has been reviewed. On selecting the option, the system will ask you if you wish to release the selected document. If you indicate that you do, it will record the fact that you have released it, both in the record of the review and by adding an “Audit trail” entry to the log of changes made after planning has been signed off.
If a document has been released, say it was originally reviewed by a manager and then released, if the manager wishes to record that the revised document has again been reviewed, they should reverse their original review and then mark it as reviewed. This will clear the details of the release from the record and reset the document to be read only.
On printed copies of internal documents, lead schedules, audit programmes and checklists, the system will list the initials and date of all reviews that have been recorded, hence if you do not complete the working paper review, nothing will be shown by “Reviewed by” in the printed reports. However, the “Reviewed by” on dividers is populated using the details from the area sign off.
The review details for other documents, i.e. user created working papers, are printed on the divider by their entry in the section index.
Viewing review details on screen
When you have an index displayed, i.e. are viewing the current year’s audit file, the permanent file or the list of user created documents, icons are displayed to indicate the highest level of review that has been recorded. In the following screen dump, the 5 working papers have been reviewed as follows:
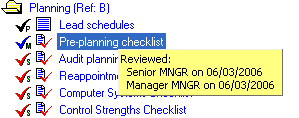
As you move the mouse over the index, the main screen prompt will change to display details of the index entry over which the mouse is positioned, showing the document title and review details. In addition, if the document has been reviewed, or released, a pop-up hint will appear for a short time showing the review details.
Locking of Working Papers
• On review the document is locked.
• If the document is then opened by someone of a lower level than the reviewer it will remain locked and the user will see a message flash up saying the document is read only.
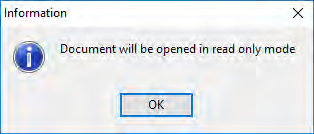
• If the document is opened by someone who is of the same level or higher than the reviewer the system will automatically remove the read only status and displays a dialog advising the user that they are opening a document that has been reviewed:

The system maintains a record of reviewed working papers that the user has opened during the current run. During the session the documents remain released, but the system monitors if another user opens the same document and switches ownership to the other user if the current user no longer has the document open. If the current user still has the document open the new user will still see it in read only mode.
When the user closes the client, the system resets the read only status of any reviewed documents that they have released and checks to see if the user has modified the document. If the document was modified, an entry is made in the audit trail indicating that the reviewed document has been modified. If the document was not modified then no entry is made in the log.
When the last person logs out of the client, the system checks all the released documents to see if any problems arose from other users (i.e. they did not log out properly) and resets them.
Documents can still be released for editing from the pop-up menu. To make it easier to mark such documents as having been reviewed again, the [Reviewed] buttons are only changed to a [Reverse] button if the document has not been released for editing. If it has been released the [Reviewed] button remains and you can mark the document as reviewed, clearing the release details, by clicking on it. Note that if you release a document, the system records the release in the audit trail but it does not record individual details of the document being amended while it is released.
Manual Changes to Reviewed Documents
As indicated, the system marks the file as read only, however, it is still possible for a user to manually remove the read only flag using windows explorer and change the document with an external program. Hence, the system checks each time a document is loaded in Audit Automation to see if the read only setting is as expected. If it is not, the read only attribute is reapplied and a record made in the log of changes made after planning sign off indicating that the document may have been changed.
When the partner signs off the audit via the completion menu, all documents are now set to read only. This means that documents that have not been reviewed will also become read only.
When a client is balanced forward, all read only attributes are removed for documents that are retained for the following year.
Sign off an audit area
When all tests for an audit area have been completed, planning has been signed off, all checklist questions answered and all notes cleared, you can sign off the area on screen. Each area can require a senior, manger and partner sign off and the master pack will dictate which sign offs are active in each area. The system therefore knows which areas require signing off at which level and will advise you if you do not need to sign off the area concerned.
To sign off an area, highlight it and click on the appropriate sign off button.
Senior sign off
On selecting this option, the system will check that all items for the area have been cleared and, if not, advise accordingly. It will also check to see if all working papers have been reviewed and if not remind the senior that any not reviewed will need to be reviewed by the manager or partner. If the area can be signed off, the Sign off dialog will appear.
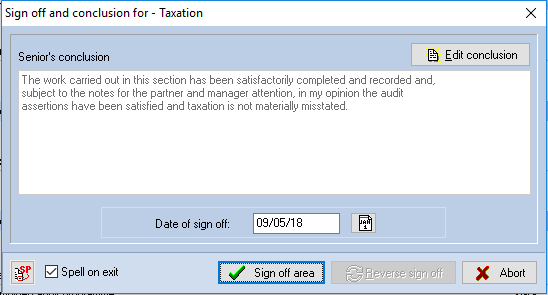
Sign off dialog
As can be seen, this dialog provides for the entry of a conclusion in respect of the area. A standard conclusion will have been inserted from the master and this can be accepted, or edited by pressing [Edit conclusion]. To complete the sign off, click on [Sign off]. To abort the process, click on [Abort]. The date of sign off will default to the current date, however, it is possible to change this if this is not the relevant date.
Seniors can sign off audit areas even if there are identified risks for which conclusions have not been entered. This is required as there may well be significant risks that the practice would not wish to senior to conclude on, but which require consideration by the manager. However, to ensure the senior is alerted to the fact that they may have missed entering a conclusion on an appropriate, a warning appears if a senior tries to sign off an area where there are identified risks for which conclusions have not been entered.
It is possible to reverse the sign off of an area by following the above procedure and clicking on [Reverse sign off]. After the senior has signed off an area the name of the area will turn to a different colour. The default colour is red but this can be changed by the system manager.
Manager sign off
On selecting this option, the system will check that a manager sign off is required and that the senior has signed the area. The system will also scan the area and check that all working papers within the area have been marked as reviewed. If some are not so marked the system will display a message reminding the manager that any not reviewed will need to be reviewed by the partner and ask if you wish to continue with the sign off.
If these checks pass, and you indicate that you wish to proceed if all items are not marked as reviewed, the Sign off dialog will be presented, as described above. After the manager has signed off an area the name of the area will turn to a different colour and all review bookmarks will be removed. The default colour is green but this can be changed by the system manager.
Partner sign off
On selecting this option, the system will check that a partner sign off is required and that the manager has signed the area and check to see if all working papers have been reviewed by at least one level. any have not been reviewed it will indicate that the partner should not sign off the area until the review has been evidenced, however, if the partner is insistent it will still allow the area to be signed off. If these checks pass, the Sign off dialog will be presented, as described above. After the partner has signed off an area the name of the area will turn to a different colour. The default colour is black but this can be changed by the system manager.
Reviewed items when signing off
When marking an area as reviewed, if there are documents in the area that are not marked as reviewed, the system displays a list and indicates that if you do not go back and mark them as reviewed the manager or partner will have to do this.

The user can mark the areas they have reviewed by using the checkbox to select the documents they wish to mark as reviewed and then click the Mark selected items as reviewed button. To mark everything as reviewed use the select all option. Alternatively, to leave any documents as not reviewed simply proceed with the signoff without marking the items as reviewed.
Draft watermark
If the pack option to force on screen completion is set, the system will consider all audit programmes and checklists as "Draft" until the audit areas have been completely signed off. To indicate that the area has not been finalised, any printed programmes and checklists for areas that have not been completely signed off will be watermarked with "Draft".
Viewing lead schedules and working papers
You may view the lead schedules and working papers by double clicking on the name of the document in the Audit document completion dialog. If you double click on a lead schedule, it will be compiled and presented in the View report dialog, see page 56 for details on how this dialog operates. If you double click on a working paper it will be presented using the appropriate program, Word, Excel, the internal word processor or the Scanned document dialog.
Moving documents in the current audit file
You can move a document to a different section of the audit file. To do this, select the item and click the right mouse button, a pop-up menu appears from which you should select Change working paper folder and reference. This allows you to change both the reference and the folder in which the document appears. Selecting this option will cause the following dialog to be displayed.
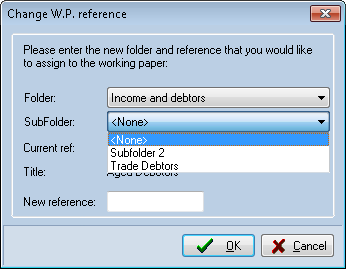
To change the Folder or Sub Folder, select the new folder from the drop-down list. To move a document to the parent folder, select the <None> option from the subfolder drop down.
If you select a new folder, you must enter a reference to use for the document within the new folder. Click on [OK] and the document will be moved and all cross references, apart from cross references on scanned documents, will be adjusted accordingly. You will need to manually change any references on scanned documents.
If you just wish to change the reference but do not wish to move the document to a new folder, leave the name of the folder unaltered and just enter the new reference.
Reviewed working paper
It is possible to delete a document or change the document reference even if the document has been marked as reviewed by a member of staff, as long as it is a user with the same level or higher to that of the person who marked the document as reviewed.
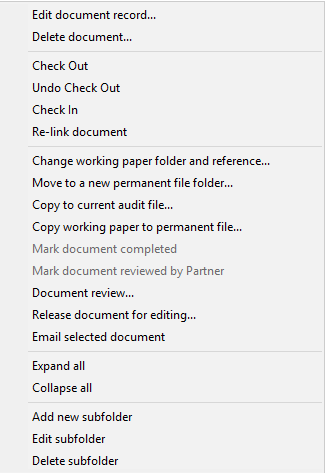
When right clicking on the document if the user is the same or higher level to that of the user that marked the document as reviewed the options to delete document & change working paper folder and reference will be available.
Note: An entry will be made in the audit trail and will record that the document has been deleted or that the document reference has been changed along with the date and user code.
Copying document to the permanent file
You can copy documents from the current audit file to the permanent file and vice versa.
To access this option, display the current audit file, select the document in the index and click the right mouse button. Select Copy working paper to permanent file and the following dialog will be displayed:
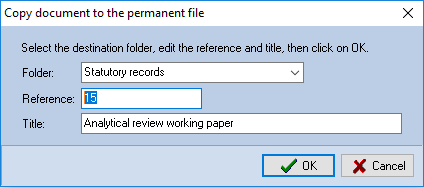
populated with the folders in the permanent file. Select the folder in which you would like to store the document, enter the reference to be allocated to it and change the title, if required. Click on [OK] and the document will be copied.
Review option
A review mode of access is included to give partners a central launch pad to access the items that they are most likely to wish to look at during their review.
To display this, select the [Review/Print] button from the Planning menu, or the [Review] button from the Utilities menu and the Review completion window will be displayed on the left.
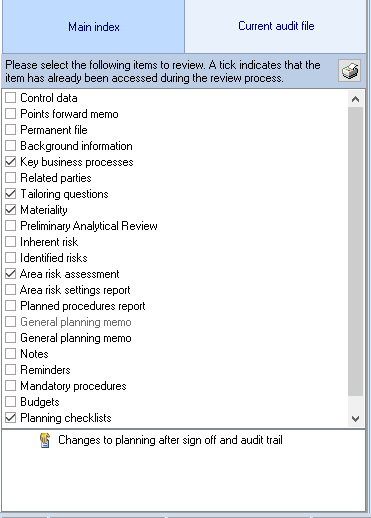
To review an area, click on an item in the list and it will be opened in review mode. On accessing a review area, a tick will appear by the item in the list to indicate that it has been accessed. The tick is persistent, meaning it will be remembered between accesses to the client. The ticks are cleared when the pack sign off is executed, hence the list can be used as bookmarks for both the manager and the partner review.
If you wish to remove a tick as you accessed a routine but did not review it, click on the checkbox of the item that contains the tick to be removed and the system will ask you to confirm that you wish to remove the tick.
When you access the Current Audit File in review mode, any audit programmes you access will be displayed in “Review mode”, only listing those items that are yet to be reviewed. You may use the options within the dialog to switch to other views as required.
Hiding additional programmes during field work
Some users find it confusing that there are multiple programmes in the current audit file showing the same audit tests analysed in different ways. These are primarily there for review purposes to allow the tests to be seen in the context of the risk, control or assertion in respect of which they provide audit evidence. All of the tests are also shown in the standard audit program or the Combined audit programme. There is therefore a review mode to the display of the current audit file. If you access the current audit file via the navigation window it will be displayed in field work mode and the following programmes will not be shown:
1. Risk Mitigation Tests
2. Tests of Control
3. Non-sampling substantive tests
4. Other Substantive Work
If you access the current audit file from the Review completion dialog, it will be shown in review mode and these programmes will be visible.
There is a checkbox at the foot of the current audit file, called Review mode. This checkbox can be ticked, or the tick removed, to change the mode of display and show or hide the additional programme views.
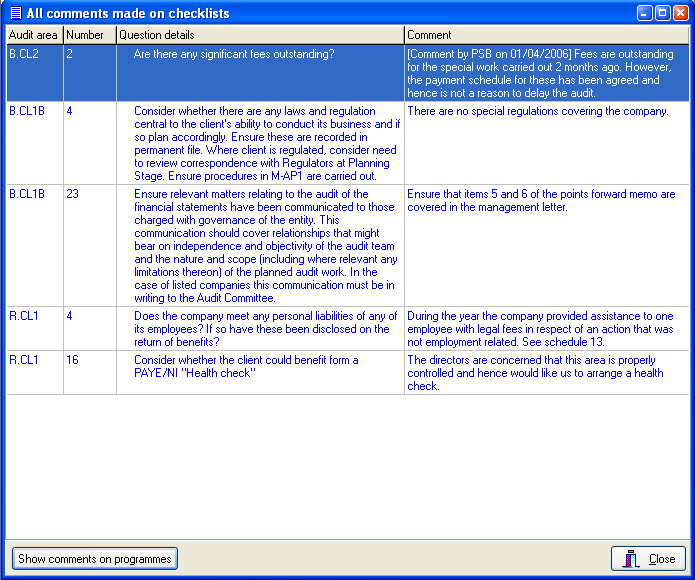
Review of all comments
The item called Comments in the Completion menu provides the facility for you to see all comments made on programmes or checklists in a single list.
Selecting this item will result in the Summary of comments dialog being displayed. This will initially contain a list of all tests across all programmes where comments have been entered, showing the audit area, the test number, the details of the test and the comments made. You may drill down to the Test completion dialog for any test shown by double clicking on it. You may use the Test completion dialog in the same way as you can use it when you drill down from the programme display.
To view the comments made on checklist questions, click the [Show comments on checklists] button. The system will display all comments made on checklists, showing the audit area, the question number, details of the question and the comments made. The button at the bottom of the dialog will change to allow you to revert back to viewing comments on programmes.