CCH Software Suite: Self Installation Guide

Introduction
About this Document & the Installer
The CCH Central Suite Installer (CSI) is designed to be a comprehensive tool to carry out new software installations and software updates for the CCH Central Suite of products.
This document explains how to use the CSI to install a Central product suite comprising any combination of the following products:
- CCH Accounts Production
- CCH Audit Automation (SQL)
- CCH Central
- CCH CGT & Dividend Scheduling
- CCH Company Secretarial / Central Link
- CCH Corporation Tax
- CCH Document Management
- Email Marketing
- CCH iXBRL Review and Tag
- CCH OneClick (on premises component)
- CCH Personal Tax
- CCH Practice Management
- CCH Scan
- CCH Workflow
Note: This release also includes compatibility updates to a number of CCH applications and services which means that there are no functional changes or fixes to these applications. They are automatically updated, so from a version perspective they are in line with this each new release
Before You Begin
Recommended requirements:
- Knowledge of the Microsoft Windows operating system and its core functionality for Server(s) and Workstation(s)
- Experience of installing and managing Microsoft SQL Server and its Relational Databases
- Working knowledge of Transact-SQL
- Experience working with Active Directory Domain Services (AD DS)
- Understanding and familiarity of Networking fundamentals, including Transmission Control Protocol /Internet Protocol (TCP/IP), User Datagram Protocol (UDP), and Domain Name System (DNS)
- Understanding and familiarity of security concepts such as authentication, authorization and Firewall configuration & policy.
Self-installation of CCH products is not recommended without the necessary technical expertise. Our Support teams will be unable to assist you with a self-installation - should you be unable to complete this yourself then a Technical Consultant will be required. Technical consultancy is charged at our standard daily rate and will need to be booked via our Scheduling team and is subject to availability.
As with many tasks, the key to a trouble-free and successful CCH Central Suite installation is preparation, this section provides useful pre-install advice.
Install Hints & Tips
- Read through this guide thoroughly and ensure you understand the procedure it describes.
- It is likely that some of the sections will not be relevant to your installation, this being dependent on the CCH Central Suite products for which you are licensed. Go through the guide and clearly mark the sections that you will need to follow.
- Check that your computers and servers meet our minimum hardware requirements.
- System Requirements: Standalone specification
- System Requirements: Multi-User specification
Installing on a Server (Domain) Network
The CCH Central Suite is comprised of a program folder, one or two databases and some services. Precisely how many databases and services is dependant on the licensed products. When installing the Central Suite on a Microsoft network, it is possible you will want to install these components on different, task specific servers / computers.
Below is a general guide as to where you would typically install these components:
- CCH Central Suite Programs – file server.
- CCH Central Suite database – SQL server.
- CCH Central Suite Services – SQL Server Before proceeding with the installation, consider where you wish to install these components and clearly identify the relevant servers and computers.
If you are unclear or unsure as to where the CCH Central Suite should be installed on your network, please refer to your local IT support team.
Installing on a Workgroup (Peer to Peer) Network
On a Workgroup network a PC needs to be selected to act as the server, it is suggested that this is the most capable in the Workgroup with the best combination of processor, RAM and disk space. On the PC that is to work as the server install all components. For all other computers in the Workgroup carry out a Travel Installation as described in the Travelling Installation section . Refer to Appendix C – Installing on a Workgroup Network which provides a bullet point list of the work required.
Note:
- Whilst we would expect our products to equal or better the performance of other similar software in a Workgroup environment, if extensive memory or CPU activities are executed on the machine acting as a server, then this will have an impact on the performance of the machines acting as clients.
- It may also be necessary to disable or remove the virus checking software and firewall from the Peer to Peer ‘server’ during installation, this should be done with caution and the advice of your local IT support
- Our application support does not cover connectivity issues between machines in the Peer to Peer network.
Installing on a PC (standalone)
On a standalone PC all components will be installed on the one computer.
Supported Environments
Supported environments for the Central Suite are:
- Microsoft Windows 11 Pro
- Microsoft Windows 10 Pro
- Microsoft Windows Server 2016
- Microsoft Windows Server 2019
- Microsoft Windows Server 2022
Note:
- Only the above listed environments are supported.
- CCH Central Suite is NOT supported on Home editions of Microsoft Windows.
Installing the Software
This section describes how to install the CCH Central Suite.
It may be that some sections of this guide will not be relevant to your practice, depending upon the Central Suite products for which you are licensed. Where a section is licence dependent it is clearly indicated at the start.
Database Install
Carry out this part of the installation on the server or computer that is to hold your Central Suite SQL database(s).
- Start the CSI – See Appendix A - Starting the Installer
- Login to the CCH licence server – See Appendix B - Logging on to the CCH Install Server
- If you are logging in to the CSI for the very first time only the Register company details window will appear.
- Select 'Register company details with CCH (Recommended)'.
- Click 'Next'.
The CCH CentralSuite Installer navigation will appear.
Click the 'Database Install' navigation tab.
◼ Select 'Install a new instance of SQL Server Express (Recommended)'.
◼ Click 'Next'.
◼ Select 'Use default install settings (Recommended)'.
◼ Click 'Next'.
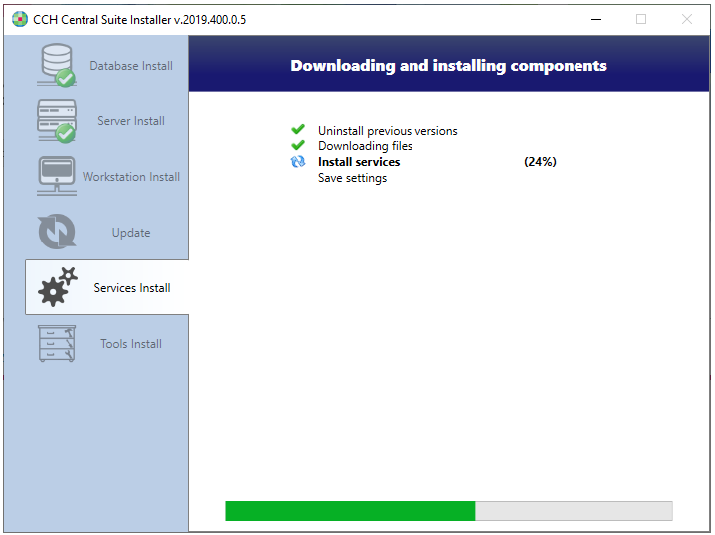
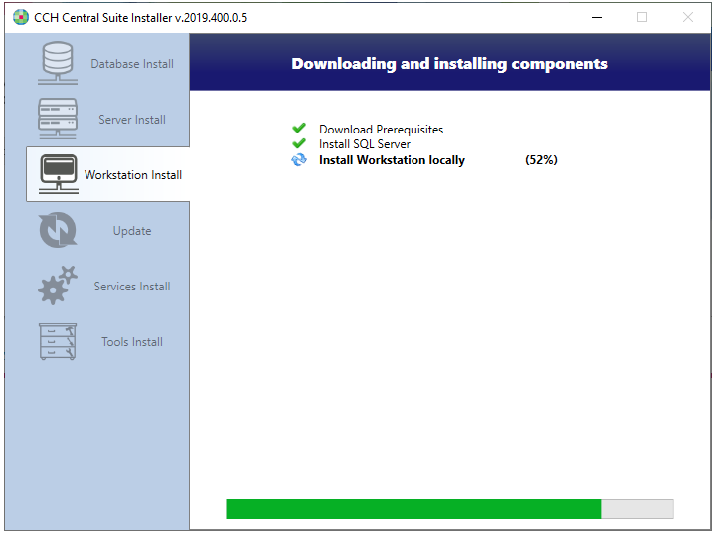
Note: The download and installation of Microsoft SQL Server has now started. This may take a considerable amount of time depending upon the speed of your internet connection and the speed of your computer. Progress will be indicated as shown in the image below.
- If the Central Suite programs are to be installed on this computer / server click Next and then proceed to the Server Install install section of this guide.
- If the Central Suite programs are to be installed on another computer / server click Exit to close the installer, go to the other computer and then proceed to the Server Install install section of this guide.
Server Install
Carry out this part of the installation on the server or computer that is to hold your Central Suite programs.
If you are installing the Central Suite programs on a different server to that which holds the database it will be necessary to restart the CSI and log back in.
- Start the CSI – See Appendix A - Starting the Installer
- Login to the CCH licence server – See Appendix B - Logging on to the CCH Install Server
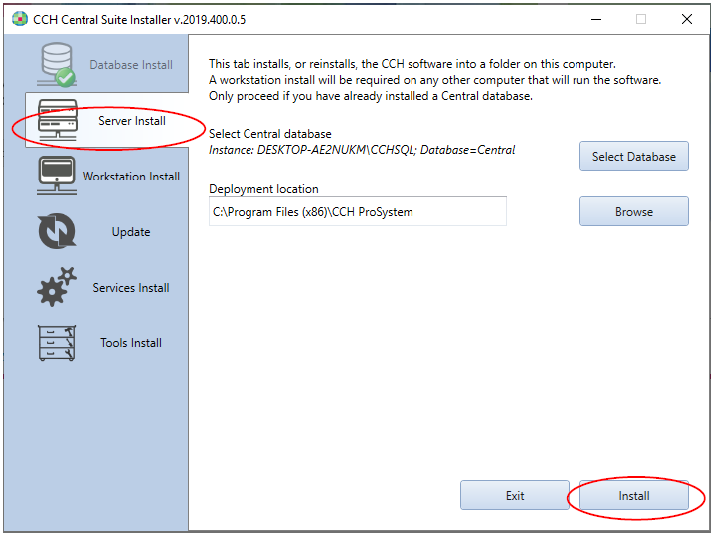
- Click the Server Install navigation tab.
- Click 'Install'.
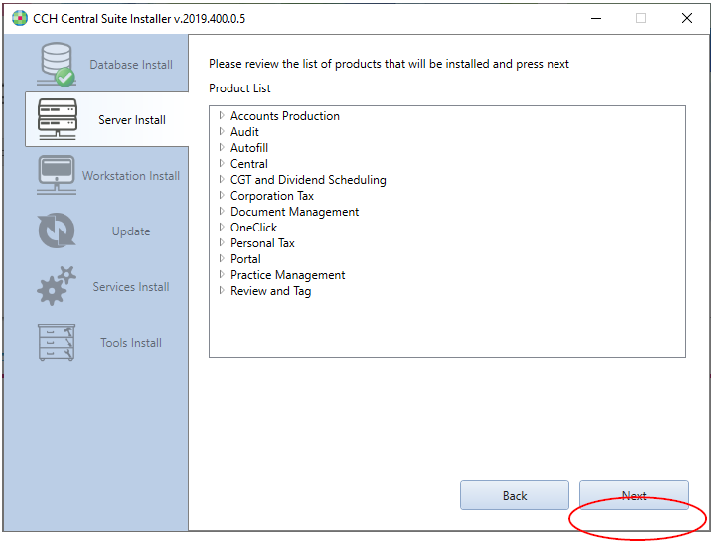
- Click 'Next'.
Note: Only products for which you are licensed will appear in the Product List.
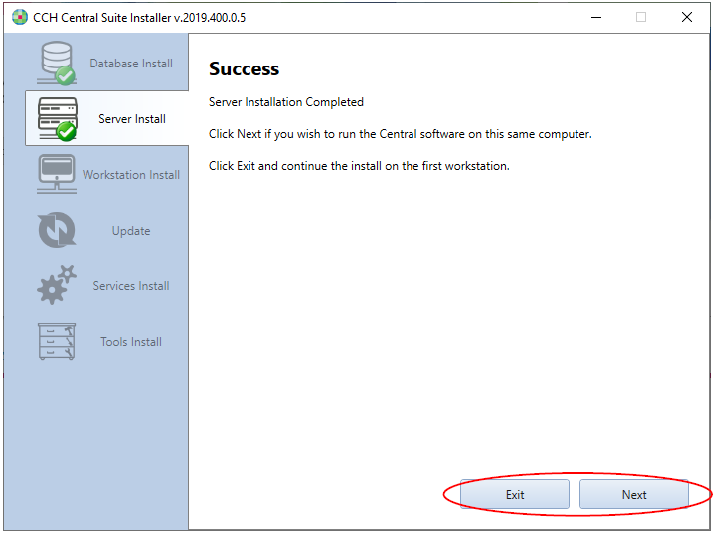
- If the Central Suite services are to be installed on this computer / server click 'Next' and then proceed to the Services Install install section of this guide.
- If the Central Suite services are to be installed on another computer / server click 'Exit' to close the installer, go to the other computer and then proceed to the Services Install install section of this guide.
Services Install
The Services Install must be carried out on the server / computer that is to run your Central Suite services, by convention this is usually the same server / computer that holds the Central database.
If you are installing the Central Suite services on a different server to that which holds the database it will be necessary to restart the CSI and log back in.
- Start the CSI – See Appendix A - Starting the Installer
- Login to the CCH licence server – See Appendix B - Logging on to the CCH Install Server
-
Note: Only services for licensed products will be available to select.
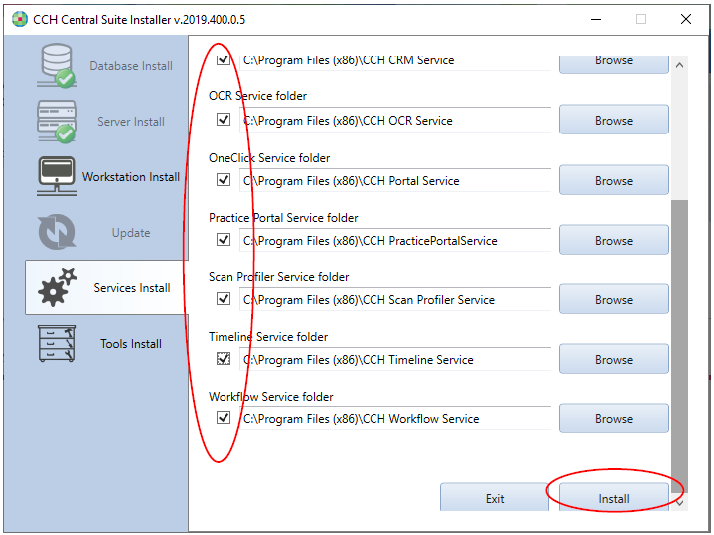
- Click the Services Install navigation tab.
- Place a tick against all of the Service Installations that are offered.
- Click 'Install'.
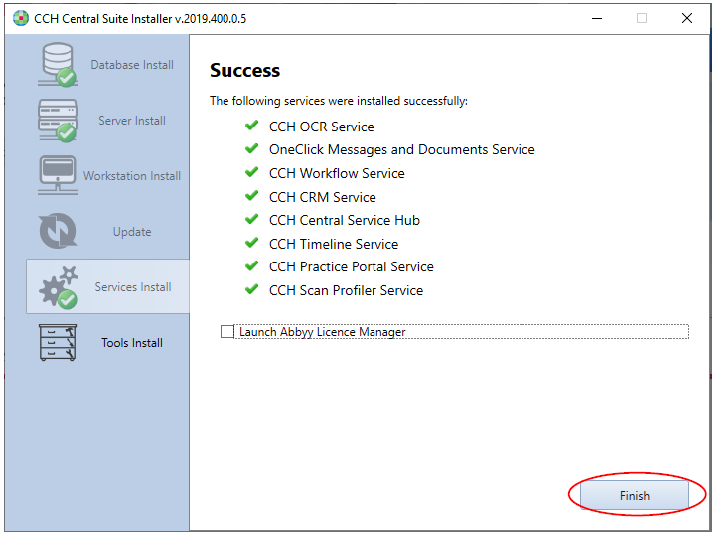
- Click 'Finish'.
- Answer 'Yes' to the question 'Are you sure you want to exit?'
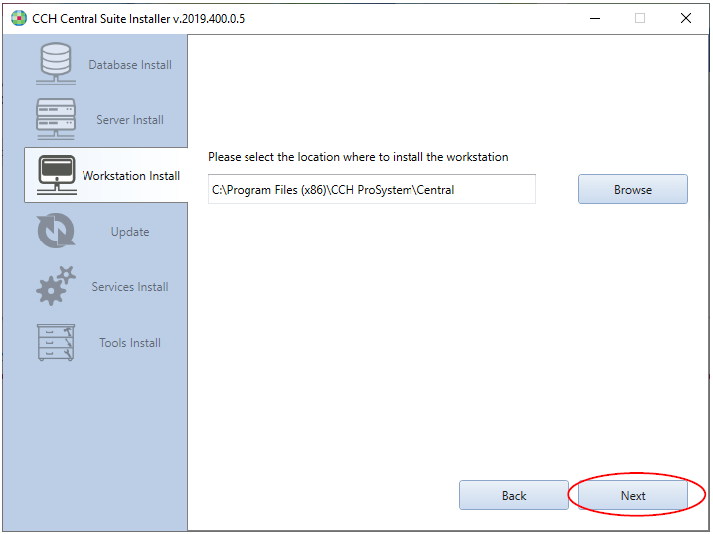
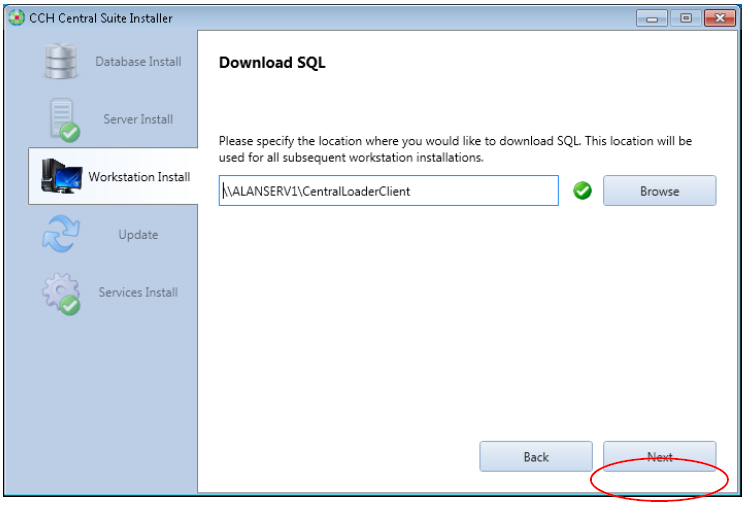
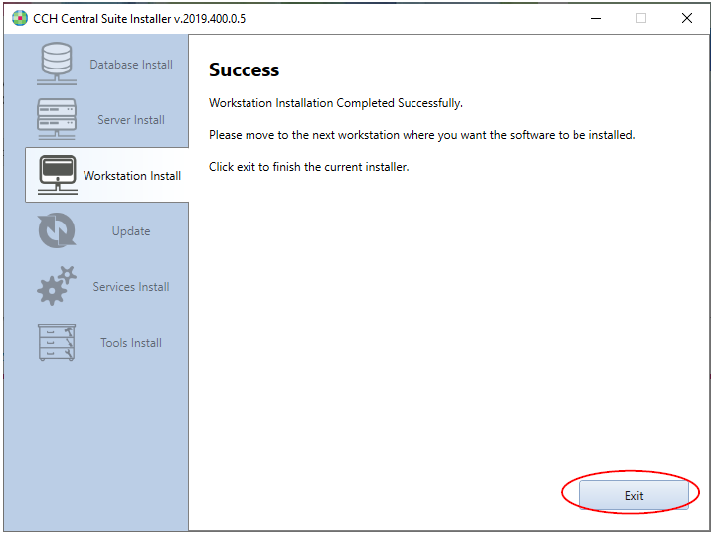
Workstation Install
Carry out this part of the installation on every computer on which you wish to run the Central Suite programs.
Note: If the workstation is a laptop and you wish to use the Travel option skip this step and instead complete the section Travelling Installation
- Start the CSI – See Appendix A - Starting the Installer
- Login to the CCH licence server – See Appendix B - Logging on to the CCH Install Server
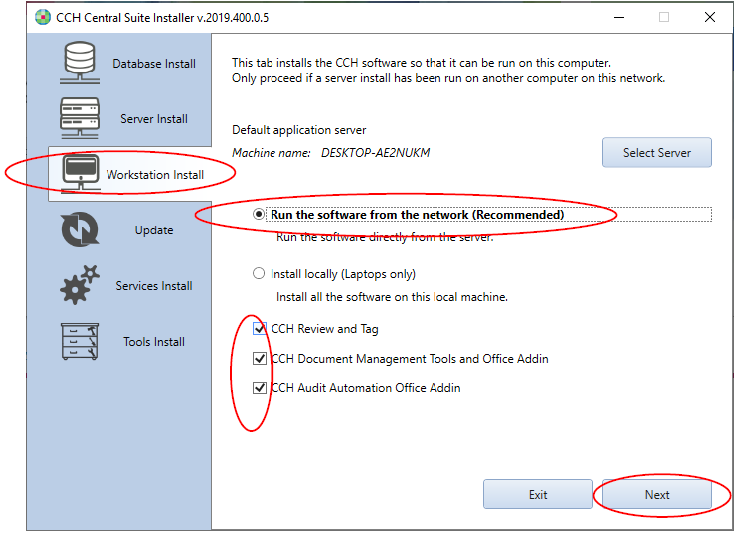
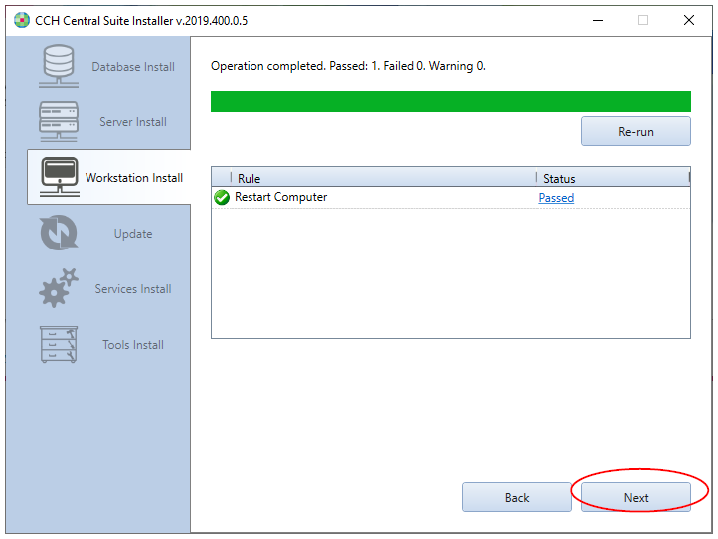
- Click the 'Workstation Install' navigation tab.
- Select 'Run the software from the network'.
- Select all additional modules to be installed.
Note: the additional products offered will vary according to the licensed products, in the image above these are CCH Review & Tag, CCH Document Management Tools and Office Addin and CCH Audit Automation Office Addin.
- Click 'Next'.
If iXBRL Review & Tag is in your licence the screen above appears, click 'Next'.
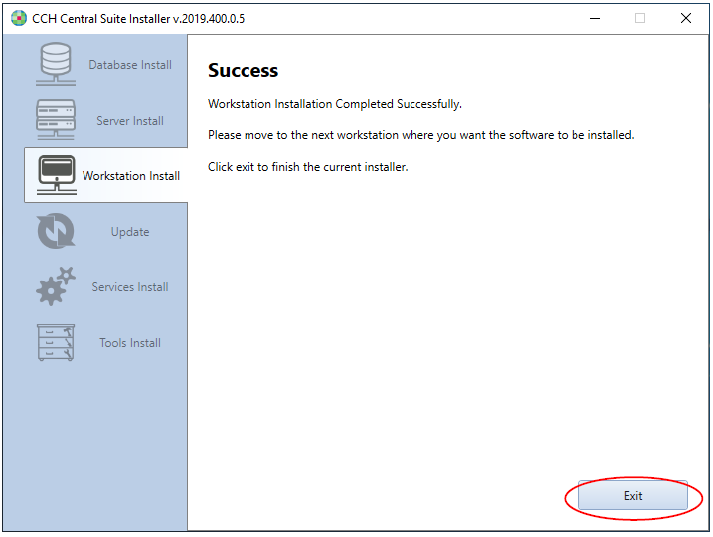
- Click 'Exit' and answer 'Yes' to 'Are you sure you want to exit?'
- Now move on to the next workstation that is to run the CCH Central Suite. When all workstations have been installed proceed to Section D – Database Upgrade.
Database Upgrade
An automatic database upgrade is associated with a Central Suite installation. This upgrade runs as a result of the first CCH Central login following the Central Suite update.
- Start CCH Central and login as a superuser.
- Click 'Yes' to 'Upgrade Needed' and continue with the database update.
- Click 'Yes' to 'Backup database' and accept the recommended backup.
- Click 'Yes' to 'Continue' to run the script.
During the upgrade, the application that is being upgraded is displayed with a  and a progress percentage, once the application has reached 100% a
  is displayed. When the database upgrade is complete the 'OK' button will be available.
- Click 'OK'.
- The Central Suite Licensing window will appear. Refer to the next section for guidance on how to enter your pin.
Entering Your Licence Pin
The CCH Central is not licensed warning will appear the very first time you login to the Central Suite.
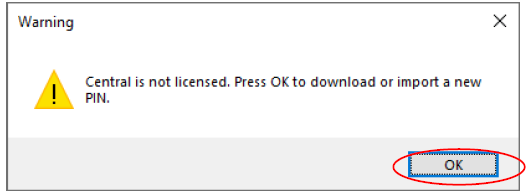
- Click 'OK'.
The Pin Management window will appear.
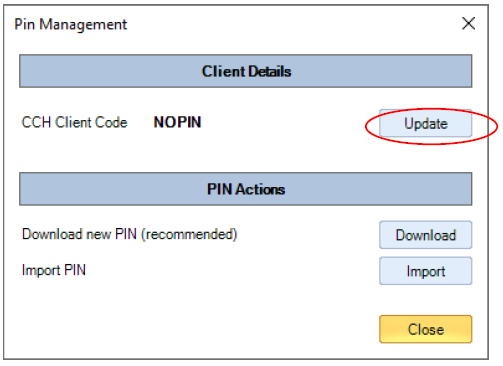
- Click 'Update'.
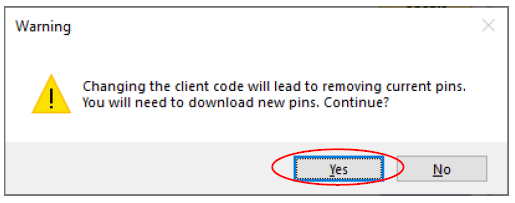
- Click 'Yes'.
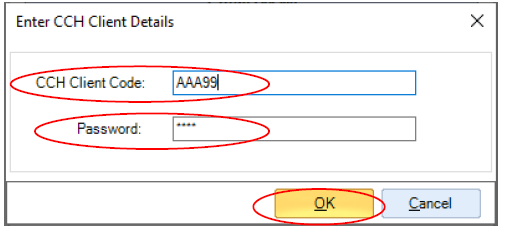
- Enter your CCH Practice Code and Password.
- Click 'OK'.
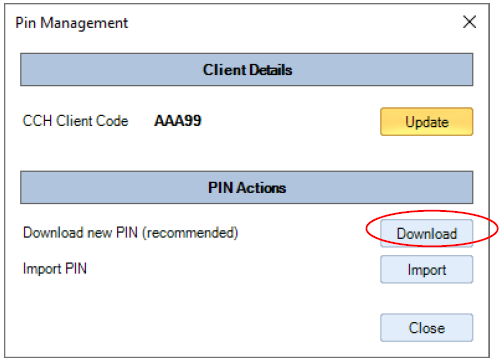
- Click 'Download'.

- Click 'OK' and then 'Close'.
Now login to CCH Central Suite using the default, built in user account.
Licensing of your CCH Central Suite is now complete.
Travelling Installation
The Travelling Installation is only relevant if you wish to use the Travel function for CCH Accounts Production and /or CCH Corporation Tax. Carry out this part of the installation on every laptop computer on which you wish to use the Travel option.
- Start the CSI – See Appendix A - Starting the Installer
- Login to the CCH licence server – See Appendix B - Logging on to the CCH Install Server

- Click the Workstation Install navigation tab.
- Select Install locally (Laptops only).
- Select all additional modules to be installed.
Note: the additional products offered will vary according to the licensed products, in the image above these are CCH Review & Tag, CCH Document Management Tools & office Addin and CCH Audit Automation Office Addin.
- Click 'Next'
- Click 'Next'
- Click 'Next'
- Click 'Next'
- Click 'OK'
- Note: The installation of Microsoft SQL Server to the laptop computer has now started. This may take a sometime depending upon the speed of your internet connection and computer.
- Click Exit, and then Yes when asked Are you sure you want to exit?
- Finally close the web browser session that is still displaying the home page of the installer.
Completion
Installation of your Central Suite is now complete.
Depending upon the products for which you have a licence, there may be some configuration tasks needed before you start using the software. For further advice, refer to the relevant product configuration.
A default Central Suite install includes the installation and configuration of a data backup. The backup is carried out to the local hard disk on the SQL server in the following location:
C:\SqlData\MSSQL12.CCHSQL\MSSQL\Backup
The backups are scheduled to run every night at 21:00 hours. Each backup will be kept for 7 days. You should check this folder location to ensure that the backups are working.
Appendices
Appendix A - Starting the Installer
CTRL + Click this link to go to the CCH Support Portal
- Logon to the Support Portal.
The Support Portal home page will refresh to include the Software Releases tile.
- Click the Software Releases tile.
- Click the CCH Central Suite tile
- Click the green Go to the Central Suite Installer button in the bottom right-hand corner of the window.
- Run the setup.exe that appears in the bottom left-hand corner of the window.
The CSI Home page will appear as shown in the image below.
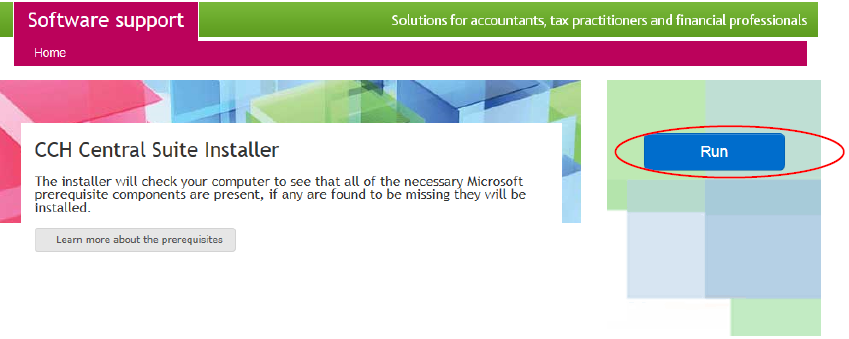
- Click Run.
Depending on the local security settings and the components that need to be installed, file security warnings and Microsoft licence messages may appear, an example of which is shown in the image below.

- Click 'Run' to any security warnings and Accept to any Microsoft Licence messages.
Warning: this part of the installation can take from 1 to 60 minutes to complete depending on Microsoft Windows components (prerequisites) that need to be installed. Please be patient and do not restart the computer!
A reboot may be requested, as described below.
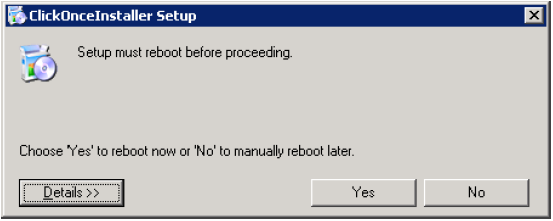
- After checking that no other users are connected to the server, click Yes.
Note: if a reboot is required, the CSI should automatically restart. If it does not, then to continue it will be necessary to log back on to the Support website, return to the CSI install page and click the Run button.
Appendix B - Logging on to the CCH Install Server
This part of the Central Suite Installer (CSI) asks you to logon to the CCH Install Server. Your Client code and password are the same as those used to register on our software support website and used to log support calls. If you do not know or can’t find these details please contact CCH Software Support, who will be able to supply them.
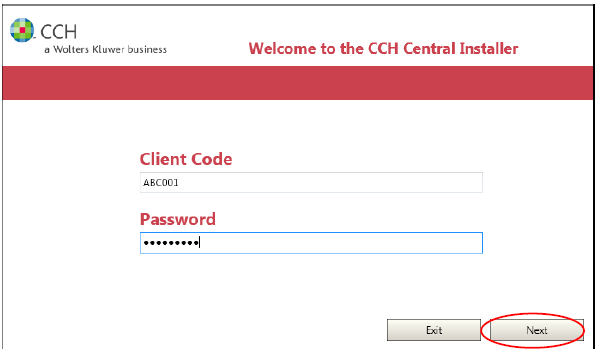
- Enter your Client Code and Password.
- Click 'Next'.
If this is the first time the CCH Central Installer has been used the window below will appear.
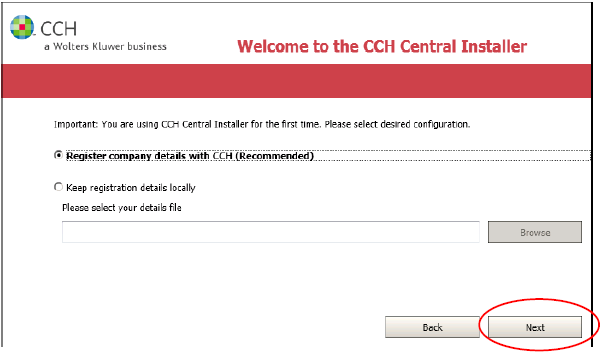
- Select the recommended option, Register company details with CCH
- Click 'Next'.
Appendix C – Installing on a Workgroup (Peer to Peer) Network
Note: all PCs that are to share a Central Suite database and install must be in the same Workgroup. If you are unsure of this refer to your local IT support for advice.
On a Workgroup network a PC needs to be selected to act as the server, it is suggested that this is the most capable in the Workgroup with the best combination of processor, RAM and disk space. Then proceed as indicated below.
On the PC that is to act as the server:
- Complete - Database Install
- Complete - Server Install
- Complete - Services Install
- Complete - Database Upgrade
- Complete - Entering Your Licence Pin
- Complete – Workstation Install
On all other PCs that are in the Workgroup and required to run the CCH Central Suite:
The Travel Installation is specifically for the CCH Accounts Production Travel function whereby accounts clients may be copied to a laptop computer and then accessed off-line, typically when visiting a client. However this feature is also useful for Workgroup installations. Travel installs on the computer a copy (instance) of Microsoft SQL Server 2017 Express. If the computer is not to be used for Travel then this instance of Microsoft SQL Server is redundant and performance will be enhanced by disabling it. To do this provide as follows:
- Click the Windows icon in the bottom left hand corner of the screen.
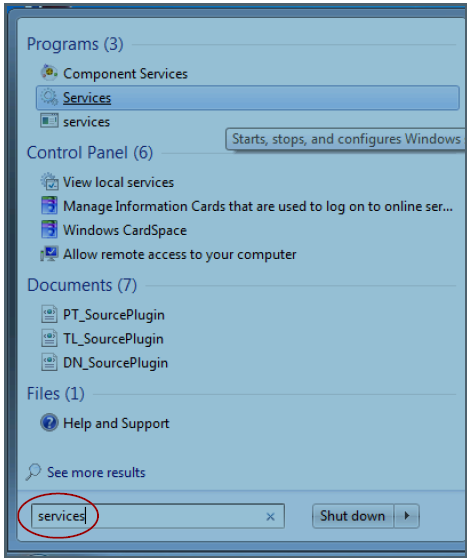
◼ Type ‘services’ in the search box.
◼ From the results returned click 
The Services window will open
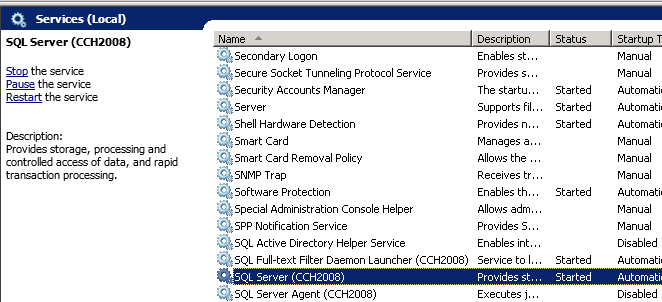
- In the list of services locate the SQL Server (CCH2008) service.
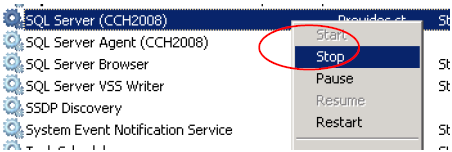
- Right-click over the service and select Stop.
- Similarly locate the SQL Server Agent (CCH2008), right-click and select Stop.
Note: Take care when carrying disabling the Microsoft SQL Services. Only disable the Services is they are described as (CCH2008) and if you have no other local installs of Microsoft SQL Server for CCH products. If in doubt please contact CCH Software Support for advice before taking any action.