Skills Search

About Skills Search
The Skills Search function located on the task bar of the 'Workflow > Employee Planner' window lets assignment managers find staff with particular skill sets and backgrounds. The window has tabs that allow you to filter employees by:
-
Availability: Allows you to view a list of employees available for a specified minimum number of hours within a date range based on Department, Office, Company, Centre and Category.
-
Employee Skills: Lets you search for employees with a specified skill. Note that you need to have these skills set up as Extra fields via the Maintenance menu before you perform the search. Examples of skills are Languages, Education, Professional Certifications, Culture, Club Membership, etc.
-
Work Experience/Client Attributes: Allows you to identify employees who have worked in specific situations. The Work Experience filters include Client, Assignment Type, Assignment and Tasks. They allow you to identify employees who have worked for particular type of client, such as Advertising, Engineering, Law, etc.
Related Topics:
How to Perform a Skills Search
Method 1:
- On the main menu, click Workflow > Employee Planner.
- The Employee Planner window appears.
- The Task Bar refreshes to display options for the Employee Planner.
Method 2:
- On the Task Bar, under Find, click the Skills Search link.
- The Skills Search window appears with the Availability tab open by default.
- The window has three tabs that help you specify various criteria for your search.
Note: all the fields in this window are optional. You can click the Show button at any point.
-
Specify Availability criteria.
- In the Availability tab, use the
 button next to the Date Range fields to specify the From and To dates.
 - Enter the Minimum Available Hours that the employee must have.
- Specify the Department, Office, Company and Centre from the drop-down lists.
- Select the employee Category.
- In the Availability tab, use the
-
Click the 'Employee Skills' tab to specify skills criteria for the search.
The options available on this tab page depend on the Extra employee fields and categories set up in the Maintenance menu. Specify the criteria by selecting from the drop down lists provided or by entering text.
Note: that you must use the [Tab] key to collapse drop down lists and to navigate between fields.
-
Click the Work Experience/Client Attributes tab to find employees with experience of specific client types.
- Use the Work Experience fields to search for employees who have worked for a particular Client, Assignment Type, Assignment and/or Task.
- Use the Client Attributes fields to search for employees who have worked for particular types of clients before. The attribute options available depend on the Extra client fields and categories set up via the Maintenance menu. Client attributes could include industry, company size, location, etc.
-
Click the 'Show' button to display the list of employees.
A tip at the bottom left of the Skills Search window tells you how many employees were found. The Skill Search window remains open while the list is displayed in the Employee Planner. -
Modify the search criteria and perform further searches OR Close the Skills Search window.
Skills Search
When you access the Employee Planner through the Workflow menu or Assignment Schedule tab you will have access to the skills search to identify employees that meet the criteria provided in the skills search.
The resource search consists out of 3 tabs:
- Availability
- Employee Skills
- Work Experience/Client Attributes
Note: Care must be taken that information supplied in the three steps will be used in conjunction to identify employees that meet all the criteria.
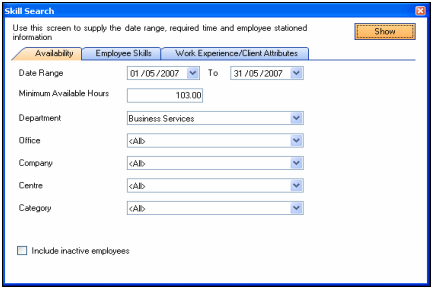
Skills Search - Availability
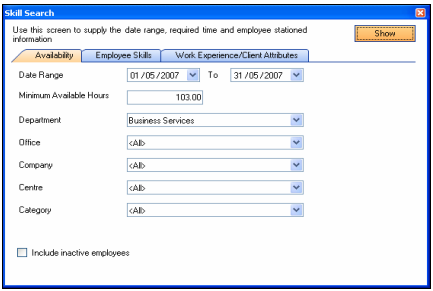
You are able to specify information for:
- Date Range : Enter the start and end date for the period that employees need to be available for
- Minimum Available Hours : The minimum amount of hours employees must be available for in the date range provided. Note must be taken that this does not necessarily mean that it will be consecutive hours but that the employee records returned will have the specified amount of hours available in the date range provided.
- Employee stationed record details : the information provided in the Department, office, company, centre and category fields will be used to filter employees and only employees whose stationed records match the information provided will be returned.
The skills search will only return employees that meet all the search criteria information entered. If you leave a field blank the skills search ignores the field and will not use that as input to the search.
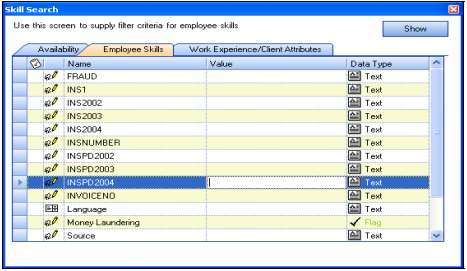
Skills Search - Employee Skills
The Employee Skills section of the search allows users to specify details for any extra fields and categories that have been created for use with employees. Extra categories and fields can be maintained through the 'Maintenance > User Defined > Custom Categories' or Custom Fields menu options respectively. The information provided will be used as input to the skills search.
You will have the ability to specify multiple instances of a custom field or category if you specified it as a field that allow multiples. For example if you create a new custom category, in the 'Maintenance > User Defined > Custom Categories' menu option, called Language and tick to allow multiples:
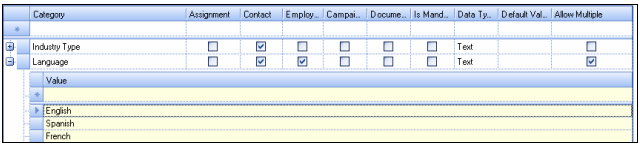
Because the Allow Multiple box has been ticked you will be able to specify more than one option when choosing a Language in the skills search:
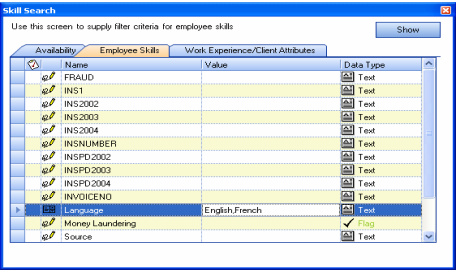
This is achieved by clicking on the drop down in the Language 'custom category' and putting a tick in the English and French tick box and then pressing the enter key.
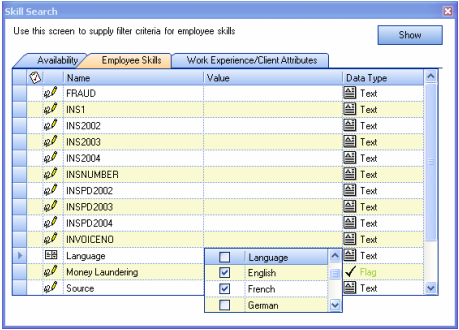
To change the input criteria you can click on the drop down in the custom field and then remove the tick boxes in the unwanted options and add tick boxes to the desired options and pressing the enter key.
Note: Care must be taken that the three tabs in the skills search do not work independently. All information provided will be used in conjunction to identify employees. The skills search will only return employees that meet all the search criteria information entered. If you leave a field blank the skills search ignores the field and will not use that as input to the search.
Skills Search – Work Experience/Client Attributes
The client attributes section work on the same principle as the employee skills section. You have the ability to specify details for custom categories and fields pertaining to clients. If you marked a custom category as allowing multiples you will be able to specify more than one option as input for the search criteria.
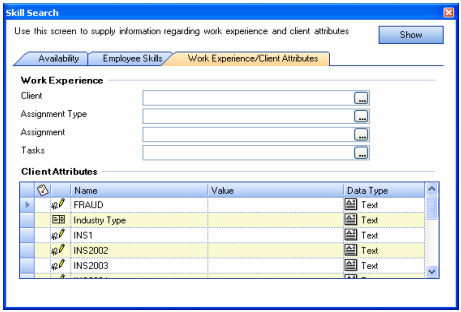
The Work Experience section queries timesheet information and will return employees that meet the criteria provided in the Client, Assignment Type, Assignment and Task fields.
As an example, if you enter Audit in the Assignment type, all employees that have worked on audit assignments that meet the rest of the search criteria provided will be returned to the result set.
Note: The skills search will only return employees that meet all the search criteria information entered. If you leave a field blank the skills search ignores the field and will not use that as input to the search.
Assigning work to Employees
You have the choice to fully or partly assign schedule stages to a single employee or a group of employees. To assign schedule stages to employees you need to identify the employees that will perform the tasks for a specific schedule stage, using the skills search, and then open the relevant assignment schedule and assign the schedule stages to the employees identified.
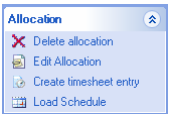
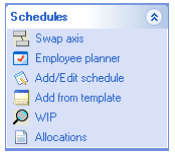
To load the relevant schedule after gaining access to the Employee Planner through the 'Workflow > Employee Planner' menu option use the 'Allocations - Load schedule' task bar option:
Alternatively, you can access the Employee Planner from the 'Schedule tab' on a client assignment using the 'Schedules - Employee' planner task bar option:
- If you access the Employee Planner from the schedule tab on an assignment the Employee Planner opens with the schedule details loaded. You can allocate the schedule stages to the employees in the Employee Planner or search for employees and then assign the schedule stages to them.
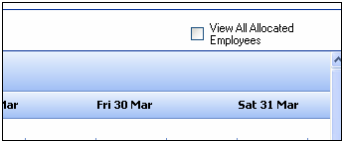
- If you assigned schedule stages for a specific schedule to employees you can open the Employee Planner from the Schedule tab and then click on the 'View All Allocated Employees' tick box to see the employees that have schedule stages assigned to them.
You can then continue to allocate schedule stages to the employees on window or use the skills search to identify alternative employees. It should also be noted that if there is a specific employee that you need to assign a schedule stage to, and that employee is not available in the current result set, you can add that employee record to the result set in the Employee Planner by using the 'Find - Add employee' task bar option.

This task bar option will add the employee to the current result set enabling you to assign schedule stages to the employee.
Assign Schedule Stages - Single Employee
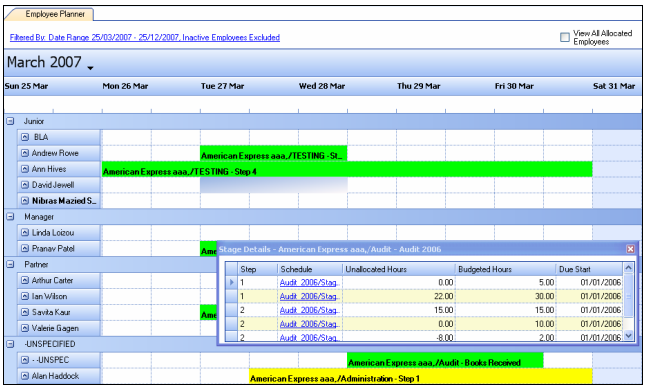
To fully assign a schedule stage to an employee you can drag and drop the schedule stage to the specific area next to the employee’s name and the schedule stage will be fully assigned to that employee. To assign only a part of a schedule stage to a specific employee highlight the section of time that you are interested in, next to the employee’s name and then either drag the schedule stage from the Stage Details window to the selected area or double click on the schedule stage in the Stage Detail window to assign the schedule stage.
Remember that you can move the allocation to another employee by clicking on the schedule stage in the Employee Planner and then dragging it to the employee needed. You can also use the click and drag technique to drag the schedule stage to another date for the employee.
To delete the assigned schedule stage you can either right click on the schedule stage and use the 'Delete allocation' option or by clicking on the allocation and using the delete button on the keyboard.
Assign Schedule Stages - Multiple Employees
If you need to assign a single schedule stage to more than one employee you can do so following the steps described in the 'Assign Schedule Stages - Single Employee' section with the exception of where you place the highlighted section on the Employee Planner.
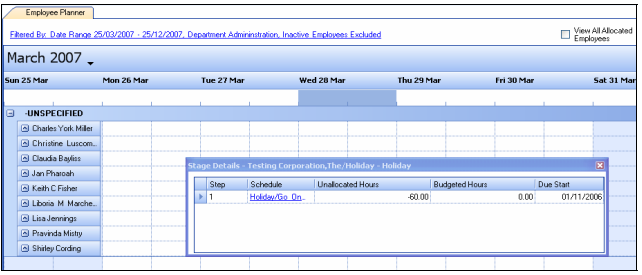
To assign a specific schedule stage to more than one employee you need to ensure that you highlight the area above the employees for the date and amount of time needed:
You can then drag and drop the task to the first employee on the list and you will be presented with the following question:
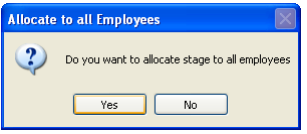
- If you click 'Yes', the schedule stage will be allocated to all the employees in the list. If you click 'No', the task will only be allocated to the employee that you dragged the schedule stage to.
- If you allocate a schedule stage to multiple employees by mistake that there is no option to delete all the allocations. You will have to delete the allocations one at a time.
Colour Setup
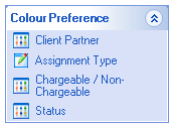
The Employee Planner is a visual display assigned schedule stages. You have the ability to change the colour display to view the information according to the:
- Client Partner: this colour setting will show you all allocated schedule stages set to the specific colour chosen for the client partner responsible for that assignment.
- Assignment type: this colour setting will show you all allocated schedule stages set to the specific colour chosen for the assignment type.
- Chargeable/Non chargeable: this colour setting will show you all allocated schedule stages set to the specific colour chosen chargeable and non chargeable assignments.
- Status: this colour setting will show you all allocated schedule stages set to the specific colour chosen for the status of the schedule stages.
Note: As a default the only colour preferences created are for the status of schedule stages. If you would like to make use of the colour preferences in the Employee Planner you need to set it up.
Colour Setup - Client Partner
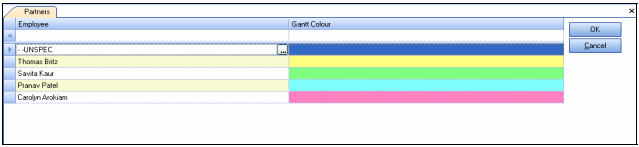
To set up the colour preferences for client partners go to the 'Maintenance > Internal > Partners' menu option and create a colour preference for each client partner.
When you then click on the Client Partner colour preference in the Employee Planner all assigned schedule stages will reflect the client partner colour preference.
Colour Setup - Assignment Type
To set up colour preferences for assignment types go to 'Maintenance > Assignment > Assignment Type' menu option and use the Gantt Colour column to set up a colour preference for each assignment type.

When you then click on the Assignment Type colour preference in the Employee Planner all assigned schedule stages will reflect the assignment type colour preference.
Colour Setup - Chargeable/Non chargeable
To set up colour preferences for chargeable and non chargeable assignment types go to the 'Maintenance > Miscellaneous > Miscellaneous' menu option and create a colour preference for chargeable and non-chargeable assignment types.
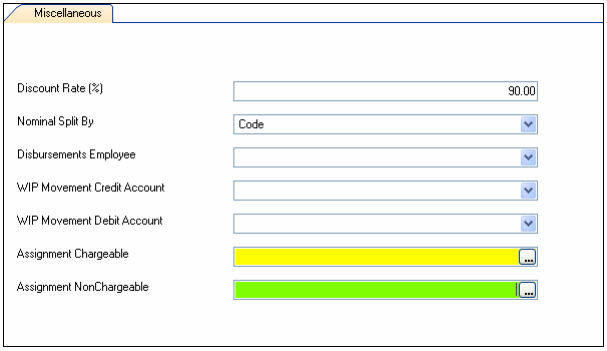
When you then click on the Chargeable/Non Chargeable colour preference option in the Employee Planner all assigned schedule stages will reflect the chargeable or non-chargeable colour preference.
Colour Setup - Status
To set up the colour preferences for the status of the schedule stages go to the 'Maintenance > Assignment > Task Status' menu option and assign a colour to each task status.
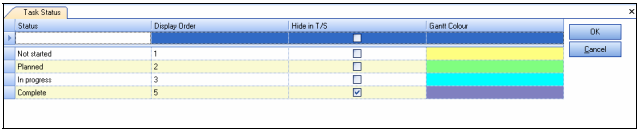
When you then click on the Status colour preference option in the Employee Planner all assigned schedule stages will reflect their task status colour preference.