Client Activation

CCH OneClick Activation
To enable you to use both the Messages & Documents and the Digital Data Request functionality within CCH OneClick, you will need to have an activated CCH OneClick account
- If you haven't already activated your workspace, you should have received an activation email sent by your accountant from notifications@accountantspace.co.uk
- Click the link in the email to set up your account and create a password
- Next, set up multi-factor authentication (MFA) to ensure your account is secure
- Log into the client workspace
If you need help with the activation process or setting up MFA, please refer to the relevant videos on this page
Organisation Selection Screen
If you have access to more than one account, when you login, you will be prompted to select which account you would like to view using the organisation selection screen
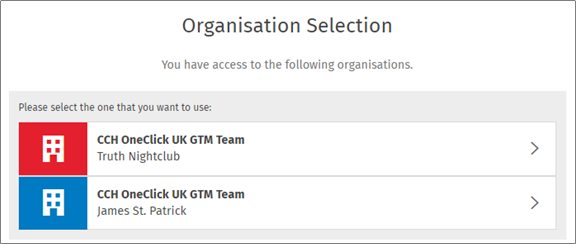
Once you have logged in, you can select Switch Account to come back to this screen and view another account
Client Workspace
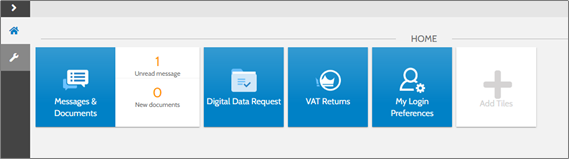
Your workspace will show the Messages & Documents, Digital Data Request and/or the VAT Returns tiles depending on the access given to you by your practice

Select the My Login Preferences tile to change your password or add/amend MFA options
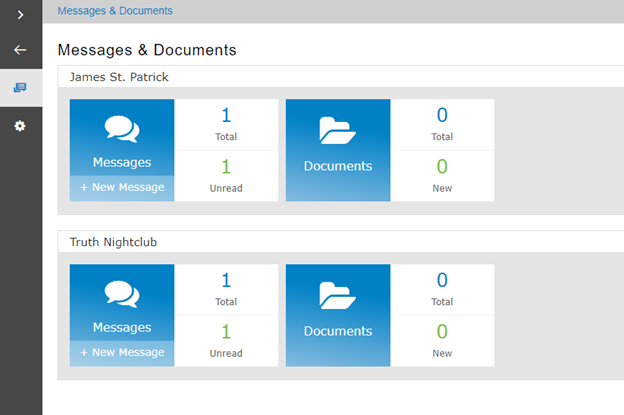
Messages & Documents
- Messages & Documents is the functionality within CCH OneClick that allows you to exchange messages, files and information online (previously known as Client Portal)
- It is accessed through your client workspace within CCH OneClick

- From within Messages & Documents, you will see all accounts that you have access to
- If you are an associated contact of multiple businesses you will be able to see them all here
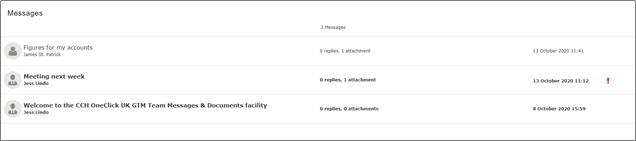
Messages
- The Messages tile will take you to the conversations for that account
- There is also an indicator here of how many messages you have and how many are unread
- You will be sent an email notification when you receive a new message

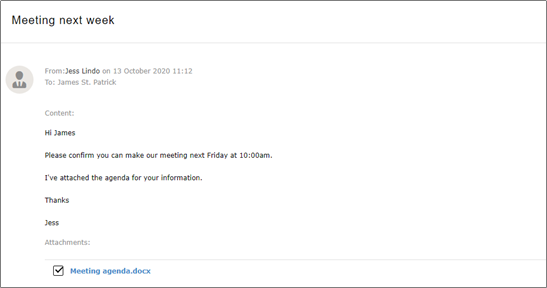
Create a message
- Select the + button at the bottom right of the screen to create and send a new message
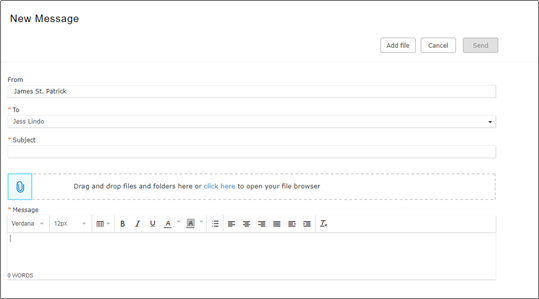
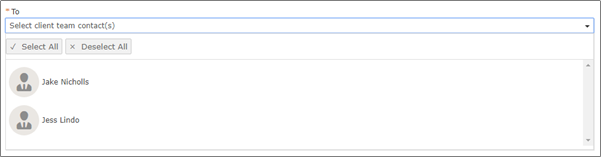
- The To section is a required field. The dropdown list will allow you to send a message to any member of your client team
- Multiple employees who are in your client team can be copied in when creating or replying to a message. Additional employees will appear in the To field
- The subject and message sections are also required fields so must be completed before the message can be sent
- Use the Add file button or drag and drop files to add an attachment to the message
Message list
- The exclamation mark signals that there is a document within this conversation needing your approval
- Open the message and select which option you’d like to choose

- If approving the document, enter your login password
- You may have to view the document first before it can be approved
- If your accountant is using our eSign functionality, you may also see the option to electronically sign the document

- When you select eSign, the document will load showing the sections and areas where a signature is required:
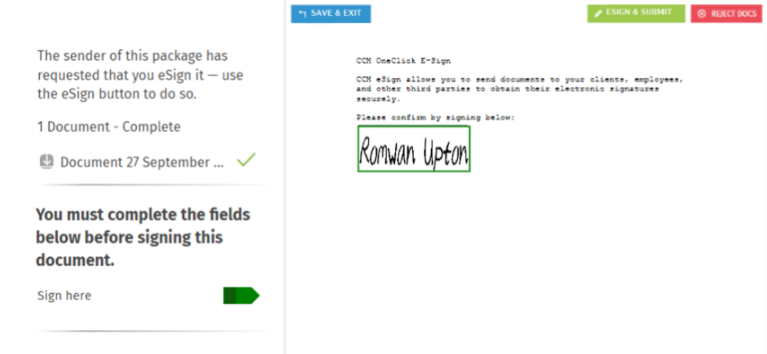
- Hover the mouse over the field and click to apply your Signature. The system will apply a pre-defined signature using a forename and surname.
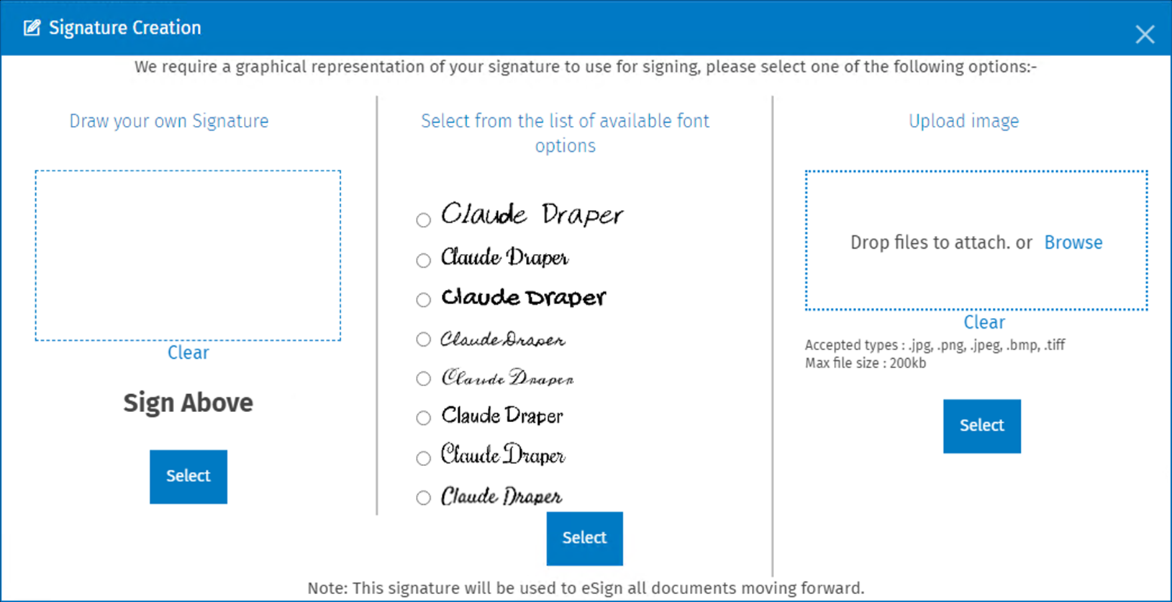
- To change the pre-defined signature image, select the Signature field and click CHANGE SIGNATURE to view and select an alternative font type or to draw your own signature. In addition, users can now upload an image of a signature of their choosing.
- Once the signature is applied, click ESIGN & SUBMIT to send the document back to your accountant and to return back to your messages.
- The signed document will be updated and you can view and download it via the message and the Documents folder.
- Use the overview icon to return your list of available accounts, or the messages icon to return to the message list

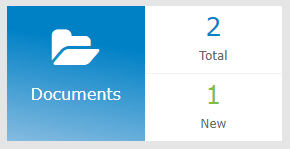
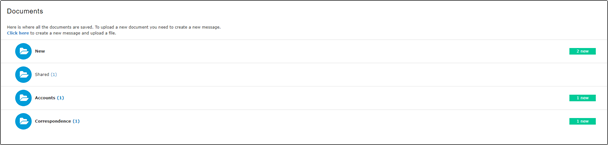
Documents
- The documents tile will take you to all the documents available for that particular account
- Select the new folder to view all the latest documents that have been received and not yet reviewed
- Documents will be split out into folders (as specified by your accountant)
- Access any documents needing your approval here
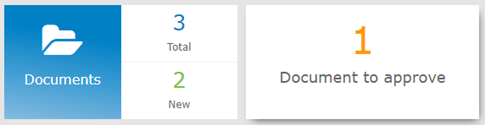
- Tick the checkbox next to the relevant document and select Approve, Reject or Download
- You will need to enter your password to confirm your decision
- If your accountant is using our eSign functionality, you may also see the option to electronically sign the document (instructions as above)
- Click the documents icon to return to your document list

Digital Data Request
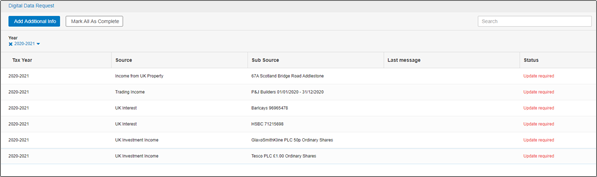
- Digital Data Request will present you with a list of income sources from your accountant for which you need to provide data, along with any supporting documentation required
- It can be accessed using a browser-based application will be accessible through the Digital Data Request tile in your CCH OneClick workspace (if your practice has enabled this for you)
- If an information request has been sent, you will be presented with a list of items requiring action. If your practice has not sent you an information request, this screen will be blank

- Potential sources of income will include:-
- Income from UK property
- UK investment income
- Employment income
- Child benefit
- Trading income
- UK bank interest paid gross
- Deductions
- Foreign interest
- Foreign dividend income
- Other foreign income
- Foreign state benefit income
- Foreign pension income
- On all screens, please add the full amount of income and expenses
- The form will auto-calculate your personal net income from this at the end based on the percentage %
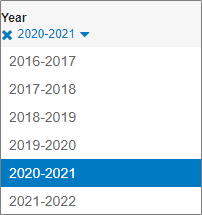
- The drop-down can be used to filter on tax year
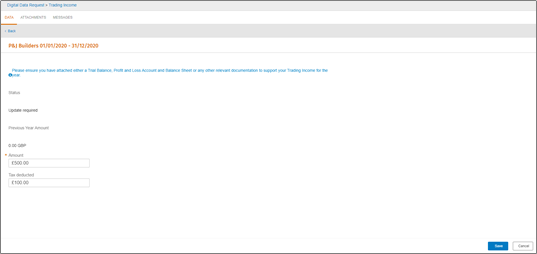
- Select a row to see that section
- When you open a section you can review the data which is displayed
- Some of the information may be pre-filled by HMRC and cannot be changed
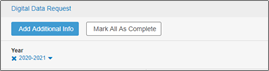
- Use the buttons at the top to add additional information or mark all as complete
- When you click on a row the information will show on 3 tabs

Data
- Review and make any required changes to the figures in each section (if applicable) then select Save, or Cancel to discard your changes
Attachments
- The attachments feature allows you to quickly attach documents to a section
- Use the upload attachment button to attach any relevant documents to each income source
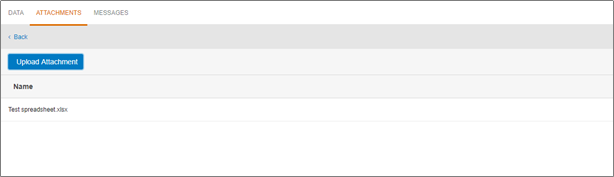
- Once uploaded, you can preview the attachment by selecting the relevant line
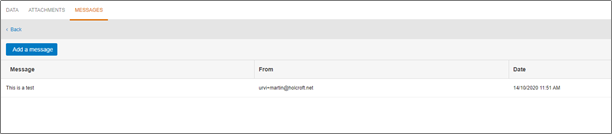
Messages
- The message feature allows you to quickly send a message or comment about a particular section to the practice
- Select the Add a message button to add a message /comment
Joint Income
- If a source of income is marked as joint this will be shown by the tick box being completed
- If there is a share /% this will also be populated

Other foreign income
- The currency details will automatically be populated here if applicable

VAT Returns
A separate guide to show you how to use the VAT Returns functionality can be found here