Making Tax Digital for VAT: Guide for Clients

Introduction and Prerequisites
Making Tax Digital for VAT introduces the requirement for VAT registered businesses with taxable turnover above the VAT registration threshold to keep records in digital form and file their VAT returns via compatible software.
Our priority is to support Advisors, and their Clients, by delivering a VAT filing solution that allows you to maintain your current VAT processes as closely as possible. You may have significant legacy calculations and formulas within spreadsheets today that makes the recurring task of completing your VAT return more efficient.
This quick start guide documents how to work with Making Tax Digital for VAT within CCH OneClick.
Note: you need to have signed up/subscribed to MTD for VAT on HMRC’s website, otherwise you will not be able to authorise CCH OneClick with HMRC.
The authorisation with HMRC is expected to last for an 18-month period, so should not need to be repeated frequently. However, if HMRC introduce any new APIs/services, then this may require CCH OneClick to be authorised again.
Please note: once you have signed up to MTD for VAT, HMRC may take up to 72 hours to send a confirmation email.
DO NOT try to enter your VAT registration number in CCH OneClick until you have received this email, otherwise, it will fail.
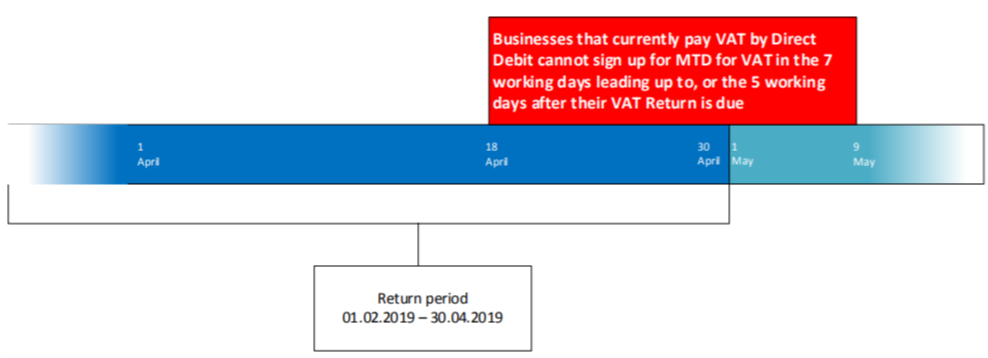
Businesses that currently pay VAT by Direct Debit cannot sign up for MTD for VAT in the 7 working days leading up to, or the 5 working days after their VAT Return is due. For example, VAT return quarter-end 30th April 2019 means you have to sign up by the 18th April or wait until 9th May 2019 to sign up.
CCH OneClick Activation
To enable you to use the VAT submission functionality within CCH OneClick, you will need to have an activated CCH OneClick account
You should have received a CCH OneClick activation email sent by your advisor from notifications@accountantspace.co.uk
- Click the link in the email and enter your activation ID (Your advisor will have informed you of this, or you will have received a text message when your account was activated)
- Create a new password
- Select two security questions
- Log into the client workspace using your email address and new password
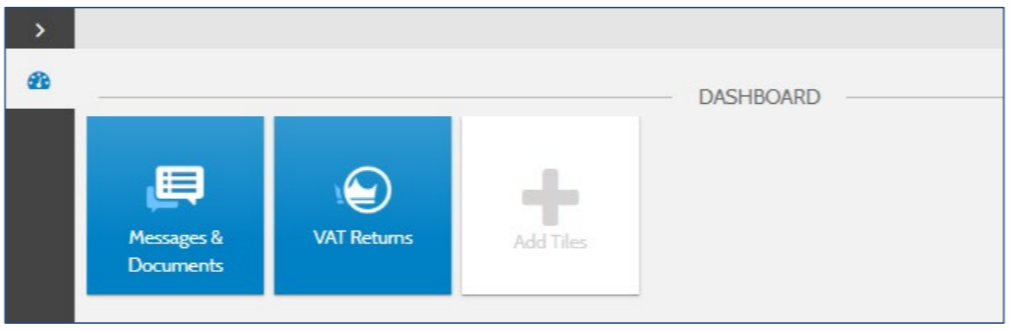
Your workspace will show Making Tax Digital for VAT, Messages & Documents and/or the Digital Data Request App tiles depending on the access given to you by your advisor.
Authorise CCH OneClick with HMRC
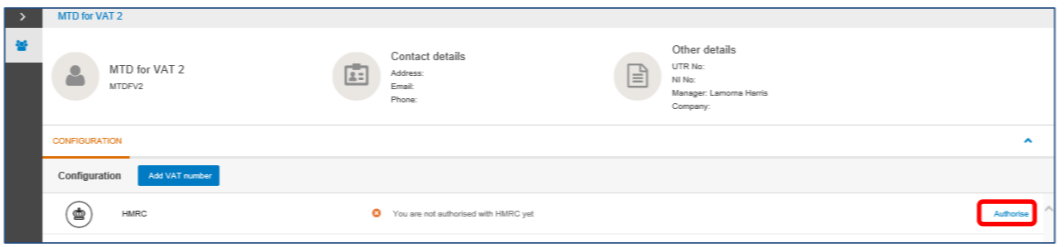
1. CCH OneClick must be authorised with HMRC
2. Click on the VAT Returns tile
3. Click on 'Authorise'
3. The page is redirected to the HMRC website
3. Click on 'Continue'

4. Enter your HMRC user ID and Password
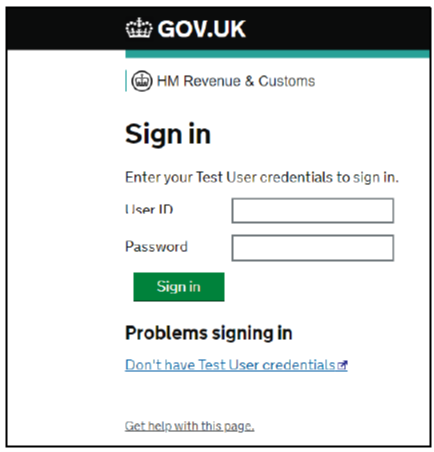
5. Click on 'Sign in'
6. Click on 'Grant authority'

Note: your credentials used to sign into HMRC’s page, in order to grant authority for CCH OneClick with HMRC must be your government gateway ID that HMRC require all businesses to create. These will be used to use all the API-based services that HMRC provide. The authorisation with HMRC is expected to last for an 18-month period, so should not need to be repeated frequently.
Confirmation email
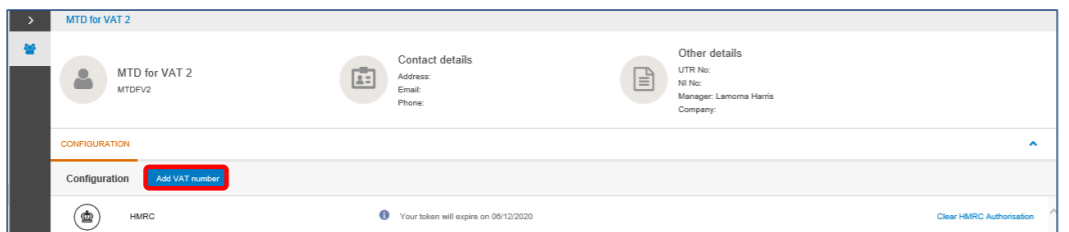
8. Once you have signed up to MTD for VAT, HMRC may take up to 72 hours to send a confirmation email. DO NOT try to enter your VAT registration number until you have received this email otherwise it will fail
9. Once you have received the confirmation email from HMRC, it’s now time to enter your VAT number by clicking on 'Add VAT number'
10. Add your VAT number
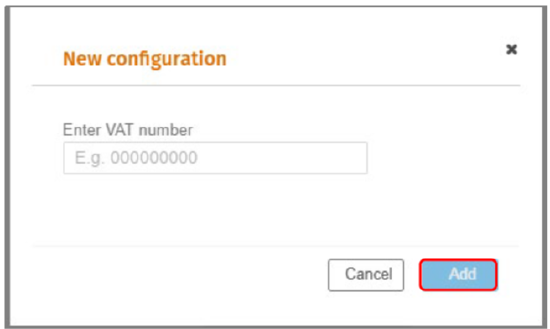
11. Validation is then applied to check that:
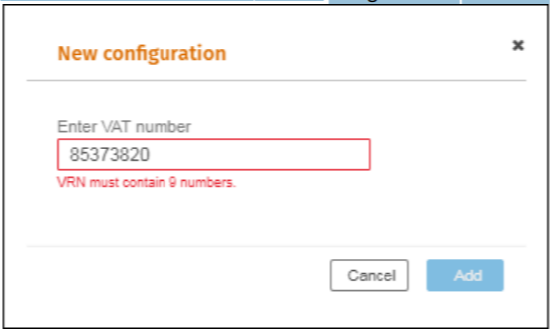
- Your business has subscribed to Making Tax Digital for VAT. If not, then the error below is shown.

- If the VAT Number does not contain the correct number of digits a validation message will be displayed
12. Click on 'Add'
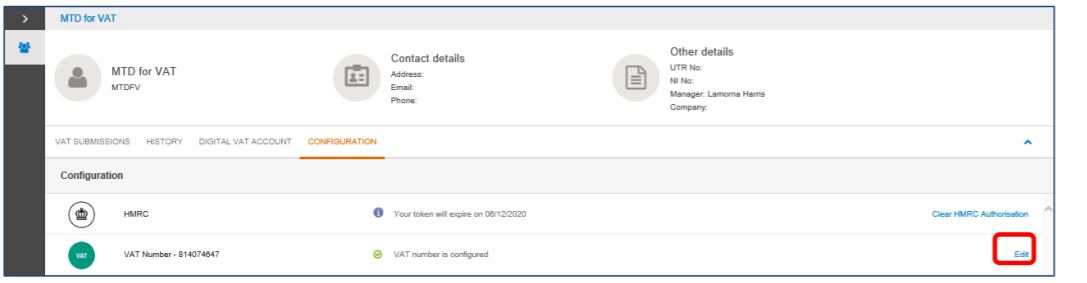
13. If you need to edit the VAT number click on 'Edit'
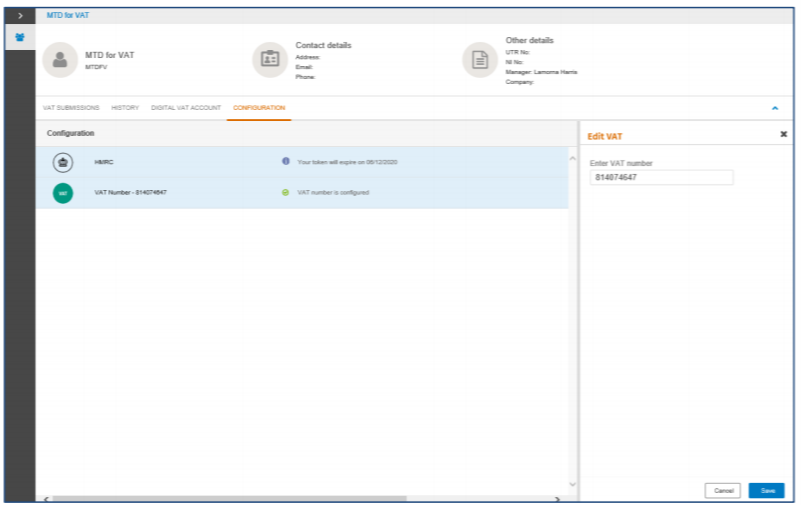
14. Click on 'Save'
Authorising Multiple businesses/company’s
- If you are an associated contact of multiple businesses, each client workspace is accessed by clicking on your email address.

Each business/company will need to be authorised with HMRC by following the process above.
Creating Digital Links
Scenario 1 (Simple)
Your current bookkeeping solution is not MTD compliant or you want to make minor changes to the VAT calculation.
- Export the VAT return from your bookkeeping solution into MS Excel
- Continue to follow the instructions Tagging the MS Excel spreadsheet
Scenario 2 (Complex)
If you have multiple spreadsheets for example, a spreadsheet containing the sales detail and one containing purchases detail, or if you encounter a problem during the upload due to the spreadsheet complexity, use this method to create digital links.
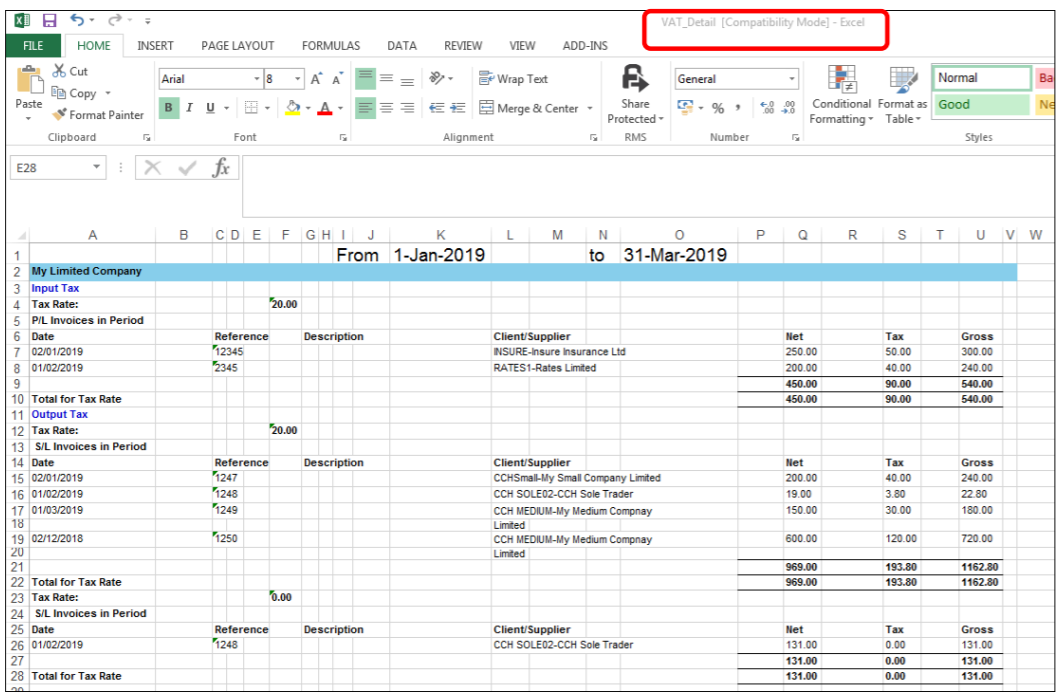
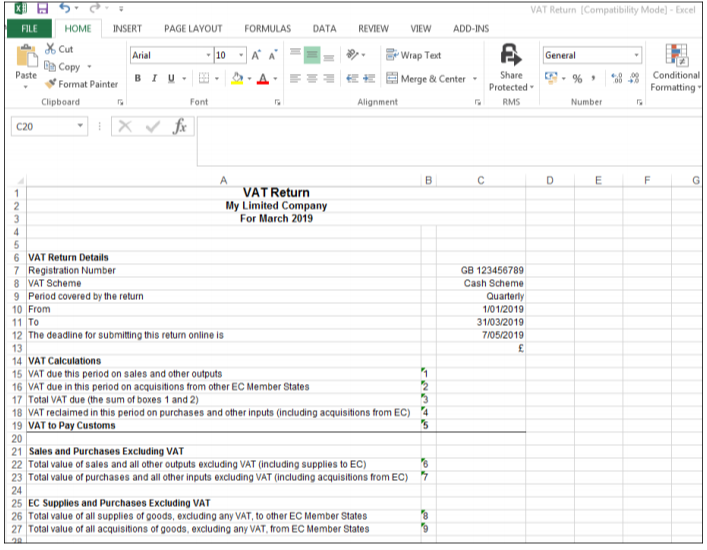
1. Open the spreadsheet for VAT_Detail
2. Create a new Workbook within MS Excel for example - VAT Return
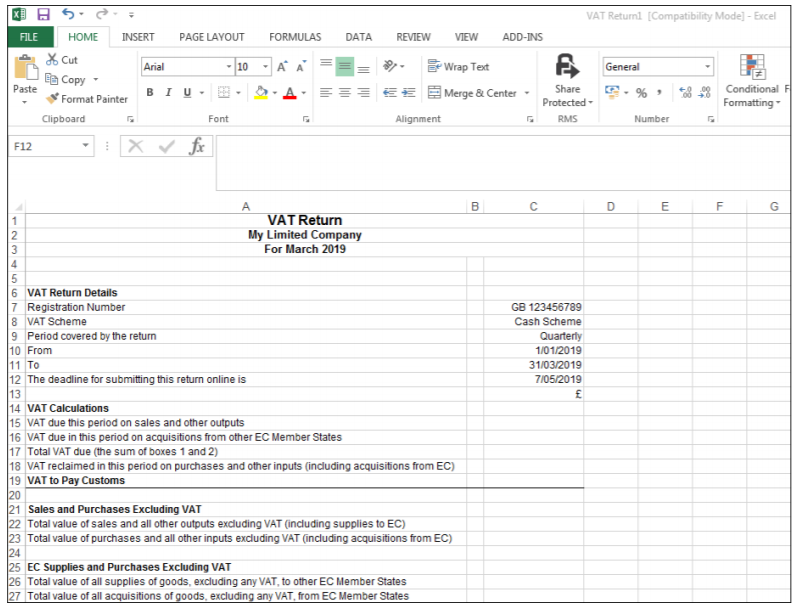
3. In column B allocate a number from 1 to 9 against the rows as shown in the example below:
4. In row 15 column C, type = then browse to the Total VAT figure for on the VAT_Detail spreadsheet and press 'Enter'

5. In row 18 column C, type = then browse to the Total VAT figure for from VAT_Detail spreadsheet and press 'Enter'
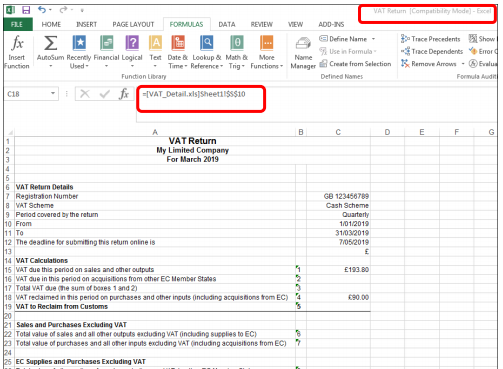
6. Continue the process until all relevant values have been digitally linked
Please note: the spreadsheets can have any naming convention, and Sales and Purchase can be within the same spreadsheet on different sheets or in separate workbooks.The above is for demonstration purposes only. Please make sure all relevant values have been digitally linked.
Tagging the Excel Spreadsheet
Before the spreadsheet can be uploaded into Making Tax Digital within CCH OneClick, tags need to be applied to boxes 1 to 9.
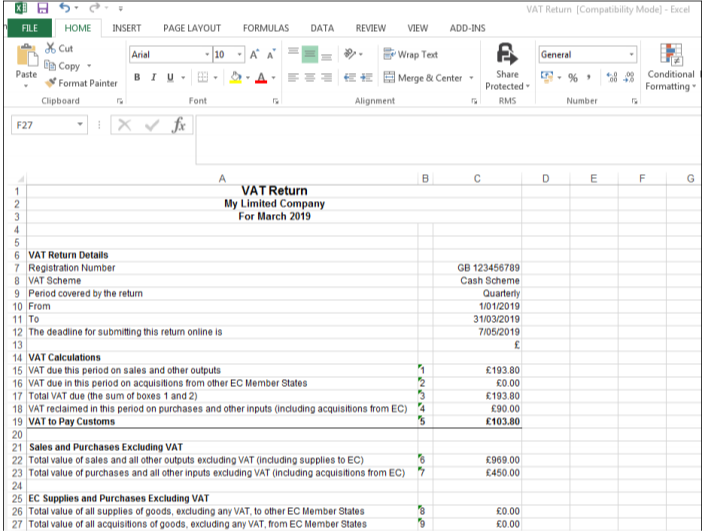
- We are using the Excel Name function to tag the VAT information to allow it to be imported
- Excel name function is used to rename a cell from C15 to a set name that will allow the software to read the data
- To apply the tags to the above example, Click on Cell C15
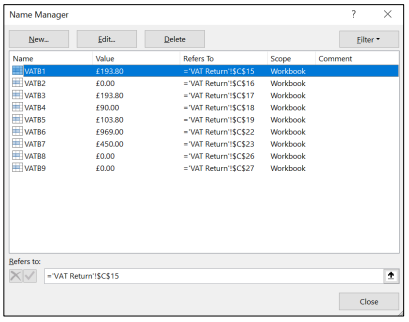
- Select Formulas>Name Manager>New
- Name = VATB1

- Repeat the process for the other 8 VAT box cells
Submitting a Return to HMRC
- Click on the 'VAT Returns' tile

- Defaults to the 'Vat Submissions' tab
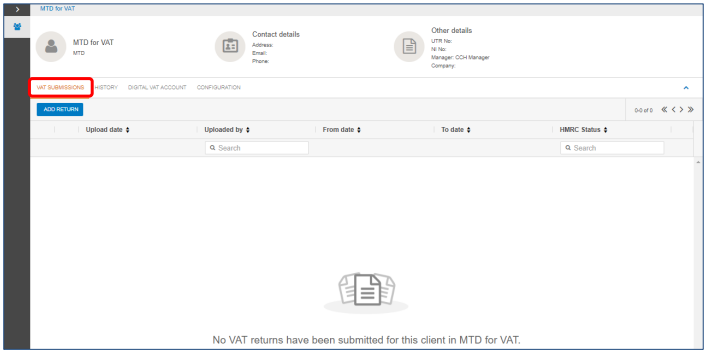
- Click on 'ADD RETURN'
- Click on 'UPLOAD'
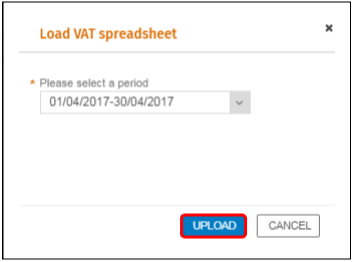
- The date is automatically pre-populated based on the obligations issued from HMRC
- Click on 'UPLOAD'
- Browse to the location of the spreadsheet, then select open and the validation screen will appear
Please note: the obligation date in this example is for demonstration purposes only.
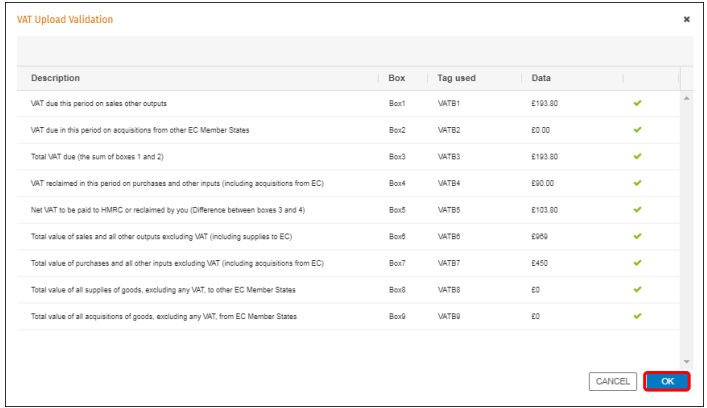
Note: Validation is then applied such as: are all the nine tags found, are any of the tags duplicated, are the tagged amounts consistent with HMRC’s requirements and do the amounts tagged pass arithmetic tests.
8. Click on 'OK'
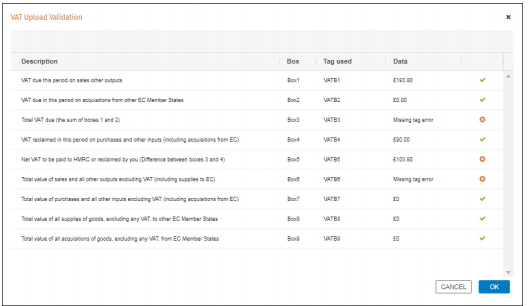
Note: If the Validation has not passed, check the naming convention of the tags.
9. To delete the return, click on

Note: once the VAT return has been sent to HMRC, it cannot be deleted.
10. To send the return to HMRC, click anywhere on the row
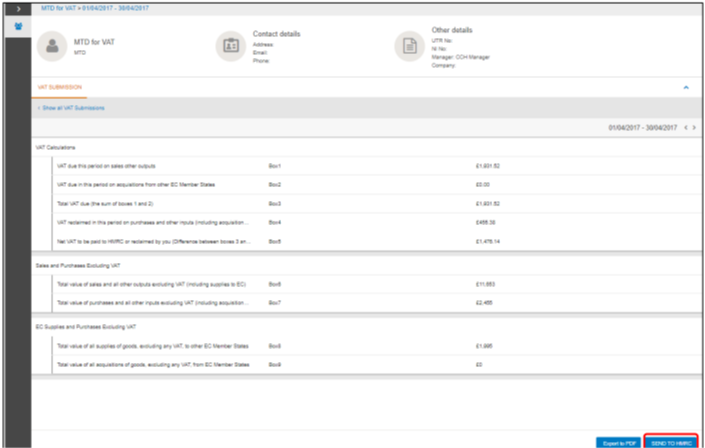
11. Click on 'Send to HMRC'
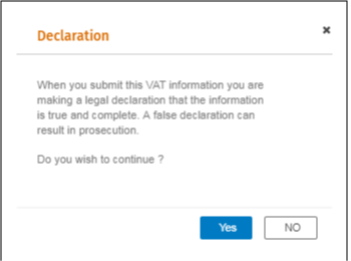
12. Click 'Yes' or 'NO' on the Declaration
13. If 'Yes' is selected the following message is displayed 'Data was successfully sent to HMRC'
Please Note: If 'NO' is selected then the VAT return is not submitted.
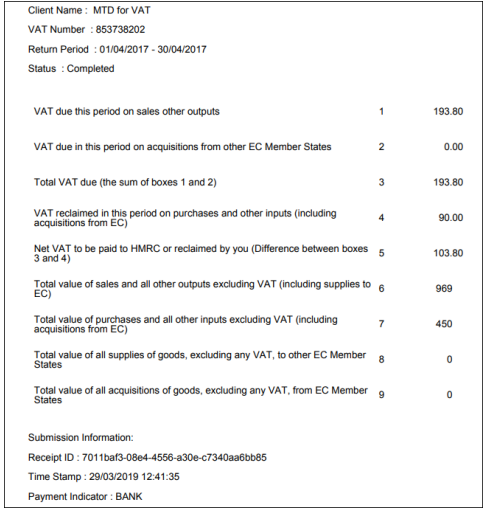
14. Export to PDF will display the following information
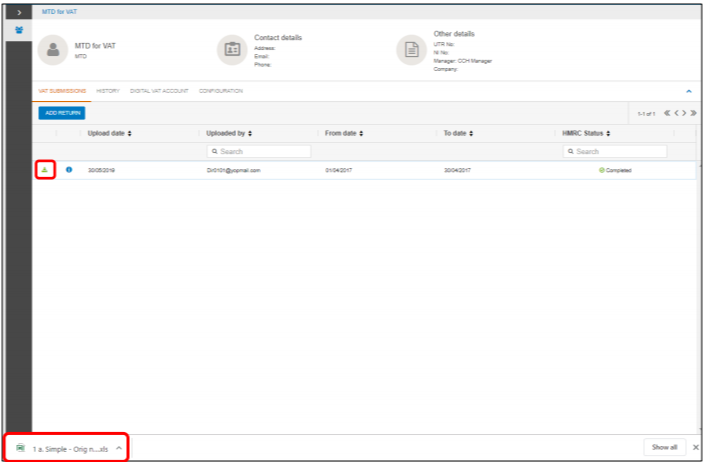
15. To download a copy of the spreadsheet, click on

16. Click on the spreadsheet to view
Digital VAT Account and History Tab
1. Click on the Digital VAT Account tab to display information on liabilities returned by HMRC
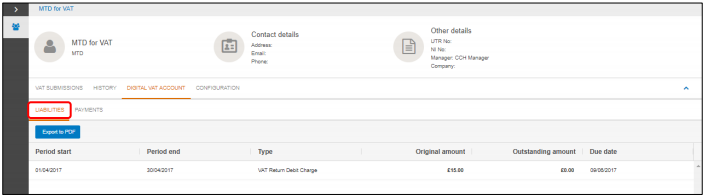
Note: the first time you submit a VAT return, they may be a slight delay in the Digital VAT Account being updated, please check again after one hour.
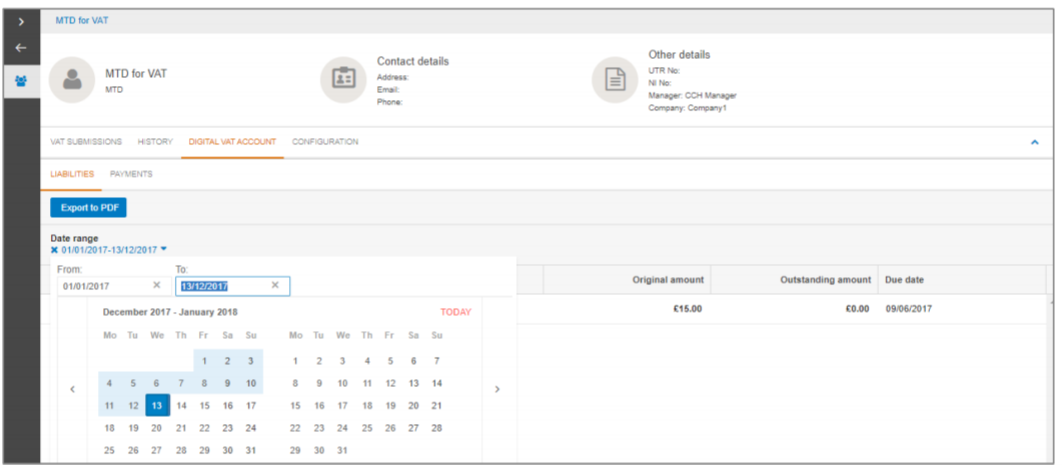
To view data that is more than one year old, change the date filter.
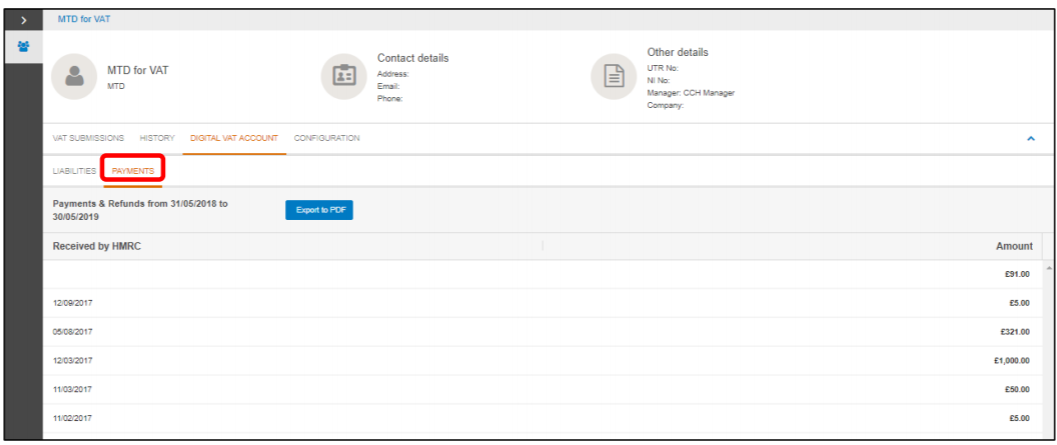
2. The history tab will display all submissions made to HMRC.
Please note: until a VAT submission is made or a payment made for a liability under MTD for VAT, the payments and liabilities tabs will not return any data.
This is because only data relating to MTD for VAT can be shown. Meaning liabilities and payments prior to MTD for VAT cannot be shown.