Creating Customised Tangible Fixed Assets Templates

Customising the Tangible Fixed Assets Statement
The default template is used unless a customised template has been created in an earlier Period of Accounts for a company.
Change Column Headers
To change the column header description, place the cursor over the relevant header and a box will appear around the text. Left-click within the box to type. Either tab or click out of the field to save the change.
Insert or Delete Columns
To insert a new column, right-click on a column header adjacent to the desired location of the new column. The pop-up menu gives the option of inserting a new column before or after the selected column.
To delete a column, right-click on the column header of the applicable column. The pop-up menu gives the option to delete the column.

The only column which cannot be deleted is the Total column. This will always be the final column in the summary.
Change Row Description
To change the row description, place the cursor over the relevant description and a box will appear around the text. Left-click within the box to type. Either tab or click out of the field to save the change.
The description can no longer be changed once an analysis has been inserted and it becomes a hyperlink.
Insert new section rows or prior year rows
The default template includes three section rows which are Cost/valuation, Depreciation and Net book value. Three is the maximum number of section rows allowed.
To insert new section rows or prior year rows, highlight the Cost/valuation row and right-click on row in the highlighted area to the right of the Description column and select the required option
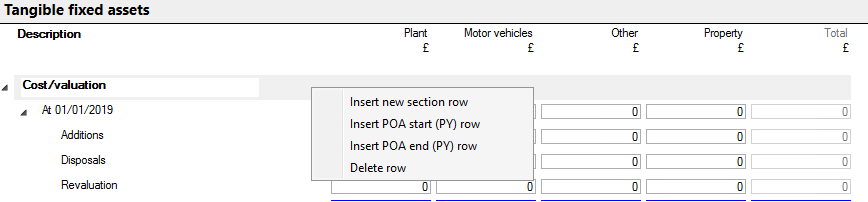
Do the same for the Depreciation and Net Book Value rows
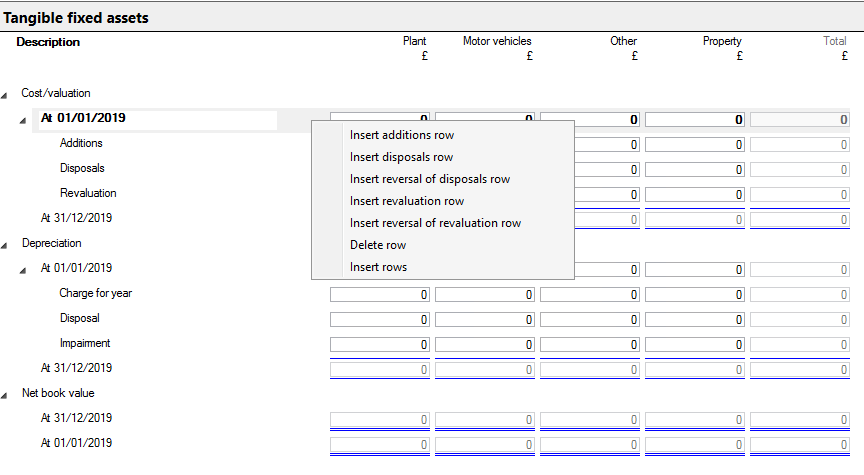
Insert or Delete Rows
To insert a new row, right-click on the POA start date row within the section on the space between the box surrounding description text and the box for the first data entry column where you wish to insert the new row and select the required option.
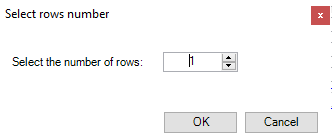
If you select Insert rows, an option box will appear where you can select the number of new rows to add.
To delete a row, highlight the row, right-click and select Delete.
If any default row descriptions are deleted, they will appear in the pop-up menu in the list of options of row types to insert.
Sign convention
Within the Cost/valuation section, disposals and revaluation decreases need to have a minus sign typed to be a negative figure.
Within the Depreciation section, figures are shown as a positive in line with the Fixed Asset Note within a company's financial statements. Disposals need to have a minus sign typed to be a negative figure.
Boxes which are greyed out are automatically calculated and populated by the system.