Default Identified Risks

The authors of master packs can define default identified risks that will apply to all clients that are created and linked to the master. When you create a new client, these risks will automatically appear in the client and will be flagged as risks that should be carried forward on balance forward. Risks defined in master packs will not be added to existing clients.
Once created, the risk can be edited to customise it for the client and audit procedures designed as required. The risk can also be deleted if it is not appropriate to the client. This can be done by any user with a level of senior or above irrespective of the new setting described in Restricting editing of an identified risk to person who raised it.
To add, edit or delete default identified risks, load the pack for editing and click on the Default identified risks option with Risk Model in the Master options list. The system will display the Identified risks dialog.
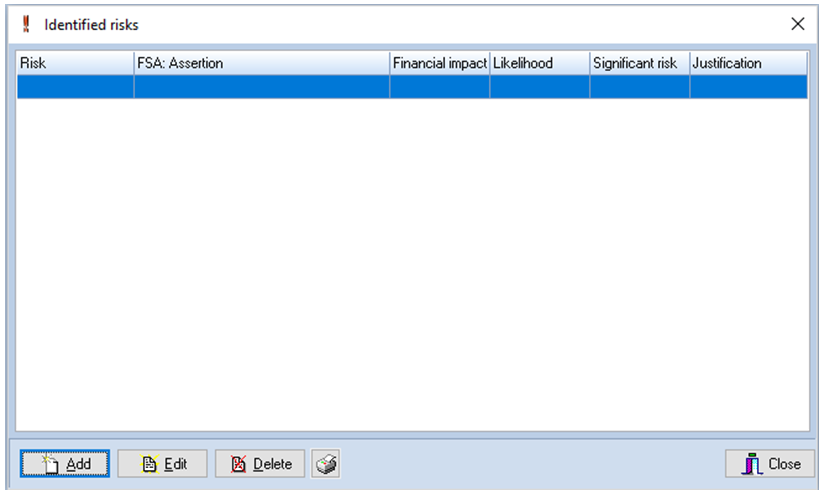
Identified risks dialog
Adding a risk
To add a risk, click on the [Add] button. The Identified risk form will be displayed.

Identified risk dialog
- Description of risk – The description of the risk should be typed in here.
- Keep risk record on balance forward - The checkbox is ticked by default to make sure the risk entered and saved here gets balanced forward. You can uncheck this box if you don’t want it to.
- Select risk profile and justify your settings
- Financial impact – Select the level of significance the risk has
- Likelihood of misstatement – Indicate the likelihood of the risk materialising
With both of the above levels chosen, use the text box to the right to justify your settings.
- Significant risk – check this box to indicate a significant risk
- Assertions – you can add or delete associated assertions by clicking on the [Add] or [Delete] buttons. If you choose to add an assertion the following dialog will pop up:
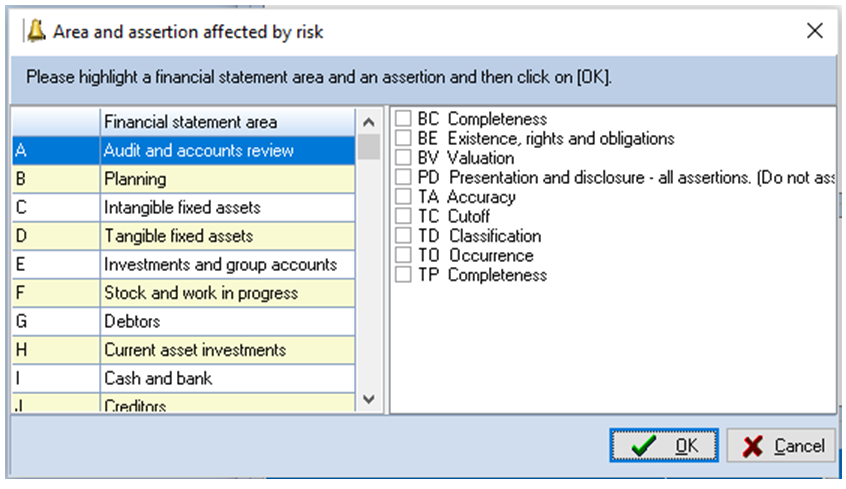
Choose the Financial statement area it relates to from the left-hand side, then check any number of associated assertions from the right and click [OK]. If it relates to more than one area you can then click [Add] again to select another area and choose the related assertions.
Clicking [OK] will then add the new risk to the risk of identified risks
Editing a risk
To edit a risk, highlight it from the list and click on [Edit] or just double click on it and the Identified risk dialog will be displayed for you to edit. After editing, click on [OK] to save it or [Cancel] to exit the dialog without saving the changes.
Deleting a risk
To delete a risk, highlight it from the list and click on [Delete]. The system will request that you confirm your actions before deleting the entry.
Printing Identified Risks
To print the identified risks, click on the printer icon button. The system will present the standard Windows printer dialog to allow you to select the printer to use.