Importing

The File Manager allows for various transactions types to be imported into Twinfield such as: - Journals, bank statements, cash transactions, customers, suppliers, P&L and Balance sheet nominal codes. Depending on the file that you are importing, the steps are similar.
To access the ‘File manager’ click the ‘Folder’ icon on the blue menu bar.
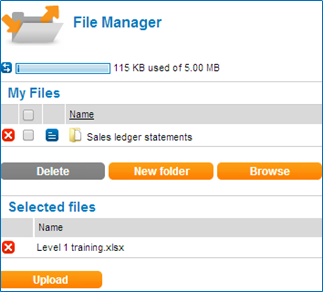
- To upload a file, click the orange 'Browse' button and select the file you wish to upload.
- Under the heading 'Selected files' scroll down and click the orange button ‘Upload’ button.
- The file will now appear in the 'My Files' section.
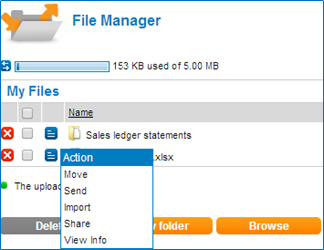
- From the 'Action' menu select 'Import'.
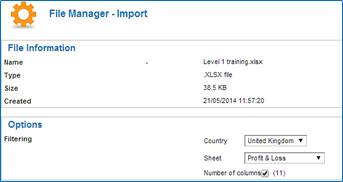
Under the section 'Options' there is a dropdown box called 'Sheet', this option will only apply when importing Excel workbooks which contain multiple tabs.

Twinfield displays various file formats depending on the columns within the import template. Where multiple templates have the same number of columns, choose the right template from the 'Template' dropdown box.
Click ‘Process’ to start the import.
Impoting Tips!
A pop up notification will appears at the top Right of the screen when the import has completed. Alternatively, click the refresh icon.
A dot appears under the ‘Status’ column and a log file appears under the file which was imported. The dot under the Status column indicates whether the file has been successfully imported.
Green indicates successful.
Red indicates that some or all the lines in the file have not been imported; the log will show details of the error(s).