Practice activation

Practice Activation
- Once you have requested that CCH OneClick be added to your licence, you will receive an email guiding you through the installation and activation process.
- You will be directed to an activation page where you can activate your practice’s CCH OneClick workspace.
There are three steps that need to be completed to activate the OneClick workspace
Your practice information – validate the client code and set up the sub-domain;
Your admin profile – create an administrator profile to manage the CCH OneClick practice website; -
Payment method – choose the method of payment for the monthly billing.
CCH OneClick activation creates the secure OneClick workspace which your employees and clients will access. The domain name of the website will appear as follows: https://[yourpracticename].accountantspace.co.uk
We recommend practices use the same domain name as their main website for consistency. In keeping with domain name conventions, spaces and special characters are not permitted.
Please note: that the activation must be completed by your designated administrator for CCH OneClick
The email address used must NOT be the same as an email address used in CCH Central by an employee that you wish to activate for CCH OneClick.
If your CCH OneClick administrator will also be a user of CCH OneClick, then 2 different email addresses will be required.
Online Activation
- After installation is complete, your designated CCH OneClick administrator should activate your practice's workspace here or use the CCH OneClick button on the ribbon bar in CCH Central to begin the activation process for your practice.
- The online activation wizard will guide you through the process of activating your practice’s CCH workspace
Client code & password
- Enter your unique client code and six-letter client password, then select Validate credentials
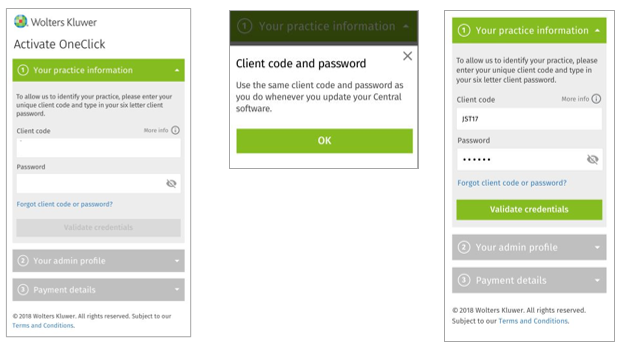
Domain name
- Based on the credentials you have just entered, a CCH OneClick domain name will be suggested for you
- You can change this suggestion if required, subject to availability
- Select Confirm when you are happy with the name
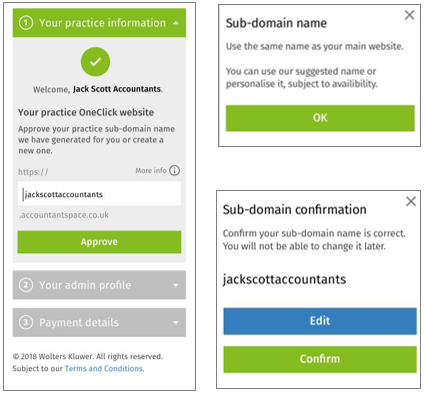
- Read and accept the terms and conditions, then select Continue
Admin user account
- An admin user profile must now be created to manage your practice’s CCH OneClick workspace
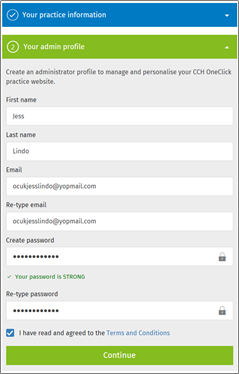
- The email address used to setup the administrator account must NOT be the same as an email address used in CCH Central by an employee that you wish to active for CCH OneClick
- If your OneClick administrator will also be a user of CCH OneClick, 2 different email addresses will be required
- Tick to say that you have read and agreed to the 'terms & conditions' then continue
Enter payment details
- Select if you want to pay by direct debit or credit card and enter the relevant details
- If you require more than 1 signatory to setup a direct debit, please contact us directly on +44 (0)344 561 8181 (option 5 then option 1)
- Select Ok, thanks

Activation complete
- After your payment details have been entered, you will be asked to enter an activation code that you’ll receive by email from Bottomline Technologies PT-X Onboarding <ptxo-no-reply@pt-x.com>

- After the code is entered, your CCH OneClick workspace will be activated!
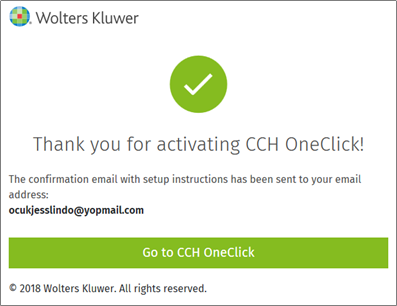
- Select Go to CCH OneClick and when prompted use the login details created for the admin account
Link your CCH Central database to CCH OneClick
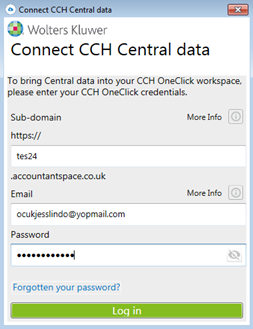
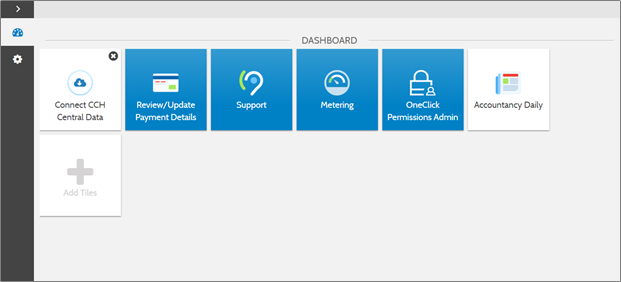
- To link your CCH Central database to CCH OneClick, select the Connect CCH Central data tile on your workspace

- This will launch a download for an executable file that needs to be run against your CCH Central database

- Select the CentralDatabaseInstaller.exe to start the wizard that will guide you through the connection process
1. Enter your CCH OneClick credentials used for the activation process above
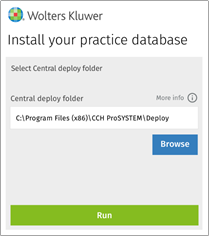
2. Browse to your Central deploy folder and select 'Run'
Customise the CCH OneClick workspace
- Customisation of the workspace will be reflected on the workspace that your client sees and not on your own practice workspace
- To customise the background and logo, return to CCH Central
- File > Maintenance > OneClick > OneClick Customisation
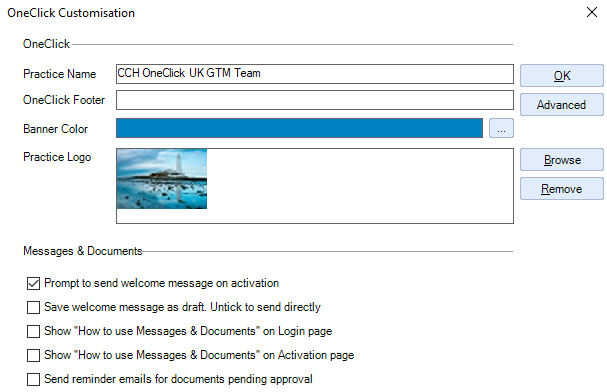
- Within the OneClick customisation screen you can:-
- Enter your practice name
- Enter a OneClick footer, which might be used either for the practice’s promotional strapline or a copyright message.
- Banner Colour enables you to customise the colour on the banner header on the login page and client workspace. You have access to the usual colour palette by clicking the
................................
- If you want to use the custom colour palette, click Define Custom Colours and select your chosen colour, clicking Add to Custom Colours when you have the required colour. For lighter shades use the hue slider.
- Add your practice’s logo – this can be done by selecting browse and locating the image from within your files.

You then have a number of checkboxes that allow you to:-
- Prompt to send a standard welcome message on activation. When this is selected you will be prompted to send an email for both employees and clients once their OneClick workspace has been created. If this is not ticked the email will be sent without further input from someone in the practice before sending.
- Once the above option is selected, you now have the option to select/unselect the option to save the message as a draft. When this is selected, it will save welcome messages as a draft to allow for amending prior to sending. When unselected, emails will send automatically.
- Draft messages can be found in the Messages & Documents section of the CCH OneClick homepage
- Finally, the send reminder emails for documents pending approval option, when selected, will provide you with the option for how often a reminder should be sent and the maximum number of times to send a reminder email.
CCH OneClick tab within CCH Central
- From within the CCH Central homepage, you will notice an icon on the ribbon bar for OneClick

- Selecting this will load your CCH OneClick workspace in your default browser
Email Templates
- You will now want to review/amend the email templates that will be sent to employees and clients. These can be viewed by selecting File > Maintenance > OneClick > Email templates
- The three templates to review are:-
- AAACreateOneClickClient
- AAACreateOneClickEmployee
- AAACreateOneClickUserAndAssociateToClient

- To open a template, double click on your chosen template, this will open the ‘Edit OneClick Email Template’ screen
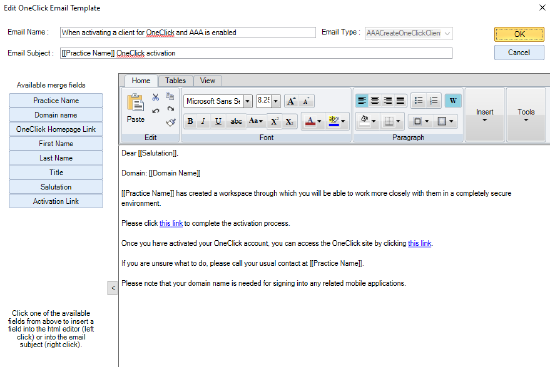
- Amend the template as required
- A logo can be added to the email by selecting Insert, then Picture on the ribbon
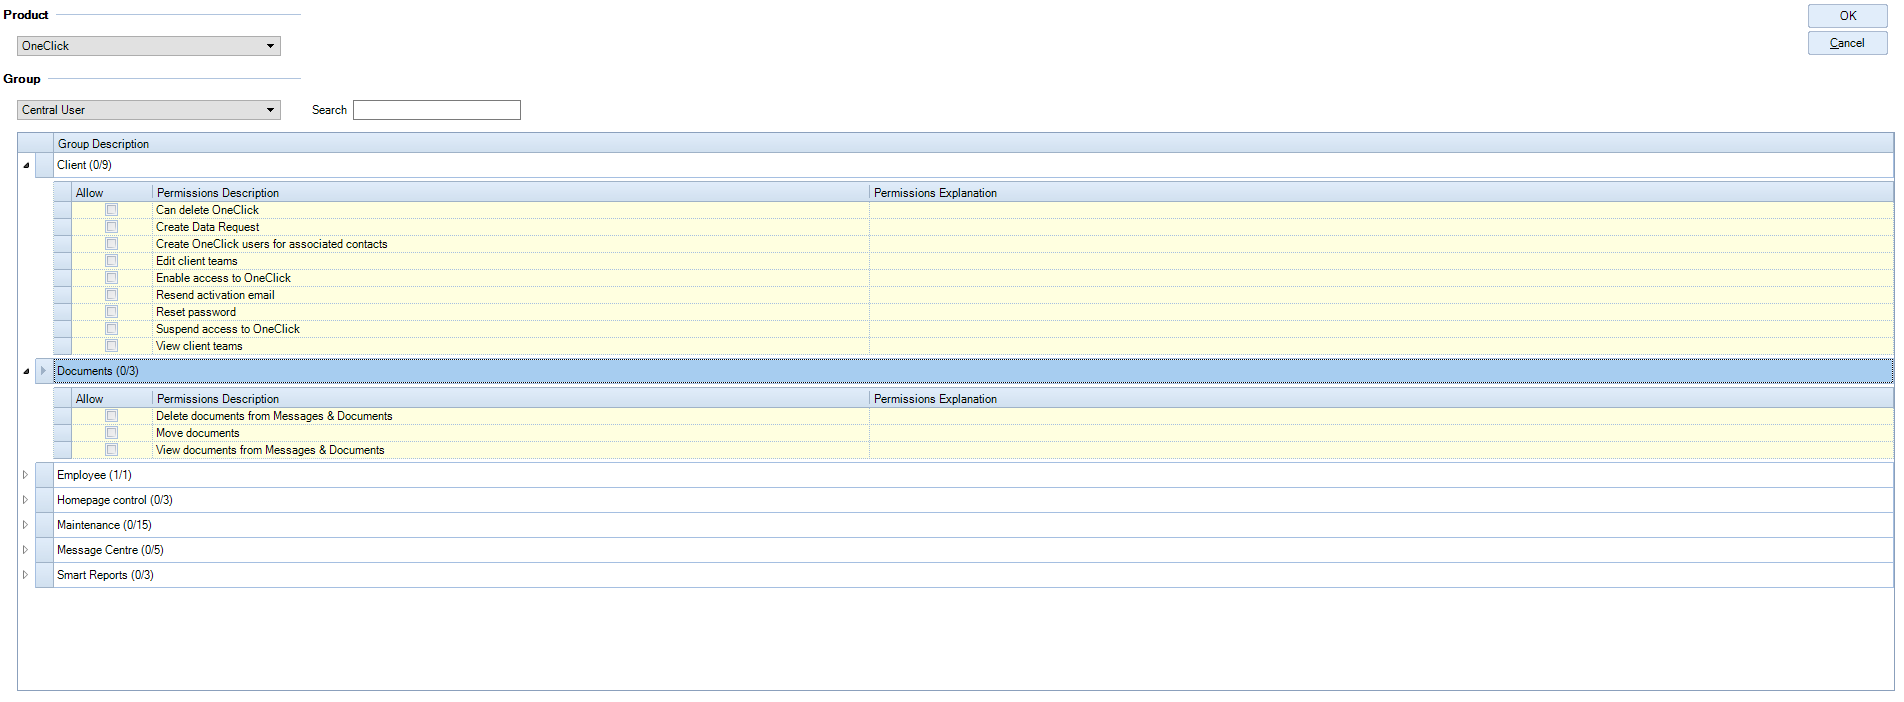
Set employee (Practice user) permissions
- As with all of the CCH suite, there are user permissions to set for your practice CCH OneClick users to meet your internal requirements
- User permissions can be found in Maintenance > Security > Task Permissions
- Select OneClick from the Product drop down then, for each security group you have created within the practice, review and allow permissions as appropriate by ticking the relevant box. Select OK to save changes
Employee Activation
- In CCH Central, select Employees from the taskbar
- You will be presented with the following message:-
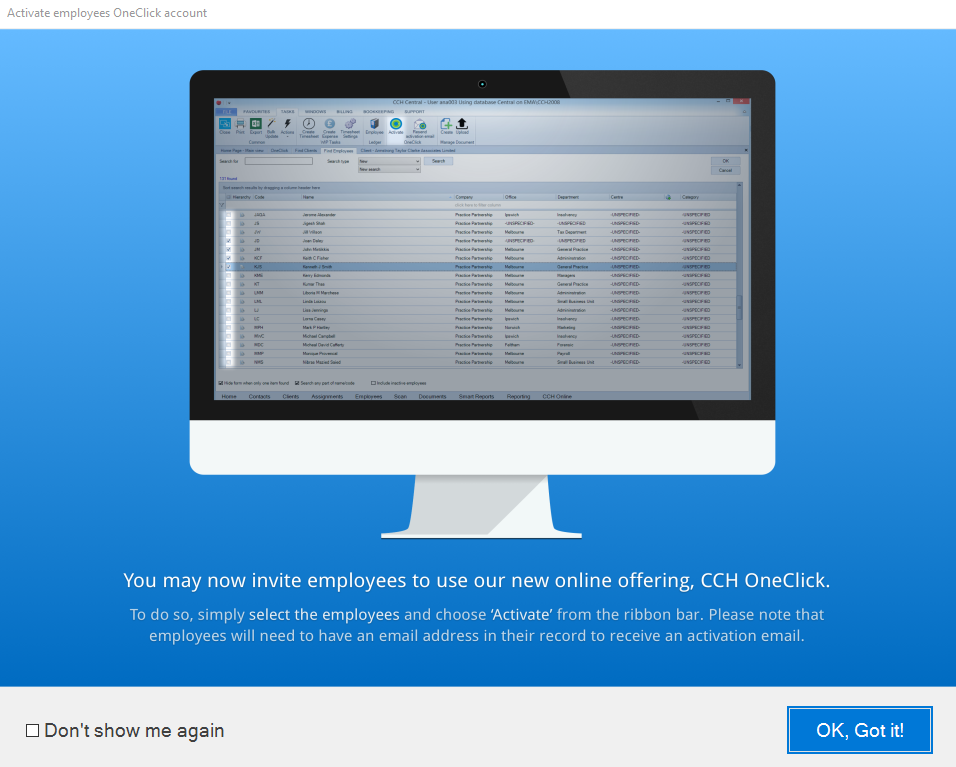
- Select ‘OK, Got it!’ and tick the ‘Don’t show me again’ button if you’re happy with the content of this screen
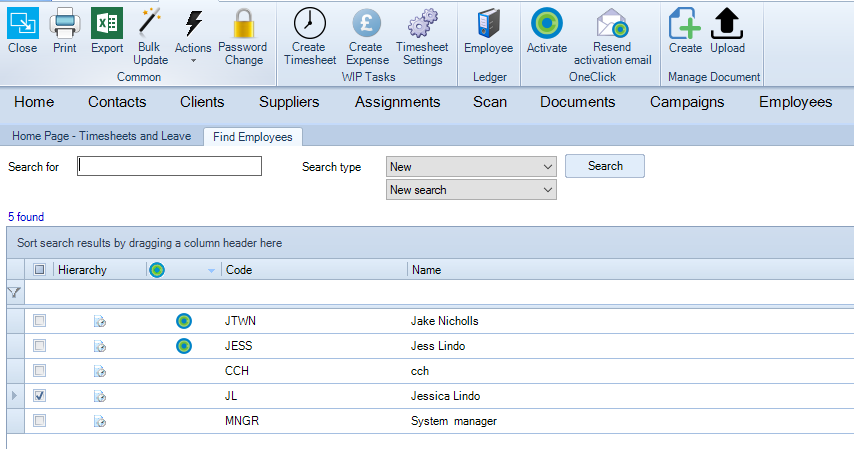
- Select ‘Search’ to bring up the list of employees
- Select the employee(s) you wish to activate the choose Activate on the ribbon bar
Employee activation results
- When the employee activation process is complete, the Employee Activation Results screen is launched, displaying the activation results.
- The Status column displays the status of the employees (e.g. OneClick activated successfully) or the reason why the employees have not been activated (e.g. No email address).

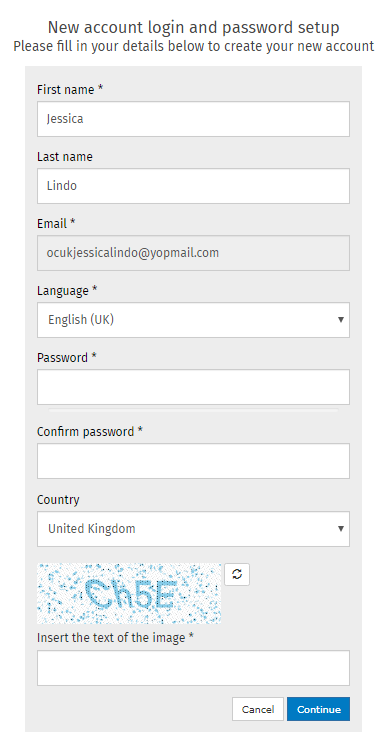
- If the activation was successful, the employee will receive an email asking them to click the link to complete the activation process
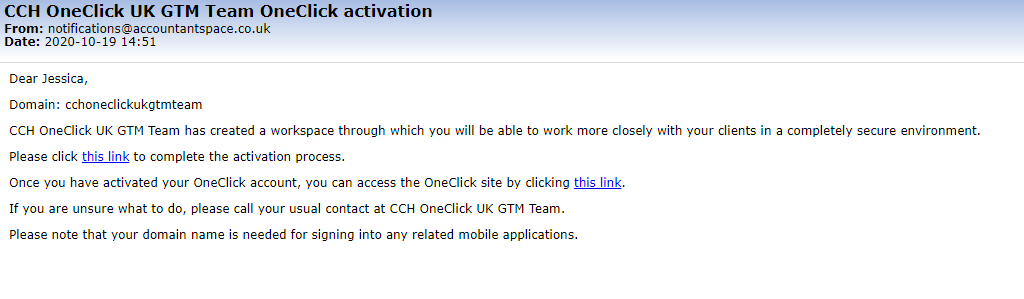
They will need to set up a password, then configure Multi-Factor Authentication (MFA)
 |
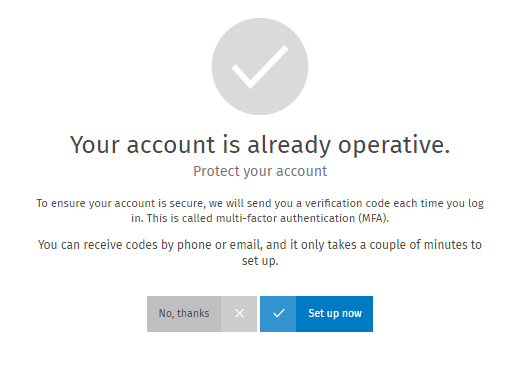 |
Videos to explain the MFA process and set up can be found here
Once the setup of MFA is complete, the employee can log in and begin to use their CCH OneClick workspace

Resending activation email
- In the event that the employees fail to activate their CCH OneClick account, you can resend the activation email.
- In the Find Employees window, select the employees you wish to resend the activation email to then select Resend activation email from the ribbon bar
CCH OneClick Permissions Admin
CCH OneClick users can be assigned to a set of pre-defined roles. The roles allow you to control which area of the CCH OneClick suite your users have access to.
All users will, by default, be added to the basic roles for all products. This list is currently limited but will grow with future CCH OneClick releases.
You can manage the roles for your practice's CCH OneClick users through the OneClick Permissions Admin tile within the admin workspace.
Note: to access OneClick Permissions Admin, you must log in to your CCH OneClick Admin account. This should have been setup when you set up CCH OneClick. (If you didn't set up an admin account, please navigate to https://oneclick.accountantspace.co.uk/activation and follow the instructions to do so)
- Within this area, you will see a list of pre-defined roles into which you can assign your CCH OneClick users
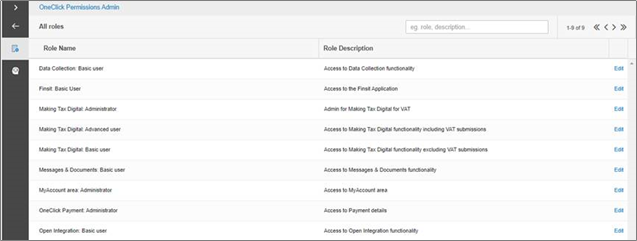
- A role defines a set of permissions, so when a user is assigned to a role, they will be given the permissions defined within that role. The details of a role can be seen under the description field
Note: the permissions within these roles are pre-set and cannot be edited
- The current list of roles and description is shown below with a brief explanation of the user experience:-
|
Role Name |
Description |
Experience |
|
Data Collection: Basic user |
Access to Data Collection functionality |
User will see the Digital Data Request tile in CCH OneClick |
|
Finsit: Basic User |
Access to finsit |
User will see the finsit tile in CCH OneClick and will be able to launch finsit from Open Integration |
|
Making Tax Digital: Basic user |
Access to Making Tax Digital functionality excluding VAT submissions |
User will see the MTD tile in CCH OneClick, but will not see the Submit VAT button within MTD |
|
Making Tax Digital: Advanced user |
Access to Making Tax Digital functionality including VAT submissions |
Same as the basic user, but the user will see the Submit VAT button within MTD |
|
Messages & Documents: Basic user |
Access to Messages & Documents functionality |
User will see the Messages and Documents tile in CCH OneClick |
|
Open Integration: Basic user |
Access to Open Integration functionality |
User will see the Open Integration tile in CCH OneClick |
|
OneClick Payment: Administrator |
Access to Payment details |
User will see the Practice Payment information tile in CCH OneClick. This should be used for employees who are also Practice Administrators |
- If a user is removed from a basic role, they will no longer have the permissions set by that role. They will also lose the ability to view that specific tile within their CCH OneClick workspace.
- e.g. If a user is removed from the Messages & Documents: Basic user role, they won't have permissions to use Messages & Documents and they will no longer see the Messages & Documents tile.
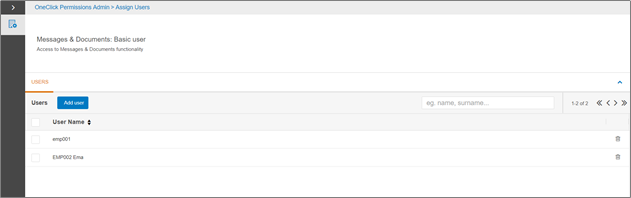
- To see which users belong to a particular role, either click the role name or select Edit

- A list of all users currently assigned to that role will be shown

- To add a user to the role, select the Add User button
- Select the box next to the user/s you want to add to the role and click the Add selected users button

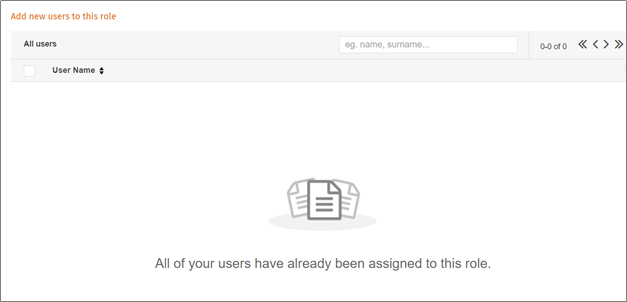
- If there are no users available to add, then the following message will appear
- To remove a user from a role, tick the box next to the user/s and select Remove users
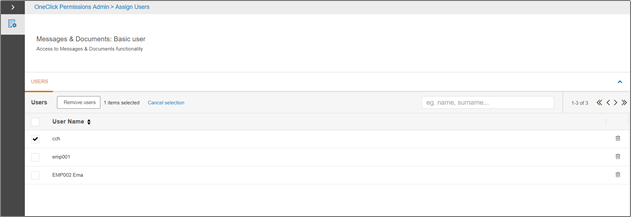
- Users will be subject to their new roles the next time they log in to CCH OneClick