Activating individual clients

CCH OneClick individual activation
Checks before CCH OneClick individual activation
Before you activate an individual client for CCH OneClick, you need to check the following areas:
- Client email addresses
- Client team responsibility
Client email addresses
The contact or client email address must be unique and cannot be shared with another person in the CCH database.
View the client email address in the following 2 screens in Central:
The Main tab:

And the Addresses tab:

If the client does not have an email address, or the email needs amending, use the Addresses tab shown in the screen above.
Client team responsibility
Within the client record, there is a Responsibility tab which is used to record the various practice employees who will communicate with an activated CCH OneClick client. This client team will be reflected in the client workspace as long as these employees are themselves CCH OneClick activated.

Adam Barton and Andrew Cooke will be part of the Client Team once Paul Cookie (the client) has completed the CCH OneClick activation process. Paul Cookie will see their assigned team (i.e. the two employee names listed in the above Responsibility tab, plus the Partner) in their client workspace.
CCH OneClick individual activation
Once the above checks have been completed, the individual client is ready to be activated.
You can activate a single client from the open client record, or activate several clients simultaneously from the client search screen.
Activate a single client
If you are still on the Responsibility sub tab for a single client, you need to click the icon Activate OneClick on the ribbon bar.

If the 'Activate OneClick' icon is not displayed, click the TASKS menu to view it.

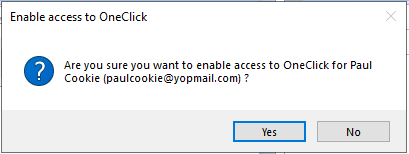
The following message will be displayed. Confirm that the email address is correct, then click Yes.
The following screen will allow you to choose the OneClick features you wish to add to the client:

By default, OneClick Workspace (including messages & documents) is pre-selected.
Click OK if you only want this feature activated.
A progress bar will run for a short time:

Then the following message is displayed:

To show the client a welcome message inside their portal once they activate their account and log in, click Yes. This is the recommended option for most clients.
If you have recently activated this individual for CCH OneClick as a contact for another client, you could consider clicking No to not send the welcome message.
Once the client has been activated from your side, you can see this information in the client file header:

Activate several clients simultaneously
To activate several clients simultaneously, use the Find Clients tab.
Search for the clients you wish to activate simultaneously.
In this example, it will activate simultaneously 3 individual clients (CLIENT1, CLIENT2 and CLIENT3).

Tick the box to select the 3 clients and click Activate on the ribbon bar  .
.

The option OneClick Workspace (including messages & documents) is pre-selected.
Click OK to activate this feature for the 3 clients.
The following message is displayed:
To show the client a welcome message inside their portal once they activate their account and log in, click Yes. This is the recommended option for most clients.
If you have recently activated this individual for CCH OneClick as a contact for another client, you could consider clicking No to not send the welcome message.
You will get a progress bar as each client is activated:

Once all the clients are processed, an activation results screen is displayed:

The grid is a recap of the clients activated with this action. 2 columns are very important: the OneClick status and the OneClick features.
Click on OK on the top right corner to close this tab.
If you refresh your search (by clicking on Search button again), you will get the following screen:

There will be a grey target icon for each new client activated with OneClick from your side. It means the OneClick activation is currently pending.
The target icon will turn into green when the end client has activated OneClick from their side.
Optional features of CCH OneClick
If you open any activated OneClick clients, you will get this screen:

On the top right you see the OneClick status for the client.
From there, you can check the features available for your client by clicking on the Oneclick features hyperlink.
The following screen will be displayed:

Options on the top left corner:
- Contact status: will remain 'Pending' until the end user has activated and logged into CCH OneClick
- 'Resend activation email' hyperlink: allow you to send the activation email for the current client a further time.
To learn more about these optional digital features available to your client, click here.