Check In Documents

After you have finished working on a document you must check it in so that others can work on the document. If you want to know how to add a document, which automatically checks it in at the same time see: Add Document for Client or Contact.
Check In Documents
When a document is checked out, this symbol will appear in the Checked out column in the main screen 
- Either in a Client or Contact record or in the Global Document area, locate the document that you want to check in.
- Do one of the following to check in the document:
- Right-click the document and select Check In.
- Click Check In under Version Control on the Task Bar.
- Click on the red cross in the top right corner of the document.
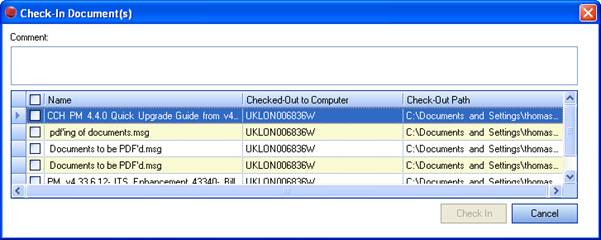
- In Comment box you can add details relating to the changes made to the document.
- To check in one or more documents, click the check box next to the document name and then click Check In.
A new version of the document is created.
Note: You can also check in documents from within MS Word and MS Excel.
