Using Tabs

When you open a toolbar item, the tab displayed on the content area is shown in white as below i.e. Home Page. The other pages that are not displayed on the content area are shown with a blue background (as per below Find Clients, Find Suppliers, find Assignments, Find Employees).

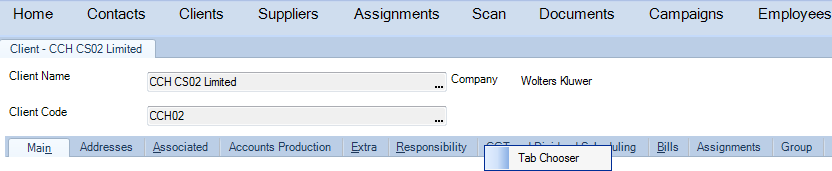
When you open a contact, client, assignment, supplier or employee record the tab will be shown in white, the information for the record selected is also presented in tabs as below: under the selected Client - CCH CS02 Limited there are several tabs underneath: Home, Main, Addresses, Associated, etc.

Right-click options available from the tab bar
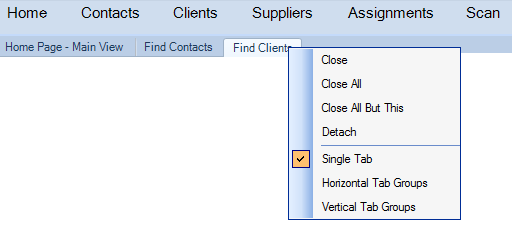
The following options are available on the tab right-click menu:
- Close: To close a tab, right -click the tab you want to close. On the pop-up menu, select Close.
- Close All: To close all open tabs, right-click any of the main tabs and choose Close All.
- Detach: To detach a tab, right-click the tab and then click Detach on the pop-up menu. The tab will display as a floating window that can be resized and moved anywhere on the screen.
- Single: To display a single tab page select Single from the right-click pop-up menu. This is the default setting.
- Horizontal Tab Groups: To split the screen in two horizontally, select this option from the right-click pop-up menu. You can move a tab to a new area by clicking the tab header and dragging it.
- Vertical Tab Groups: To split the screen vertically, select this option from the right-click pop-up menu. You can move a tab to a new area by clicking the tab header and dragging it.
Choose which tabs to display
- On an open contact, client, supplier, employee or assignment record, right-click a tab.
- From the right-click menu, click Tab Chooser. The Tab Chooser window opens listing all the available tabs for the record.
- Select or clear the check box for each tab to display or hide the tab from the record. Tabs with clear check boxes will not appear.

Order the tab display
-
On an open contact, client, supplier, employee or assignment record, right-click a tab.
-
From the right-click menu, click Tab Chooser. The Tab Chooser window opens, listing all the available tabs for the record. .
-
To move a tab up or down the order, select the tab so that it is highlighted and then use the Up and Down arrows
 on the right side of the window to move the selected tab through the list.
Select the display style
-
On an open contact, client, supplier, employee or assignment record, right-click a tab and then click Tab Chooser on the right-click menu.
-
On the Tab Chooser window select one of the two following Style options:
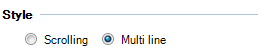
- Scrolling: To display the tabs in a single line along with arrows to allow you to scroll to see additional tabs.
- Multi-line: To display all the available tabs for the contact even if they need to be displayed in multiple lines.
Note!
You need to have the appropriate permission to access the Tab Chooser.
The access to the Tab Chooser is controlled by a task permission in Maintenance > Security > Task Permissions.
On the Task Permission window, select Central from the Product drop down list, Select the Security Group from the Group drop down list. The permission is located in the Other session and is called: [System] [Allow Tab Chooser]