Key Business Processes

The recording of the client’s accounting systems is also formalised in a way that allows you to record as little or as much detail as you wish of the client’s business processes. The minimum you need to record is a brief description, however, Audit Automation also provides a means of recording the process flows for each component within a process. You can also identify key controls and record any risks identified. Finally, if you have external documentation in which this information is recorded, such as a flowchart in Excel, you can attach this.

The designer of the master pack will specify the key business processes areas that are to appear in the main index. It is also possible for you to add further areas that are relevant to the client from a list of processes recorded. On selecting a key business process from the index, you are presented with the following dialog: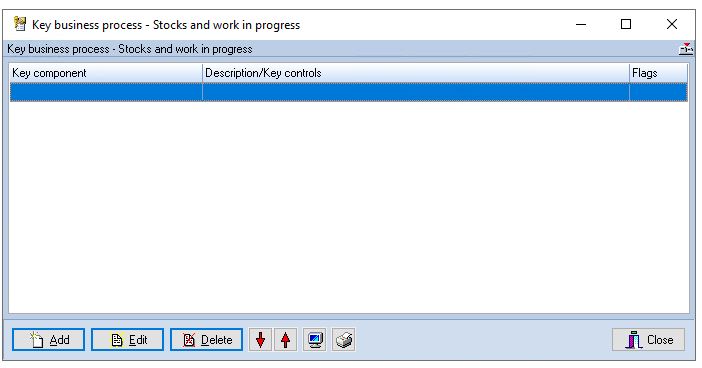
From this you can add, edit or delete a key component to the process. You can also change the order of the items listed.
Up to three icons may be shown in the flags column:
 Indicating that the item has an identified audit risk associated with it.
 Indicating that the item has a process flow recorded in respect of the component.
 Indicating that you have associated an external document with the component.
Printing or viewing the business processes
The print  and preview report
  buttons allow you to print or view the Key Business Process report. The preview button displays the report and allows you to save it as a PDF file, either as a permanent record, or to attach to an e-mail.
Adding a key component
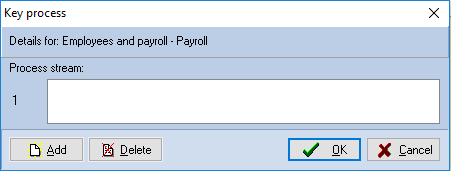
To add a new key component to the process, click on [Add] and the following dialog will appear:
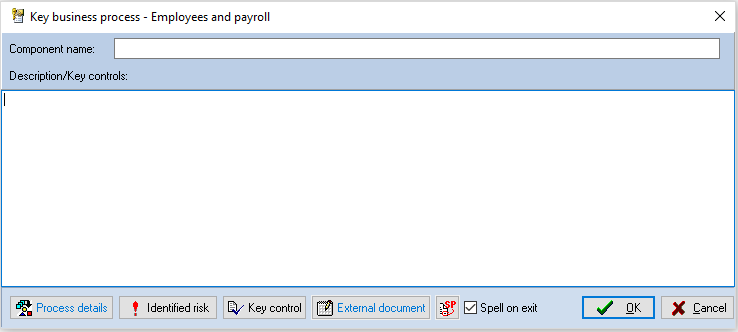
Enter the name of the component, e.g. Accounting procedures. You may only wish to record brief details in respect of the item and you can do this in Description/Key controls. However, if you wish to record more detailed information, you can either do this via the internal Process details facility, or by attaching a document that has been prepared externally from the Audit Automation software.
You can also use the [Key control] button to define a key control for this process, if required. Key controls are covered in detail in the next section.
Process details
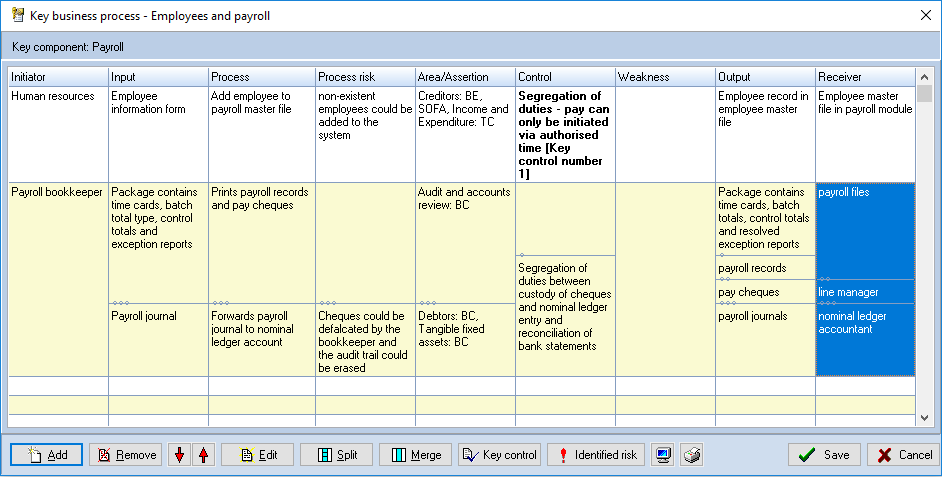
To use the internal facilities to record details of the process flow, select the [Process details] button and a blank process flow record will be displayed:

You may add any number of “process flows” in this dialog and the following is recorded in respect of each:
• Initiator
• Input
• Process
• Process risk
• Area/Assertion
• Control
• Weakness
• Output
• Receiver
It is also possible that, say, a single Initiator may produce more than one input, and further subdivisions of the flow may occur as you move across the columns. It is therefore possible to subdivide flows into a maximum of 10 sub flows.
The following screen shot demonstrates this sub division:
Adding/removing process lines
You can add and remove process lines. Clicking on [Add] will add a blank process line to the end of the list and clicking on [Delete] will remove the whole of the process line containing the cell that has focus.
Creating sub flows
Each process cell can be split into up to 10 sub flows. Each of the split positions is identified by a number of dots representing its position in the split list. When a split is created, it is shown in the first available split position, however, it can be moved down and up one position by dragging it in the appropriate direction. Hence, it is possible to line the splits up to achieve subdivisions of any of the process flows and sub flows.
You can remove a single split by dragging it away from the cell. To remove all splits from a cell, use the [Merge] button.
Repositioning a process flow
To reposition a flow, select any cell in the line to be moved and click on the up and down buttons.
Enter/edit text in a cell
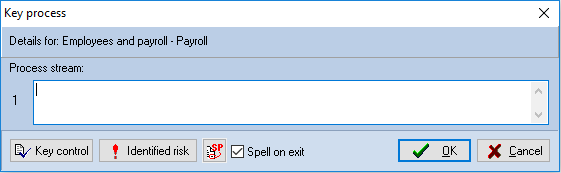
To enter or edit text, double click on a cell, or select it and click on [Edit], or press <Enter>. An edit dialog will be displayed relevant to the highlighted cell. The dialog will contain one or more process streams to match the subdivisions of the cell being edited.
The following show examples of the dialogs that are displayed for each of the columns.
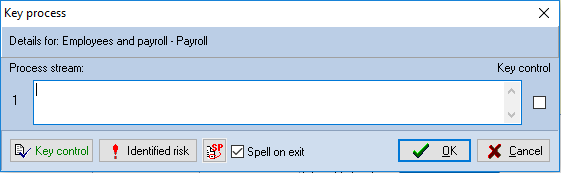
Text edit dialog
This is displayed when you enter or edit text for the following columns:
• Initiator
• Input
• Process
• Process risk
• Weakness
• Output
• Receiver
The [Key control] button allows you to enter a key control for the process flow. For further information on key controls, see click here.
The [Identified Risk] button allows you to enter a risk when entering text in the process risk cells and use copy and paste to clone data from the entry.
Enter the text for each stream and click [OK].
Area/assertion edit dialog
Displayed when you edit a cell in the Area/assertion column:
You cannot type in the stream box in this dialog, you add and delete areas and assertions using the buttons provided.
To add an item, click on [Add]. The system will open the Area and assertion dialog for you to select the combination to add.
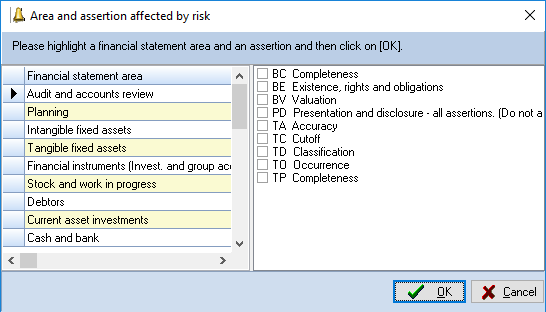
Choose the area by highlighting the relevant section on the left, then click the checkboxes to select or deselect the relevant assertions. One area can be added at a time with any selection of assertions.
Control edit dialog
Displayed when you edit a cell in the Control column:
Enter the text for the control. If the control is a key control on which you are going to place reliance, place a tick in the checkbox to the right of the control. Note that in the main Process flow window, these key controls are shown in bold.
Note that this is independent of the database of Key Controls that can be maintained, as it is for systems record purposes. However, if you use tick the Key control checkbox here, the system will assume that you would also like to record the details of the control in the database and displays the Key control dialog for completion.
It automatically inserts the text you have entered in the Process stream box as the text of the control, and you may then expand on this if appropriate. When you save the control details, the system automatically appends the number of the control created to the process control record description. This serves two purposes, it provides a visual indication that the control has also been entered in the database and prevents the control being reinserted should you remove the Key control tick and then reinsert it.
No other link is made between the two records, so you will need to maintain the details in both places should the control change.
The [Identified Risk] button allows you to enter a risk when entering text in the process risk cells and use copy and paste to clone data from the entry.
The [Key control] button lists the key controls that have been defined for this source and allows you to maintain these, if required. For further information on key controls, see click here.
Saving the process definition
After you have finished entering details of the process flows, click on [OK] to save your changes. The dialog will close and the system will add any key controls that you have identified to the text of the “Key controls” memo in the Key business process dialog, or update any that were already present.
Note that the text of the [Process details] button appear blue if there are no associated processes record. If you have used this facility to record the details, the text is shown in Black.
If you identify any audit risks while reviewing or entering a process, you can record these using the [Identified risk] button.
External document
As an alternative to using the internal facilities to record the process flow, you may have used another program to record the details, e.g. created a flowchart in Excel or a dedicated flow charting program. Audit Automation allows you to import any document that you have created, provided that the document is capable of being opened by double clicking on it in Windows Explorer.
Importing a document
To import a document, click on the [External document] button in the Key business process dialog. A pop up menu will appear showing the following options:
• Open document
• Import document
• Delete document
Select Import document and the Windows Open dialog will appear to allow you to find and select the file you wish to associate with the component. Select the file and click [Open]. The text on the [External document] button will turn from blue to black and the system will copy the document to the client’s data storage within Audit Automation. Note that the file is copied and it is not a link being created to the original document. This means that if you edit the file from within Audit Automation, you are not editing the original document and that the document will be archived and moved with the rest of the Audit Automation data. It also means that you will have a unique copy of the document stored with each year’s audit file.
Opening a document
To open a document, select [External document] and then Open document from the pop up menu. Audit Automation will launch the program that was originally used to create the document and display it for review/edit.
Removing a document
If you have imported a document in error, or wish to change the associated document, select [External document] and then delete document from the pop up menu. Audit Automation will prompt you to confirm that you really do wish to delete the file and, if you confirm, remove the file and the link. Note that you are only deleting the file from the Audit Automation records for the current year, the original file and any past years’ copies of the file will not be affected.
Printing the process details
Selecting the [Print] button from the Key business process dialog will result in a printed report containing the details of the process displayed.
Accessing the list of all records
It is also possible to access the list of all recorded processes from the menu by selecting Reference [Business processes]. The following dialog will appear:
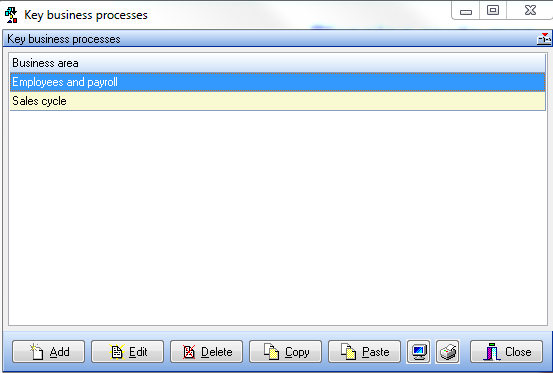
This will contain a list of all processes that have been defined. From this you can enter the edit routines described above, by selecting a business area and clicking on [Edit], or double clicking on the business area.
You can also add new areas even if they are not defined in the Main Index, by clicking on [Add].
Clicking on the [Print] button from this dialog will result in a printed report containing all recorded processes.
Adding a new process
You can also add new areas even if they are not defined in the Main Index, by clicking on [Add]. The following dialog will be displayed:
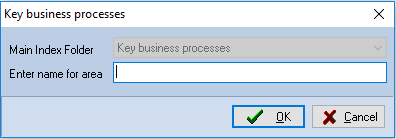
Enter a name for the area you wish to create and you may then proceed as described above to define the processes and record the process flows.
Note that each business area name must be unique, hence if you enter the name of an existing area it will simply be loaded for editing.
Copying business processes
You can copy a business process from one client to another. This is achieved using the [Copy] and [Paste] buttons in the Key Business Process dialog.
To copy processes, load to the pack to copy from, select the process record to copy and click [Copy]. Then load the pack to copy to load the dialog and click on [Paste]. If you wish to copy a number of records, you may have 2 instances of Audit Automation running and copy and paste each in sequence. If you wish to copy all of the background information from one pack to another, this can be done using the import planning option.