Background Information

The system provides a structured environment within which you can store the background information you hold in respect of a client. The records provide a simple format for you to store the background area and key facts relating thereto. For designated background areas included by the designer of the master pack, templates are also provided to allow more detailed information to be recorded. It is also possible to add other areas applicable to the client and, where risks are identified during the collection and updating of this information, to record identified audit risks and link them to the background area.
As indicated, a master pack may specify background information areas to appear in the main index and a template may be associated with it to guide you through the type of information that it is anticipated that you will record for the area. For example, the following shows the areas included in our master packs:
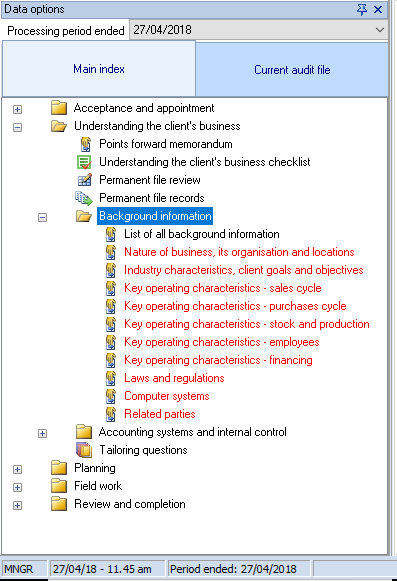
The first item in the index, ‘List of all background information’, is a link to the Audit Automation menu routine Planning | Reference data | Background information, described below. The remaining items are categories of background information that operate as described next.
Selecting a background information category
When you select a background category within an audit pack index, you are presented with the following dialog:
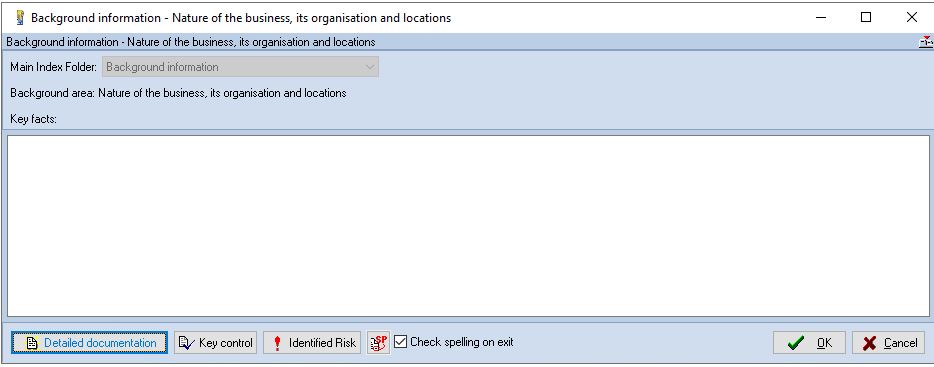
You can enter the key facts in the memo box and/or access the detailed document to record more detailed information. You can also enter any audit risks identified in respect of the area. If a full document has been created, the button text is shown in black, otherwise it is shown in blue.
When you click on the [Detailed documentation] button, the system will either load the existing document for edit, or if this is the first time that the option has been selected for the area, load the template that the master pack designer has associated with it. The document may be created/edited using the internal word processor, Word or Excel. The pack designer determines the type of document to be used. If they have defined a word document, they can either force it to be a Word document, or provide both internal word processor and Word templates so that your firm’s preferred word processor will be used.
The [Key control] button allows you to add and maintain key controls relating to this background information, if required. See the Key Controls section on click here.
Accessing the list of all records
It is also possible to access the list of all recorded background information from the menu by selecting Reference [Background information]. The following dialog will appear:
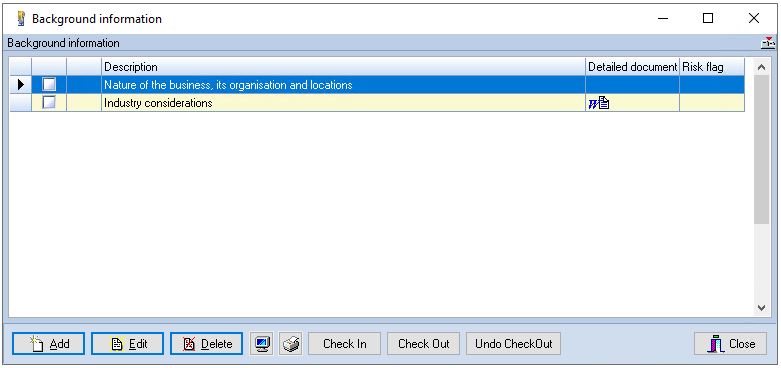
This will contain a list of all background information that has been entered. From this you can enter the edit routines described above by selecting an area and clicking on [Edit], or double clicking on the name of the area. You can also add new areas that are not defined in the Main Index, by clicking on [Add]. The system will display the Background information dialog shown above, but the background area name will be an edit box to allow you to enter a unique name for the new area. For new areas, you can select the [Detailed documentation] button and you will be presented with a blank word processing document for completion. Adding a new background information area will result in the main index being updated to include the new area.
If you have attached an external document to a background information item, in addition to the name of the item in the main index no longer appearing in red, the icon will change to the type of document that has been attached, Word or the internal word processor. Double clicking on such items will take you directly to the document itself. You can still access the Background Information dialog by opening the background information list and opening the item therefrom.
In the list of background information, the column called Detailed Document will show if a document has been added to the area. Double clicking within this column will result in the document being shown. Double clicking anywhere else on the line will result in the Business Information dialog being displayed.
Note that in the above dialog, there is a column headed Risk flag. If you have recorded any identified risks in respect of an area, the system will display a red exclamation mark in this column.
Printing or viewing the background information
The print  and preview report
  buttons allow you to print or view the Background Information report. The preview button displays the report and allows you to save it as a PDF file, either as a permanent record, or to attach to an e-mail.