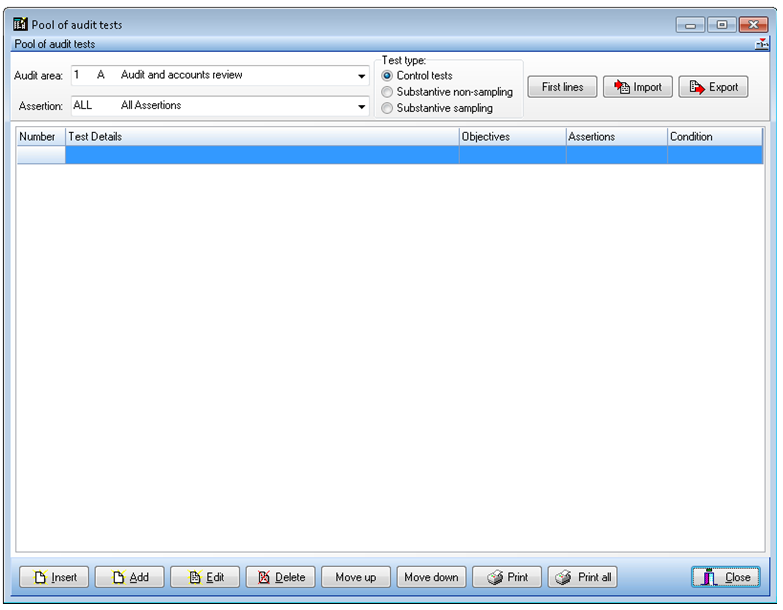
Pool of Audit Tests

A user can select the tests to be included in an audit programme from the Pool of Audit Tests. This facilitates a “blank sheet of paper” approach to designing audit programmes.
The Pool of Audit Tests is used in conjunction with the concept of mandatory procedures that are designed and triggered by audit area activation and conditions in each test.
Adding a Pool of Audit Tests
To define a pool of tests, load the pack for editing and select the Pool of audit tests option within the Risk model folder in the Master options list. The Pool of audit tests dialog will appear.
Pool of audit tests dialog
Select the Audit area for the tests. Tests are also associated with assertions so, once the audit area is selected, the list of assertions that relate to the audit area will be populated. You can then select the assertion from the drop-down list, if required.
Finally, tests are classified into test type:
- Control tests
- Substantive non-sampling
- Substantive sampling
Select the radio button for the appropriate test type.
If any tests have already been defined for the combination, they will be listed. You are now free to add, remove or edit tests as required.
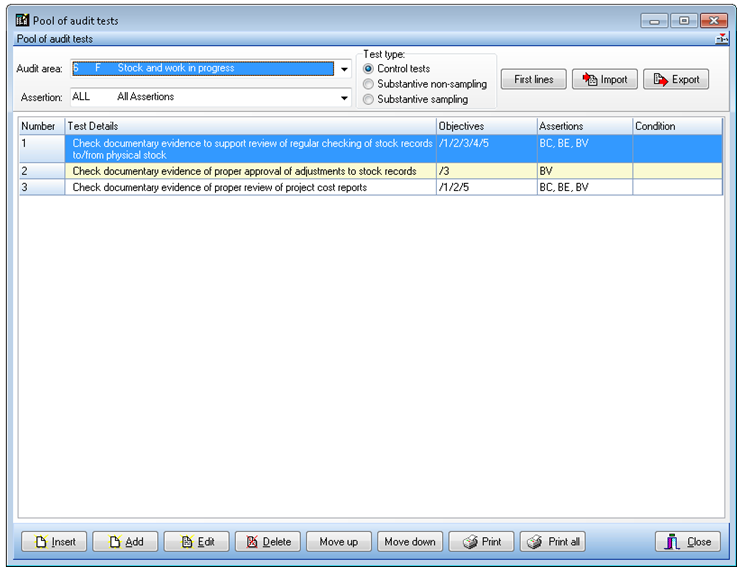
Pool of audit tests for audit area listing assertions
Adding or inserting a new Test
Note: it is only possible to add or insert a new test when ALL of the Assertions are displayed.
There are two ways to add a new test to the test pool for an audit area:
- Add a new test at the end of the existing tests
- Insert a new test at a selected place in the list of existing tests.
To add a new test to the end of the existing list of tests, click [Add] to display the Test pool for xxx dialog. Alternatively, to insert a new test at a selected place in the existing list, click on the test above which the new test should be included, and click [Insert] to display the same Test pool for xxx dialog.
Note: if you insert the test in the wrong location in the list you can use the [Move Up] and [Move Down] buttons to re-sequence the tests.
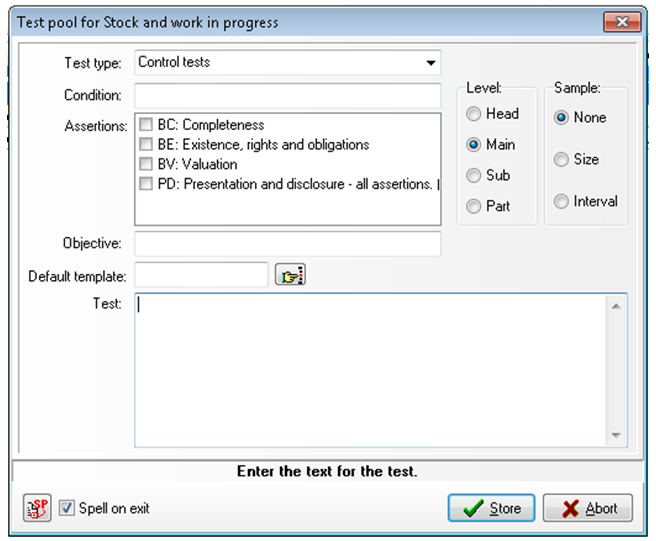
Test pool dialog
The Audit Area chosen appears in the dialog title and the Test Type chosen is displayed on the dialog.
The fields in this dialog are as follows:
- Condition – You can enter a condition on a test. This is used to indicate to the user that the test may be appropriate to the client and is available for selection. When you click in this area the Conditions to test dialog appears to allow you to define the test (see page 87 for information on entering conditions).
- Level - This determines the level of the test entered, Main tests are numbered 1, 2, 3 etc, sub tests fall within a main test and are lettered a, b, c, etc. and parts fall within sub tests and are numbered 1, 2 ,3 .etc.. It does not matter what order you enter tests as they can be repositioned, however, it will be quicker to enter the tests in logical order. Select the level of the test being entered. The first one will normally be a main test. You may also enter headings to subdivide the pool and give guidance to users.
- Sample - If this is a control test or substantive sample, where appropriate select the sample type, size or interval. Size will either be populated with the control sample size or a substantive sample.
- Assertions - Tick all the assertions for which this test applies.
- Objective - Enter the objective that the test satisfies in the format “/1/2/3”.
- Test (and Test Guidance) - In the Test area, enter the text of the test.
To enter guidance text to assist the user, after you have entered all of the text for the test itself, enter a line that only contains the text of [Guidance]. Then, starting on the next line, enter the guidance text.
When the test or question is displayed in completion, the system only displays the text up to the [Guidance] line in programmes and checklists. For any tests and questions that contain guidance, a red question mark appears at the bottom right of the cell showing the text of the test or question. Clicking on the question mark displays the guidance notes in the standard Guidance dialog.
When you have entered all of the pool test details required, click on [Store] to add the test and clear the contents of the dialog to allow you to enter another new test. You are now free to enter the details of another test, changing any setting required. For example, you may now wish to enter a sub test to a main test so change the level setting. These standard settings will remain for subsequent new tests until you change them back, or close the dialog.
When you have finished adding tests, click on [Abort] to close the dialog. The Pool of audit tests list reappears and the new tests are included.
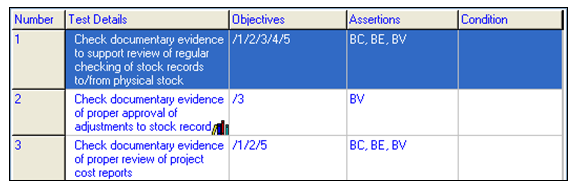
If you added guidance for a test, this is indicated on the Pool of audit tests list by the Guidance icon that appears in the bottom right of the Test Details field.
Editing a pool test
To edit a pool test, either double click on the test line, or select it and click on [Edit]. The Test pool for xxx form displays the pool test details. Edit this information as required and click on [Store] to save your changes. Clicking on [Abort] will clear the form without recording any changes that you may have made.
Deleting a pool test
To delete a pool test, click on the test then click on [Delete]. The system will request that you confirm your actions before deleting the entry.
Re-sequencing the tests
To move a test up or down one position in the Test pool list, click on the test then click either the [Move up] and [Move down] button. The tests are renumbered and re-lettered as the test moves.
Note: These buttons are only available if All of the assertions are displayed.
Shrinking (or expanding) the test description
By default, the Pool of audit tests dialog displays all of the test text which will often use several lines in the dialog. If there are a large number of tests this can be reduced to a single line by clicking the [First lines]. This button is toggle, so click the button again to display the full text of the test.
Printing the Pool Tests
Two print options are provided. Click [Print] to print the tests currently displayed on the dialog.
Alternatively, click [Print all] to print a full list of all tests that have been defined with the appropriate headings for areas, assertions and test type.
Exporting Pool Tests
To export the tests currently displayed in a format that can be imported to another pack or a new area, click [Export]. The pool test details are written to an export file as plain text in a format that can be imported using the Import option explained below.
On selecting this option the standard Windows Save As dialog appears will be displayed to allow you to select the destination directory and name of the file to create.
Importing Pool Tests
If you already have your pool tests stored in electronic format, the Import option allows you to bring them into Audit Automation. The import file is made up of a series of commands contained in braces {…} and plain text. To import a file, click on the [Import] button and select the file from the standard Windows Open dialog.
The import file for pool tests takes the following format. Note that lines starting with “//” are comments for information only.
{Area 4}
{Assertion C}
{Type 1}
// Above are optional. If not included tests are import to displayed
// area.
// If they are included, they can be included any number of times
// throughout file so that you can import multiple sections in one go.
{Size}
{Test /1/2/3/4/5|C, E, M}
Compare changes in production output to additions/disposals of plant and machinery.
{Test /1/2/3|C, E, M}
Review ratio of maintenance and repairs to cost of fixed assets.
{if #01/01}
{Sub |C, E, M }
Check casts and cross-casts;
{Sub |C, E, M }
Check the opening balances agree to the previous period’s accounts;
{Part |C}
Agree the totals to the trial balance and accounts;
{Part |E}
Check to records maintained by the company.
{Interval}
{Test |C, E, M}
Select a sample from the list of assets (including brought forward asset)
{Sub /2|E}
using a sampling interval, based on net book value, and test for:
{Sub /2|E }
Physical existence;
After entering and editing tests, they are displayed as follows:

Pool of audit tests dialog