Using an Image in the Header or Footer

Using an Image in a Header or Footer
It is possible to define an image to print in the header or footer of each A4 page. This is done via the Theme box in the maintenance area for CCH Accounts Production.
A bespoke Theme must have already been created - see Link to Themes: Job Themes and Themes
To access navigate to File > Maintenance > Accounts > Themes
Adding an image into a header or footer
With the *Bespoke (Practice) Theme selected, *note the Description will be that given by yourselves, this example is using the description Bespoke Theme.

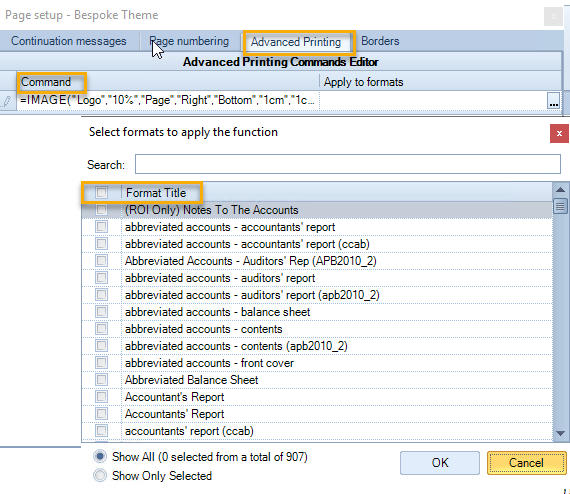
- Click on Page Setup on the ribbon
- In the Page set-up box, select the Advanced Printing tab
- Enter the Image Command into the Command input row, e.g. =IMAGE("Logo","10%","Page","Right","Bottom","1cm","1cm"). Ensure the location is set to Page and not Cell.
- Select the formats by clicking on the ellipsis button in the input row under the Apply to formats column.
- In the Select formats to apply the function box, select those which are to have the image applied to them. There is a search facility above the list, or use the scroll bar to the right. Tick the box beside each row, alterantively if applying to all, tick the box on the top row beside Format Title.
- once completed Close the box.
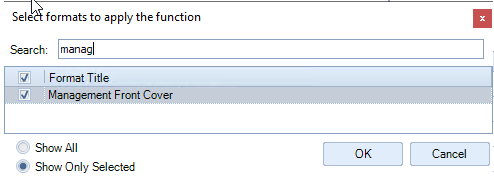
Adding multiple images into a header or footer
Multiple Image commands may be added, for example, to add a Practice logo to appear in the bottom right of the footer and also the Client's logo to appear in the bottom left of the footer.
Enter the Image Command twice, ensure the commands are changed accordingly, and select the appropriate pages, as explained above, from the Select formats to apply the function box. Remember there is a search facility if only applying to certain pages. e.g. searching for those named Front Cover or Management Front Cover. When searching use the Format name, this the name that is listed in the Financial Statements screen, being the Title of the page.
At the bottom of the screen is a filter to list only those formats currently selected. by using the radio buttons at the bottom of the screen.
Click OK to save the selection.
Hint: When inputting the Image command into the Advanced Printing tab, there is no validation of that command. So, if for example you have forgotten to input a quote mark or comma you will not be alerted to this but the image will not display correctly in the print preview. You may therefore find it easier to construct the =Image command on the face of a format, so you can ensure it is valid, before copying and pasting it into the Advanced Printing tab.
Hint: Don't forget that the Client you are using must be linked to the correct Theme via Maintenance > Accounts > Job Themes. Job Themes and Themes