Chart Categories, Chart Nominals and Charts

Charts
Chart maintenance
File > Maintenance > Accounts > Charts
Bespoke Charts can be created and attached to a new entity upon creation. This involves a three-step process:
Create:
- the new chart
- the correct categories
- the required codes.
1. Creating the new chart
- Select the entity type that the new chart will apply to.
- Select the master pack that the new chart will apply to, note this master pack must be in an unpublished state to be able to create a new chart.
- In the name field, type in the name of the chart.
- In the MainCode Length field select the relevant e.g. 4 digits. Select the SubCode Length, e.g. 2 digits.
2/3. Adding the new nominal to the chart
- File > Maintenance > Accounts > Chart Nominal
- Select the correct entity type and master pack.
- Click on the drop-down arrow next to chart name to select the relevant chart.
- Add the required nominal codes, the nominal will belong to a category.
- Repeat the process until the chart is complete.
Chart Categories
Chart categories for each entity
File > Maintenance > Accounts > Chart Categories
This screen list the chart categories set up within CCH Accounts Production for each Entity and Chart. It is possible with a draft master pack open to add/amend but this should only be carried out by an advanced user as it will affect every category of a chart within an entity. We find this area is not usually changed.
To add/edit:
- Select the entity, unpublished master pack and chart.
- In the Description field type the name of the first category e.g. Turnover section, repeat as necessary.
Extract of Chart Category screen:

Chart Nominals
File > Maintenance > Accounts > Chart Nominals
This screen is used to create a new nominal at the master level, to edit the description of a nominal code and /or to change rounding settings within a specific entity.
Before making any edit/additions you must have master pack open (draft) for the entity.
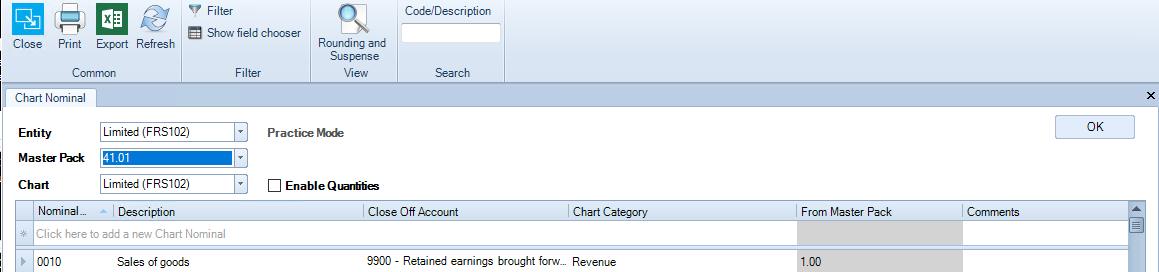
Whether creating a new nominal, editing a nominal or changing rounding settings first:
- Select the Entity
- Select the draft Master Pack
- Select the Chart
Changing the description of a nominal code
- From the Ribbon, using the Code/Description search to search for the nominal code to be amended, you are able to search either by code or by description
- For the selected code, click into the description field
- Amend the text as required, enter to the end of the row
- To leave the screen click on OK
Adding a new nominal code
- Click into the field: Click here to add a new Chart Nominal
- Type in the nominal code and description
- Check the Close off Account and Chart Category
- Enter to the end of the row so that the new codes drops into the main grid
- To leave the screen click on OK
Creating sub-accounts for a nominal code
Note: Important once you have created a sub-account for a nominal code you will always post to the sub-account(s) never to the parent code. The existing transactions will be moved into the first sub-account and therefore cannot be deleted.
- Click into the field: Click here to add a new Chart Nominal
- Type in the nominal code including the digits for the subcode (this will be two or three depending upon the entity in use - see below - and description
- Check the Close off Account and Chart Category
- Enter to the end of the row so that the new codes drops into the main grid
- To leave the screen click on OK
Subcode lengths:
| FRS 102, FRS 105, IFRS | two digits, for example 0010 becomes 001001 |
| Unincorporated - Partnership / Sole Trader | two digits |
| Medical Partnership | three digits |
Changing the rounding accounts
There are two rounding accounts which may be changed, the Balance Sheet Rounding Account and the P&L Rounding Account. For example, the default rounding accounts for an FRS 102 Limited entity are as shown below.

- If you wish to change these at the master level, e.g. from 0010 - Sales of good to 3890 - Sundry expenses
- Click into the Nominal Code field displaying 0010 and either type in the name of the account of if you know the code type in the code.
- In the example below the chart of accounts has been filtered using the word sundry and then you can select which code you wish to use.
- Once selected click OK to close the Nominal Role box displayed.

This will change for all future clients. For existing clients there is the option to remain with the codes previously used or else revert to master within the chart of accounts screen rounding setting. If changing at the client level exit Accounts Production and reenter for the rounding accounts to recalculate.