Common Ribbon Options within CCH Accounts Production

Common ribbon options
On the screens within CCH Accounts Production, except for:
Home 
Statutory Database and Financial Statements 
you will see similar options; these are explained below.
Printing and Exporting to Excel

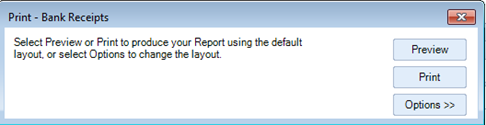
Select the option Print and depending on the screen choose relevant option, for example in the Receipts screen a print dialog appears from where you can print or preview the transactions using the default settings. Advanced options are accessible via the Options button: change the header, footer and set various other print options as well as change the column widths.
Note: Within the View Transactions screen to print a list of transactions select List Report from the ribbon, which will print the view displayed on the screen, Debit/Credit by amount or nominal depending on how the screen is displayed
Export
Select the option Export to export and create a worksheet in Excel containing the transactions displayed on the grid. The file is output in Excel as an XML spreadsheet, which may be saved as an Excel workbook.
Filtering and Grouping Data; the Field Chooser
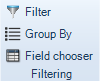
Filter
Filters may be added to restrict the contents of the grid to only display transactions that match a specified criterion. Click Filter on the ribbon, add the filter criteria, choose the field, instruction and condition, e.g. where the amount exceeds £250,000. Filters are a quick and easy way to search. The filter is an on/off option.
Group By
To group transactions, click Group By on the ribbon and then drag the column title to the group area at the top of the grid. Sub groupings may be added by dragging further column titles to the area. To remove a grouping, drag the group title back to the grid. Group settings are persevered and automatically used the next time you view transactions.
Field chooser
The Show Field Chooser option displays the Field Chooser dialog, which allows you to add or remove columns from a grid using drag and drop or double click.
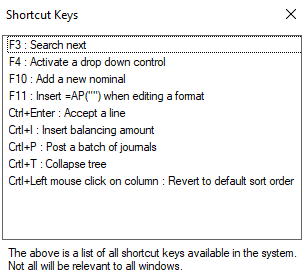
Shortcut Keys
On some screens you will see this icon