Settings and import

General Settings - All entities
The settings options will differ dependent on whether the entity is a sole trader, partnership or limited company. To make changes, enter details or select options.
Company/business name and Trading name
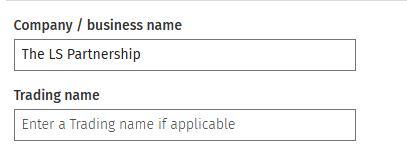
To edit or enter the company /business name and, if applicable the trading name, click into the relevant box and type to edit/enter the details.
Period end/start dates and first year of trading options

Dates: To edit date fields click into the relevant box, the calendar will be displayed, scroll back/forward as appropriate to select the date, if you prefer, type the date in. To clear the date click on the (X).
To indicate the first year of trading, change from the default No to Yes.
General settings - specific to limited companies
In addition to the company/ business name and trading name above are the following options:

Company registration number
Enter the number into the Company registration number box. To verify click the Verify button this will display the company details on screen for you to check and show matches and mismatches (if any). The information beside the verify button gives an explanation. If the registration number is invalid a message will be displayed.
Companies reporting under FRS 105 or FRS 102 are able to verify the company's details based on the company's registration number.
Trading status
To change from the default of Trading, click on the drop-down and make your selection.

Company limited by guarantee?
If required change from the default of No to Yes.
Exempt from audit?
Limited companies will select one of the following options:

Size /reporting for a Limited FRS 102 entity
If the company is an FRS 102 entity the size of the entity must be selected. In the example below Small has been selected which then allows FRS 102 Section 1A - Small Companies exemptions to be selected. The 1A option is not available if the Medium or Large setting is selected.

Business details
This area allows for the input/editing of addresses and associations:
Addresses and associations
Business address
For a sole trader and a partnership, there is one address type, the Business address. This may be edited by typing in the boxes.
Registered office address
For a limited company, there are two address types being the option to have a Business address in addition to the Registered office address.
Accountants details
Enter the details for the firm of accountants into the Accountants details boxes.
The Accountants details is used for audited and non-audited financial statements.
Bank and solicitor details
To add a second bank (maximum three) or solicitor (maximum two) click "Add another bank" or "Add another solicitor", under the area for bank and solicitor details. If you have entered a bank or solicitor in error and wish to delete, click on the word "Delete". The information icon beside Bank details and Solicitor details reveals the number allowed.
Additional information - all entities
Here you can change the selections for the Accounting body, Country of incorporation/Place of business and Date of engagement letter.

Accounting body, Country of incorporation/Place of business
To change either of these click on the drop down to select from the list.
Date of engagement letter
Click to open the calendar and scroll back/forward or enter the date. Clicking the (X) will remove the date.
Presentation
To change to a period of account
To change the period of account from the default of a year to that of less than or greater than a 12-month period, enter the description you wish to appear as the period column heading in the box e.g. 14 months or period and the period description, e.g. 14 months or period.
Click on the information circle next to each box (shown below) to show on-screen guidance.

Draft accounts message
The options are Yes and No. There is a box in which the draft message may be edited. If you do not wish to show the draft message there is no need to clear the box, just indicate No as shown below.

Theme
The CCH Theme contains all the styles that are applied to a set of accounts. This will not usually be changed.

Rounding and currency settings

Rounding: The default is to present in whole units. If you wish to present in thousands or millions, click on the drop down to select the appropriate rounding unit.
Decimal places: If you wish to present a certain number of decimal places, click on the drop down to select the appropriate number.
Currency: Presentation currency will appear as a column header, e.g. if rounding to thousands or millions you would show the column header as e.g. £'000 or £m. The functional currency appears within a paragraph, this field cannot be edited.
Data import
This screen allows you to import a trial balance in the format of a .CSV (comma delimited) file. You will follow the steps explained below.

Choose the .CSV file to import
Click on the Browse or download template button to select the file you wish to import.
- A message will appear on the screen giving you the option to download a template or upload your file.
- If you are unsure of the structure of the file, download a template first.
- Choose file to upload, if in the correct format the blue circle will move to (2) and the file name and date will be displayed.
- If the file is in an incorrect format an error will appear on the screen and an X beside the first step, Choose CSV file.
If your file has header rows, enter the number of rows e.g. 1, or if not leave as 0.

Structure name
Click on the drop down Select year(s) to import to select the number of year(s) to be imported. Up to 5 years may be imported.

Mapping name
Click on the Select mapping drop down to choose the pre-determined mapping file. If using CCH codes, then select None.
Nominal chart mapping
All items mapped
If all items are mapped a message will appear and you can move on to the next step.

Items need to be mapped
If items need to be mapped an error appears on the screen, click Edit Mapping to ensure all items are mapped, you cannot import a trial balance with unmapped items.
If required, a new nominal code may be entered by clicking on the Add nominal / sub-account button. Once all items are mapped, click on the Save button to return to the Import screen.
Import CSV file
Once all stages have been passed indicated by ticks replacing 1-4 in blue above, you can click the Import button. A message will appear advising that importing data will overwrite all existing transactions - click yes to continue or Cancel if you do not wish to proceed.
