Reconciliation Report

CCH Practice Management integration with Twinfield works by using a synchronisation process. From time to time, it is possible to find a difference between your total debtors figure on the debtors reports in CCH Practice Management when compared to the balance on the debtors control within Twinfield.
Possible causes of these differences can include
- Client debtors cash transaction posted directly to CCH and without an adjusting transaction being posted to the debtors control in Twinfield
- Client receipt in CCH Practice Management has been reversed using the reverse option without the adjusting entry being posted back to CCH Practice Management
- When using multiple companies in Twinfield and CCH Practice Management, a balance on a clients debtors control has been transferred in CCH Practice Management from one billing company to another and the intercompany transaction has not been reflected in Twinfield
- The nominal code set against an assignment used on a client bill in CCH Practice Management is not a valid nominal code in Twinfield
- A bank statement or paying in slip has been posted provisionally to Twinfield and not made final on the same day
- A line on the bank statement in Twinfield has been coded to a client code which is closed or changed in CCH Practice Management
- An adjustment has been posted to the debtors control in Twinfield which has not been reflected in CCH Practice Management
To help with reconciling the two balances the following notes explain how to create a report in Twinfield which can be used to balance against transaction in CCH Practice Management
Reconciliation report
Once designed this report will list all transactions posted to the debtors control in Twinfield grouped by their transaction type. This information can be used to check against the reports and daybooks from CCH Practice Management to identify where differences are.
Designing a report in Twinfield
The custom report is deisgned using the General Ledger / Transaction list report. Designing this report requires your Twinfield user to have permissions to access General Ledger reports and make changes to the report designs. Your super user will be able to grant these user permissions to you.
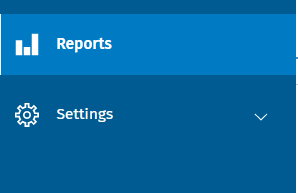
From the navigation menu, click on reports
From the report list find the report to edit - System reports can not be over written, however, custom reports can be.
Note, if you only see 10 reports per page you can extend the page length by clicking on (max 10 lines) and entering a higher value - 99 is the maximum you can enter.

Creating the reconciliation report
Find the report General Ledger / Transaction list in the report management screen and click on the edit pencil to open the report designer. The report designer works best when the screen is maximised.

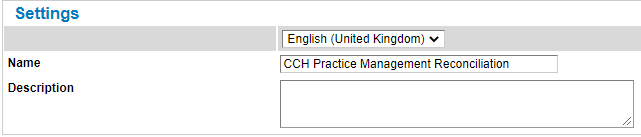
Name the report
In the Settings header enter a name of CCH Practice Management Reconciliation
The following changes are made to the report design
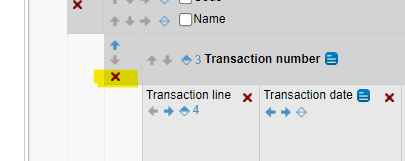
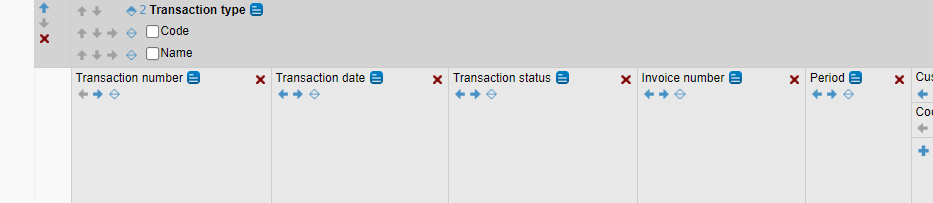
Remove the groups which are not requiredRemove the group for Transaction number by clicking on the red x to the left of the darker grey area of |
 |
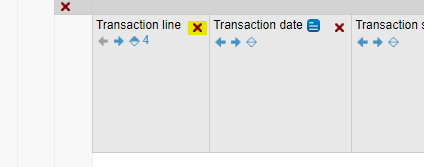
Remove the columns which are not required from the detail section of the reportFrom the report columns, the lighter grey area, delete the following by clicking on the red x to the right of the column name.
|
 |
Add additional columns to the detail section of the reportAdd the following columns to the report by dragging the field from the list of available at the foot of the page and dropping on the lighter grey area to position the field where it is required.
|
|
Change the sort order of the reportAgainst the column for Transaction date, click the diamond shape to add this column as a sorted column. The shaded area of the diamond demonstrates the order and the number is the position within the sorting. |
 |

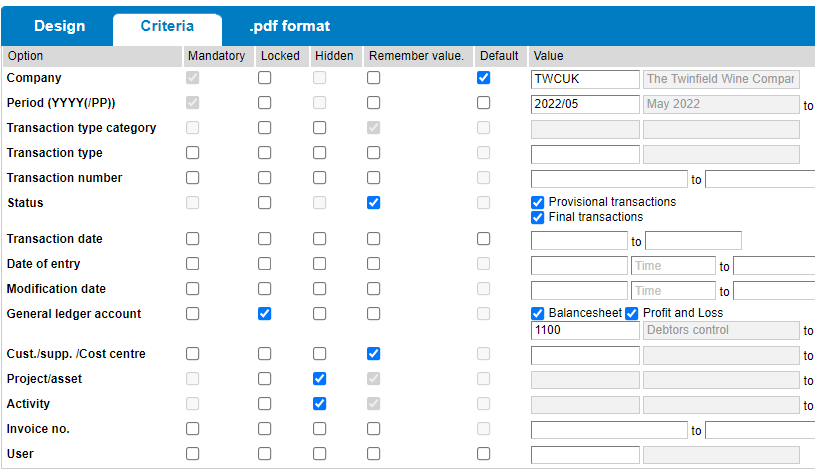
Amend the criteria options
From the Criteria tab on the report designer make the following changes

| Period | Untick Default and remember value |
| Transaction type category | Untick hidden |
| Transaction type | Untick remember value |
| Transaction number | Untick remember value |
| Transaction date | Untick remember value |
| Modification date | Untick remember value |
| General ledger account |
Untick remember value
|
| Cust./supp./Cost centre | Untick remember value |
| Invoice no. | Untick remember value |
| User | Untick remember value |
 |

Save the new report
At the bottom of the report deisgner screen, click Save copy orange button.
Note - If you are editing your report after saving, please click Save rather than Save copy to overwrite your custom report.
Report Security
New custom reports are restricted to use by the designer by default. If your report is to be run by other Twinfield users the Access rights will need to be edited.
| After saving the customer report, find the new report in the Report Management list and click on the Access rights icon at the end of the row. |  |
| To allow all users access to this report, delete the two entries in the custom access rights section by clicking on the red X against each row. | 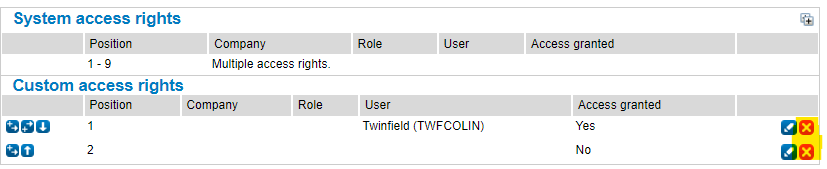 |
| Click the orange Save button to save the amended Access rights |