Quick Start Guide 2018.2

Introduction
CCH Working Paper Management is a Central module that provides the ability for users to maintain working papers within CCH Accounts Production that correspond to the financial statement areas of the accounts. As it is accessed through CCH Accounts Production, it can therefore be regarded as a module of CCH Accounts Production.
Features
Working paper templates can be customised at a master pack or client level
- It is fully integrated into the statutory database tree within CCH Accounts Production, meaning users can link directly to the working papers within each section.
- It offers the facility for users to create working papers from both templates and existing documents and provides both completion and review facilities through the use of 'sticky note' and sign-off functionality. Review notes are attached directly to figures in the accounts.
- Review points are easily displayed for managers to view/sign off on the summary panel at the front of the client file
Benefits
Working paper formats are standardised across the practice to ensure a consistent approach to all accounts jobs.Working papers for a client are all stored in one place.
- The problem of having multiple versions of spreadsheets on your network or staff’s local drives is removed
- Review points are clearly displayed for managers/partners to view/sign off enabling them to quickly determine if there’s any work outstanding on the client and view the overall status of the file.
- There will no longer be multiple requests to clients for the same information
- Transparency will be improved within the team of where they’re up to with a job and any issues they may have
Limitations
As well as the Limited (FRS102) and Limited (FRS105) master packs already available, the Unincorporated, LLP (FRS102) and LLP (FRS105) entities will be shipped with this release.
- At the moment, practice packs for entities not shipped by CCH can’t be created
- Other limitations of CCH Working Paper Management are listed under FAQs
Getting Started
Prerequisites
CCH Working Paper Management is a licensed product. You can see whether you are licensed in File > Help > About > Licensing. To use CCH Working Paper Management you also need CCH Accounts Production.
Therefore the prerequisites are:
- CCH Accounts Production
- A licence for CCH Working Paper Management
To install CCH Working Paper Management, run the CSI (Central Suite Installer). It will be listed separately in the CSI.
Accessing CCH Working Paper Management
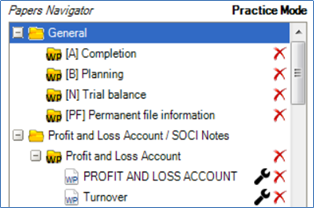
CCH Working Paper Management is accessed through CCH Accounts Production and is fully integrated into the statutory database tree
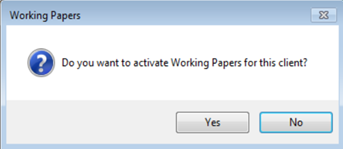
Open an Accounting Period as normal - If you haven’t already activated Working Papers for that client for that accounting period, you will be prompted to activate them at this point
To view the working papers select the Statutory Database. You will notice you now have a menu at the top to view everything within the tree, just the disclosures or just the working papers

To expand or collapse the view, right click over the statutory database tree and select the relevant option
Indexing Pack and Sections Configuration
Changing the standard indexing pack used throughout the practice
Caution: Before any changes are made to the working papers practice pack, or anyone starts to use CCH Working Paper Management, you MUST select or setup the Indexing Pack you wish to use for your practice
To view the default indexing pack used within the practice navigate to File > Maintenance > Working Papers > Indexing Packs

- If you wish to change the default pack simply tick the required box in the Active column
- Only one indexing pack can be active at a time
- To add a new indexing pack, select the Create button on the ribbon
Modifying the predefined sections for the active indexing pack
Caution: Any amendments to the sections should also be made BEFORE you make any changes to the practice pack for working papers
To view the sections within your chosen indexing pack, go to File > Maintenance > Working Papers > Sections

- The Reference and/or Name can be changed within here
- New sections can also be added by clicking on the blank line at the top of the table
Relation of indexing packs with master packs
- There is a one-to-one relationship between the indexing pack and the master pack
- For each indexing system you can create one master pack per entity and per version
Working Paper Roles Setup
To view the roles for CCH Working Paper Management, navigate to File > Maintenance > Working Papers > Roles

- The colour for each role can be changed by double clicking on the row
- There are 2 ways off assigning working paper roles to practice employees, depending on how you work within your practice
- If you use responsibility types on your clients this will take precedence over any settings you may have within Employee Categories
Employee Categories
In File > Maintenance > Employee > Employee Categories there is a new column for the Working Papers Role

You can map your practice categories to the working paper roles using the drop down on this column. This will set the role for that employee category across every client
Responsibility Types
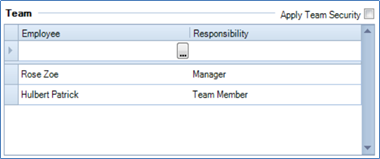
Responsibility type comes from the team setup within the client record (on the responsibility tab)
To assign a working papers role to a responsibility type, navigate to File > Maintenance > Internal > Responsibility Types

- Use the drop down menu under Working Papers Role to map your responsibility type.
- If you use responsibility type on a particular client, the working paper role here will take precedence over the settings under employee categories
Template Creation
To create your own practice working paper templates , navigate to File > Maintenance > Working Papers > Templates
On the ribbon, select Create
Note: If you have existing MS Word or MS Excel templates used by your practice you can add them here by selecting Add Existing
Select the type of template you want to create, give it a name then click OK
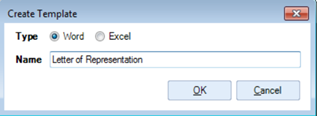
This will open the relevant program so you can edit your template
Microsoft Word
The Insert Merge Field box will appear
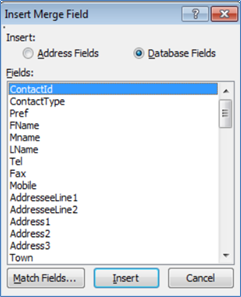
- These merge fields take their data from the Central database
- Insert any merge fields you require to your template
- Add any any other text to the templates at this stage
If you need to re-open the Insert Merge Field box, select the Mailings tab on the ribbon and select Insert Merge Field

Once you are happy with the template, it needs to be checked back in to the system.
There are 2 ways to do this:-
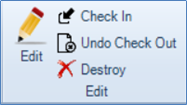
1. Select Check In on the CCH Document Filing tab then close the document
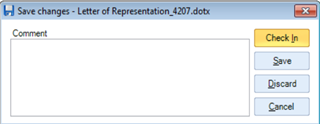
2. Close the document and select Check In on the box that appears
Microsoft Excel
The process to insert a merge field into an Excel template is slightly different. The Insert Merge Field option can be found on the ribbon within the CCH Document Filing tab.
Editing Templates
MS Word and MS Excel templates can be edited within File > Maintenance > Working Papers > Templates by selecting Edit on the ribbon bar
To ensure the template is available for use, it needs to be checked in to the system once any changes have been made. This can also be done from the ribbon (as above). If a template is checked out of the system the name of the user who has it checked out will appear next to the template name.
Master Pack Configuration
CCH Working Paper Management will be shipped with thefollowing master packs:-
- Limited (FRS102)
- Limited (FRS105)
- Unincorporated
- LLP (FRS102)
- LLP (FRS105)
Every Working Papers master pack is tied to an Accounts Production master pack
Master Pack versioning
The versioning for the working papers master packs is the same as for the accounts production master packs. Changes can’t be made to any master packs shipped by CCH.
Create a working papers practice pack
To make any amendments to the master pack shipped by CCH, you firstly need to create your own practice pack. Select the Create button on the ribbon within File > Maintenance > Accounts > Master Pack
Make sure you’ve selected the correct Type and Entity at the top of the page. This new master pack will have the same format as the master pack shipped by CCH, but it will now be editable. Give the new master pack a relevant description and click OK

Configure the practice pack for working papers
To configure your new practice pack for working papers navigate to File > Maintenance > Working Papers > Working Papers Designer
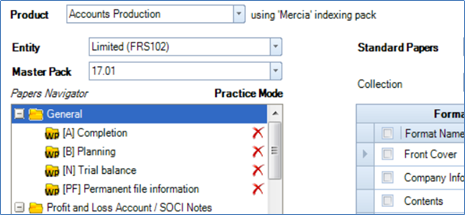
Select the correct entity and the master pack you’ve just created
Adding Folders
New working papers folders specific to your practice can be added to the statutory database tree. You can either add a brand new folder, or a folder from a referenced section.
New folder
To create a new working papers folder, select add folder on the ribbon within File > Maintenance > Working Papers > Working Papers Designer
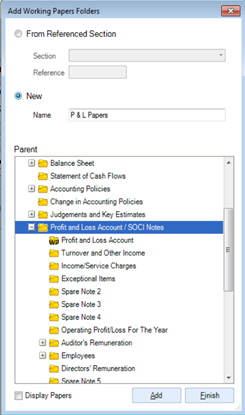
- Select New and give the folder a name
- Select the relevant statutory database section where you want the folder to be inserted and click Add
Once the folder has been added, the order within the parent folder can be changed by dragging and dropping the working papers folder
Note: The working papers folder can only be moved around within the parent folder it was added to
- To show which papers are included in the working papers folders tick the Display Papers box
- Sub folders can be added in exactly the same way. Simply choose the relevant parent folder within which to add the sub folder
From referenced section
The same process can be followed to add a folder from a referenced section. The sections shown on this list will be dependent on the sections that have previously been setup by the practice within the maintenance menu
Adding papers to folders
Financial Statements
To add a financial statement, navigate to the working papers designer File > Maintenance > Working Papers > Working Papers Designer and select Financial Statements against Standard Papers
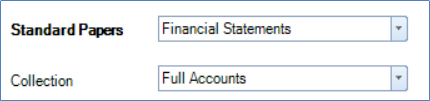
From the Collection list you can view either Full Accounts, Management Accounts or Lead Schedules. All the formats that appear in these lists come from Accounts Production based on the entity you’ve chosen. Make sure the folder you wish to add to is selected, tick the relevant formats to add and click Import. You can only import working papers into the dedicated working papers folders. Multiple formats can be added at the same time.
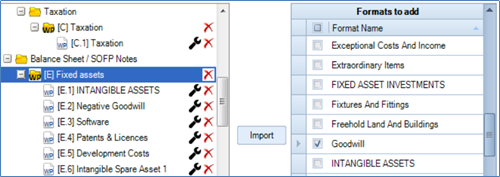
Once the working paper has been added it will be given a reference number for that section.The paper can be moved around within the section by dragging and dropping in the required location (the reference will automatically be updated).
MS Word or MS Excel templates
MS Word or MS Excel templates can be added in the same way by selecting Templates from the Standard Papers section

Please see the earlier section on Template Creation for instructions on how to setup Word or Excel templates
Folder configuration
Renaming Folders
To rename a working papers folder, right-click on the folder and select Rename

- Make the necessary changes and click OK
- Individual papers can be renamed in the same way
Removing papers
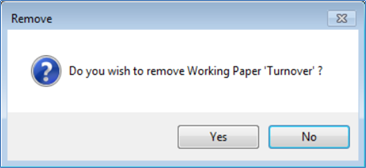
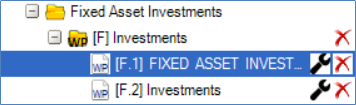
To remove a working paper from a section, select the red cross next to the working paper you wish to remove
A warning will appear before the paper is deleted
- If you wish to delete an entire working papers folder, click the red cross corresponding to the folder icon instead of to the paper icon
 .
. - If you remove a folder all the papers contained in that folder will also be removed
Note: The statutory database folders within the tree can’t be deleted or changed
If the paper you remove has a reference, the references of the other papers will automatically be updated
Changing the reference
To change the reference of a working papers folder, right-click on the folder and select Rename
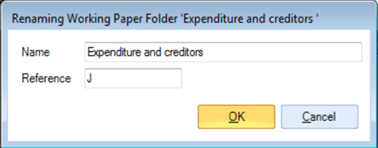
- Make the necessary changes and click OK
- The references for all papers contained within that folder will automatically be updated
- The reference for individual papers can be changed in the same way
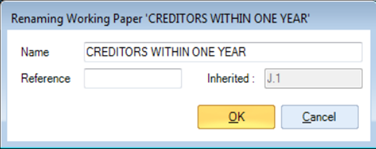
The inherited reference for that paper can be overwritten here if required
Resequencing Papers
To resequence papers within a working papers folder simply drag and drop the paper into the new required location.The reference of the papers within the folder will automatically be updated.
Changing the sign-off role at a master pack level
To change the sign-off roles for working papers at a master pack level, select Sign Off Levels on the ribbon within File > Maintenance > Working Papers > Working Papers Designer
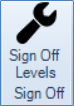
Tick the boxes that relate to the sign off levels you require for your practice

Note: This is at the master pack global level and so will cover all working papers across all clients
Changing the required sign-off role for a specific partner
You can change the sign-off roles required for specific papers within the master pack. Again, in the working papers designer, click the edit icon next to the working paper you wish to change.
This time the changes you make to the sign-off role will be for that individual paper within the master pack
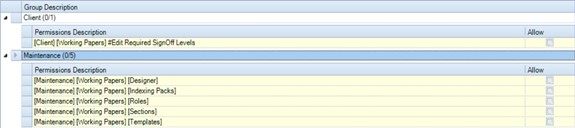
Task Permissions
The task permissions for CCH Working Paper Management can be found in File > Maintenance > Security > Task Permissions. Select Working Papers from the Product list, then the relevant security group
Integration with CCH Document Management
- All documents that are added or created within working papers are automatically saved into the document store for that client.
- For those users who have the full version of CCH Document Management, these documents will appear in the document centre and will be given the document type of Working Paper.
- For those users who do not have the full version of CCH Document Management, CCH Working Paper Management is shipped with a 'Light' version of CCH Document Management which includes the Microsoft Word & Excel plugins
Document Security (For CCH Document Management users)
To ensure the rights for working papers are setup correctly, navigate to File > Maintenance > Security > Document Security. By default, all users will be given full access to the working papers document type.
Usage in CCH Accounts Production
Ribbon
There is a new section on the right-hand side of the ribbon for CCH Working Paper Management

Adding working papers on a client level
- Working papers folders and files can be added on a client level (as well as on a master pack level)
- Any changes made to the working papers structure at this level will only apply to that specific accounting period for that client
Folders
- Open the relevant accounting period for the client you wish to look at
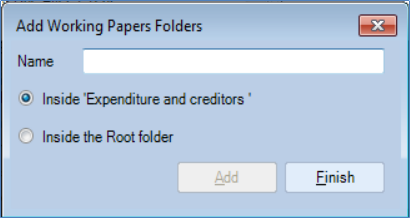
- Select where you want to add the folder in the statutory database tree, then on the ribbon select Add Folder
Give the paper a name and select if you want it to be created inside the folder you;ve selected or inside the root folder
Files
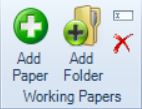
- Open the relevant accounting period for the client you wish to look at
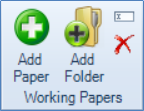
- Select the working papers folder you wish to add a paper to and select Add Paper from the ribbon
There are 4 options to choose from when adding a paper
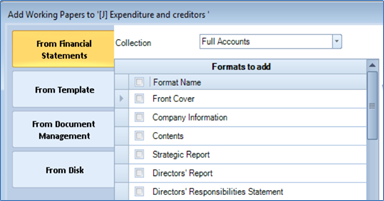
1) From Financial Statements
- These are the same formats from Accounts Production that are supported for the entity you’re working on.
- You can either pick from Full Accounts, Management Accounts or Lead Schedules
2) From Template
These are the templates previously created by your practice using Microsoft Word or Excel
3) From CCH Document Management
- If you use CCH Document Management a list of your documents for that client will be available here to add
- If you don’t use the full version of CCH Document Management any working papers or templates you have created will still be available to view from this list
4) From Disk
This allows you to add a document by browsing to a location on your PC/network etc:
- Multiple papers can be added at the same time by ticking the boxes next to the relevant papers
- Papers can only be added under dedicated working papers sections
- MS Excel, MS Word, PDFs and image files can all be added as working papers
Renaming papers
To rename a paper, right-click on the paper and select Rename. The reference for the paper can also be changed at this point.
Deleting papers
Papers can be deleted on a client level by right-clicking on the paper and selecting Remove

A warning will appear that the document will be deleted but won’t be destroyed from within CCH Document Management
Note: Usually only superusers have the rights to destroy documents from with the CCH Document Management System
Requencing papers
To resequence papers, use the Move Up and Move Down arrows on the ribbon
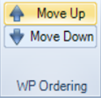
- The referencing of the papers will automatically be updated when they are moved
- The inherited reference can be overwritten (but the other references will not be updated)
- Folders can be resequenced within the tree in exactly the same way
Note: Papers can only be moved within the original folder they were created in
Formulae on the face of the lead schedule
- The reference of the paper is printed on the face of the lead schedule
- If the reference is updated, the lead schedule will also be updated
- References can manually be added to Word or Excel documents by editing that particular working paper
Note: References only appear on lead schedules, not on other types of document such as Microsoft Word, Excel etc
Editing the working paper in MS Excel and MS Word
Once added to an accounting period, Microsoft Word or Excel documents can be edited within the statutory database screen. At the top of the document preview, there is an Edit button.
Selecting Edit checks the document out of the system and opens it in the relevant program ready for you to make any changes. As with editing documents within the master pack, documents must be checked back in for any changes to take effect.You ‘ll notice the menu on the preview panel changes to also allow you to check the document in from this screen.The document can also be checked back in using the CCH Document Filing tab with Microsoft Word or Excel.

Note: PDFs and image files are not editable content wise
General comments box
The general comments box on a lead schedule can be edited from within the working papers view
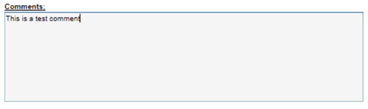
These changes will be reflected in the financial statements
Working Papers Panel
All review facilities within working papers are accessed through the panel on the right-hand side of the screen
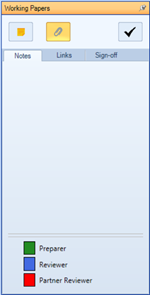 |
These include Sticky Notes, Links and Sign-Off The panel can be automatically hidden by selecting the pin in the top right-hand corner |
Sticky Notes
Lead Schedules
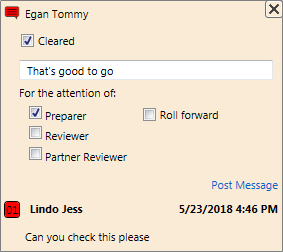
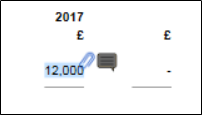
To add a sticky note, on the right-hand side panel, click the Note icon, then click the figure on the working paper you wish to add the note to.
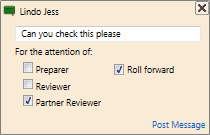
Make any relevant comments, select who the comment is to go to then click Post Message
In this example, when the reviewer opens the corresponding accounting period in that particular client, they will see a note has been added on the right-hand side panel and will be able to react to it. A notification will also appear on the working papers summary panel and on the working papers homepage (explained in a later section). The conversation can be carried on or the message can be cleared at this point.
- Once the note is cleared it will be greyed out but will still appear on the working paper and the right-hand side panel
- The colour of the sticky note bubble will change depending on the role of the person who made the most recent comment
- The bubble will also appear in the tree against any working papers that have sticky notes with the corresponding colour of the latest reply
Multiple notes can be added to a working paper
If the Roll Forward box is selected, the note will be rolled forward with the year end procedure in Accounts Production
MS Excel, Word and PDFs
Sticky Notes can also be added to Excel Spreadsheets, Word documents or PDFs in the same manner as for lead schedules
Note: The sticky note functionality isn’t supported for Images
Links
To add a link to another document on a working paper, select the Link icon on the right-hand side panel

Click on the figure (lead schedule) or cell/s (MS Excel) you want to add the link to.
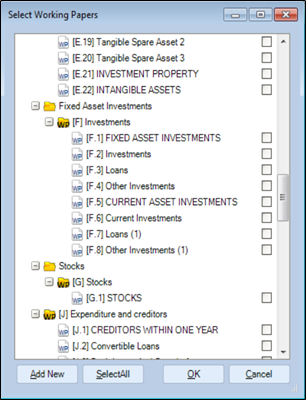
- On the screen that appears, tick the working papers you wish to link to (single or multiple).
- To add a new working paper to link to that isn’t already available in the tree, firstly select the folder you want to add it to, the select Add New
- See the Add Working Papers at a client level section for more detailed instructions on how to add a paper
The links can be viewed within the right-hand side panel under the links tab
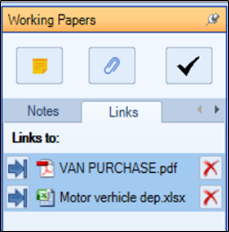
Clicking on the blue arrow will take you directly to the linked paper. On the face of the paper, a paper clip will appear to show where the link originates from
- Select the red cross next to unlink the paper.
- This will only remove the link. The paper will not be removed from the tree
- The paper clip icon will show in the tree if the paper has any links within it

A link can be created to a page within a PDF document
Note: The linking functionality isn’t supported for Microsoft Word documents or Images
Sign off
To sign-off a paper, use the Tick icon in the right-hand side panel
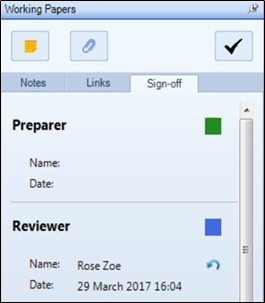
- The details of who has signed off the paper will be shown along with the date of sign-off
- The blue arrow icon can be used to undo the sign-off
- The sign-off icon will show in the tree with the corresponding colour of the role of the person who signed it off

If there are outstanding review points/sticky notes on a client you are still able to sign off the paper but you will be presented with a warning
Activating Working Papers
If you chose not to activate working papers when accessing an accounts period, you can retrospectively activate them by selecting the ‘Activate Working Papers’ button on the ribbon within the Home section of CCH Accounts Production.

Summary panel
As well as being able to see all activity on the right-hand side panel within the statutory database tree, a working papers tab has been added to the summary panel on the front of the client’s Accounts Production file
Note: To refresh this screen use the icon on the top right-hand corner of the panel
Notes
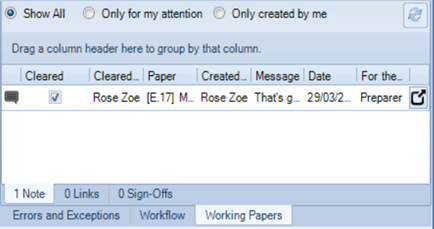
- All notes for the client will be visible here on the first tab
- This view can be filtered to show all notes, only the notes for your attention or only the notes you have created
- Select the notes button
 to view the whole conversation
 - Double-clicking on the relevant line will take you straight to the corresponding working paper
Links
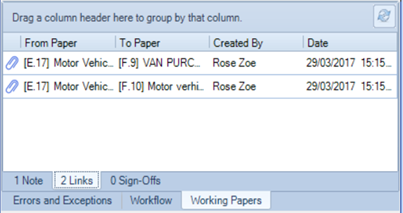
- All links created for a particular accounting period will be shown on the summary panel
- Double-clicking on the relevant line will take you straight to the corresponding working paper
Sign-off
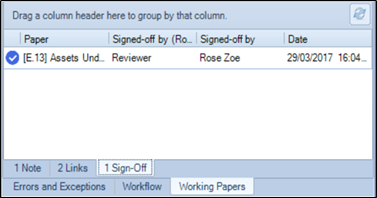
Sign-off information will be shown on the summary panel
Sign-off roles configuration
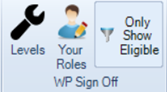
To change the role at a client level, select the Levels icon on the ribbon
You will then be asked to set the sign-off level for the client
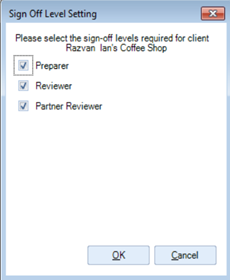
- These settings will be taken from whatever has been set at the master pack level, but can be changed here if different levels are required for this particular client.
- Rights to change the sign-off level for a client are restricted by a task permission
- The Your Roles section allows you to change your role on this particular job
Note: Changes can be made to the role if they are below your current role e.g. you can’t give yourself the partner role if you are set as a reviewer
You can also change the sign off role required on a particular paper by clicking the hyperlink on the right-hand side working papers panel.
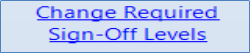
Rights to change the sign-off level for a paper are restricted by a task permission
Printing
To print the working papers for a client, select the Print Preview button on the ribbon

You can either tick the individual papers you’d like to print, or use the Select All button
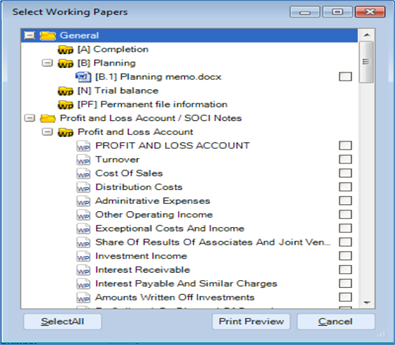
Once you select Print Preview a preview screen of your working papers will appear. From here you can either print to a printer or to a PDF file
Resynching
Within the WP Versioning section on the ribbon, the ReSync button can be used to synchronise the working papers for a client with any changes made within the master pack
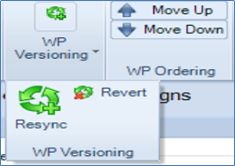
Work conducted on papers will not be lost when resyncing, even if the paper is not present anymore in the new master pack
Homepage
A working papers homepage is available that shows working paper Notes, Links & Sign-Offs
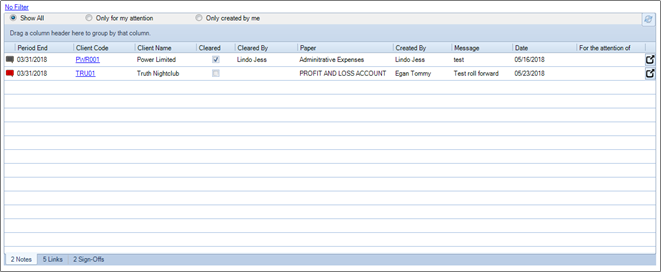
It can be filtered by AP, Period End, Client Code, Client Company, Client Dept, Client Office or Client Partner
FAQs
What are the main system limitations?
The following points should be noted:-
- As well as the Limited (FRS102) and Limited (FRS105) master packs already available, the Unincorporated, LLP (FRS102) and LLP (FRS105) entities will be shipped with this release
- At the moment, master packs for entities not shipped by CCH can’t be created
- PDF and Image working papers are not editable
- The sticky note functionality isn’t supported for Images
- Sign off information and comments are only available on the face of lead schedules (not Word/Excel documents etc)
- Working papers can be reordered but only within the same folder
- Can’t hide unused lead schedules in the statutory database tree
Master Packs
Which entities are supported in this release?
As well as the existing master packs for Limited (FRS102) and Limited (FRS105), in this release we are also shipping master packs for Unincorporated, LLP (FRS102) and LLP (FRS105)
Does this mean I can only create working papers practice packs for these entities?
For this release, yes. Master packs for other entities will be shipped in subsequent releases
Working Paper Roles
Which takes precedence? Employee category or client responsibility type?
If your practice uses responsibility type on a client record, the role for working papers will always come from what’s setup here first
Known Issues
Please refer to the The Known Issues document or online help for any issues found in this version of CCH Working Paper Management