Creating a template using the Workflow Wizard

The Workflow Wizard, available in the ribbon bar within the Standard Workflows screen, assists users by guiding them through the process of creating a workflow.
To create a workflow template using the Workflow Wizard:
- Open the Standard Workflows screen from File > Maintenance> Central Workflow > Standard Workflows.
- Click on the Workflow Wizard button from the Tasks tab within the ribbon.
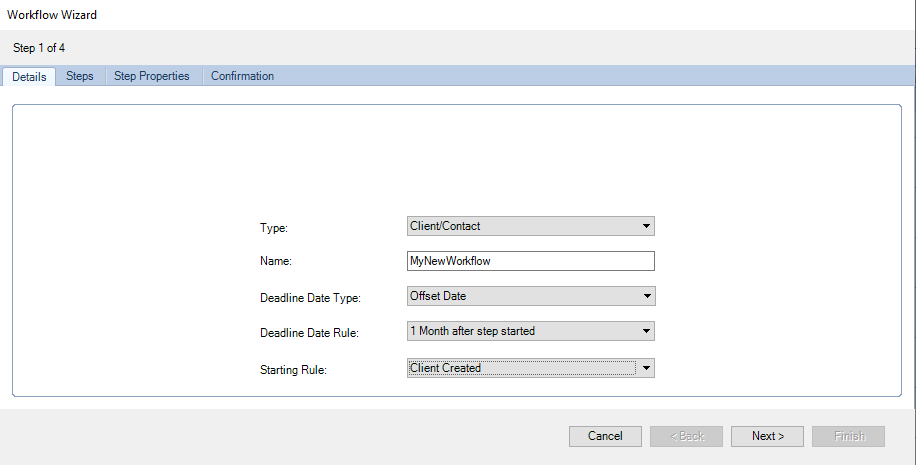
- In Step 1 of Workflow Wizard, enter:
- the Type of the workflow (eg Client/Contact, Personal Tax, Assignment Jobs)*
- the Name of the workflow
- the Deadline Date Type (Offset or Calendar Date)
- the Deadline Date Rule
- the Starting Rule if required
*The Subject/Workflow types available are dependent upon the products for which your practice is licensed.
4. Click Next to proceed to the Steps tab from the Workflow Wizard.
5. In Step 2 of Workflow Wizard, users can add the workflow steps.
In the Step Name grid, the available Step Types are displayed. A brief description about the step type that is selected in the Step Name grid is displayed in the bottom left side of the screen.
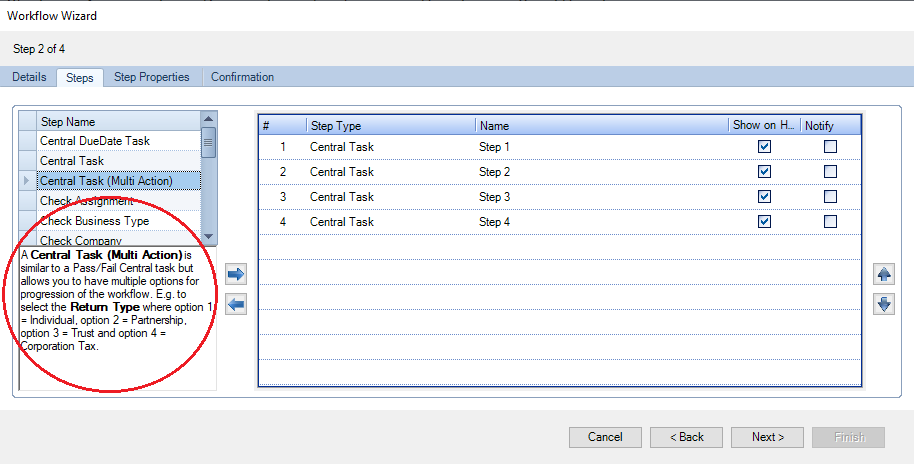
6. To add the workflow steps, highlight the desired step type and use the right arrow to add the steps in the grid.
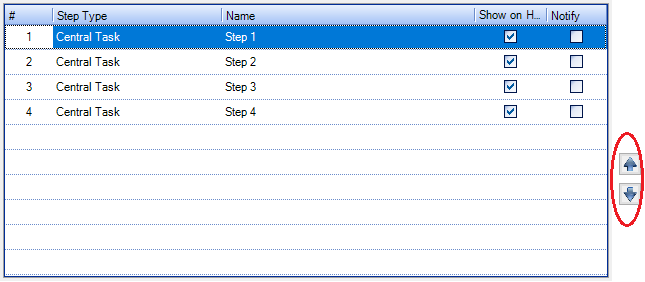
Note: By default, the steps are inserted at the top of the grid, however these can be re-ordered by using the up/down arrows on the right.
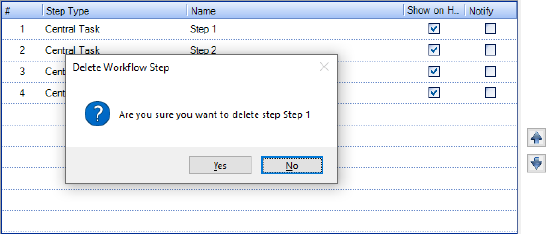
To remove a step from the grid, highlight it and use the left arrow or press the Delete button on the keyboard. The following message is displayed:
In the grid are displayed the following columns:
- # : Displays the number of the step.
- Step Type: Displays the step type: e.g. Central Task, Check Extra Field, etc
- Name: Enter a unique name for the step (Special characters are not supported within the Name column i.e.?*& etc.).
- Show on Homepage: If the step is to be displayed within the Workflow Home Page control, tick this box.
- Notify: Notifies the relevant employee by email that a task has been allocated to them.
The default structure of the workflow is the order in which the steps have been created. To alter the order, highlight a row in the grid and select either the Up or Down arrow from the right side of the screen.
7. Click Next to proceed to the next step.
8. In the Step Properties of the Workflow Wizard, you are required to add additional properties for certain steps. Where the step number is shown in red, there are mandatory properties which have not been added.
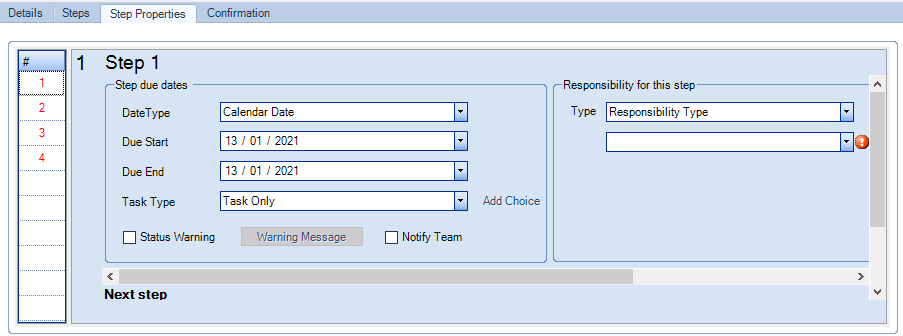
The Step Properties differ depending on the Step Type. To set the Step Properties for a Central Task or Central Task(Multi Action):
- Highlight a step number.
- Select a Date Type, a Calendar Date refers to a specific date and an Offset Date relates to Date Rules.
- From the Responsibility for this step section, select an Employee Type to assign the step to, then select an option from the second drop down. Depending on the first select, either a person or group becomes available.
- In the Next Step section, for each outcome, edit the name (where relevant) and select the next step from As a result jump to. When using Central Task (Multi Action) additional outcomes may be added by selecting the Add Choice option. A new outcome is created.
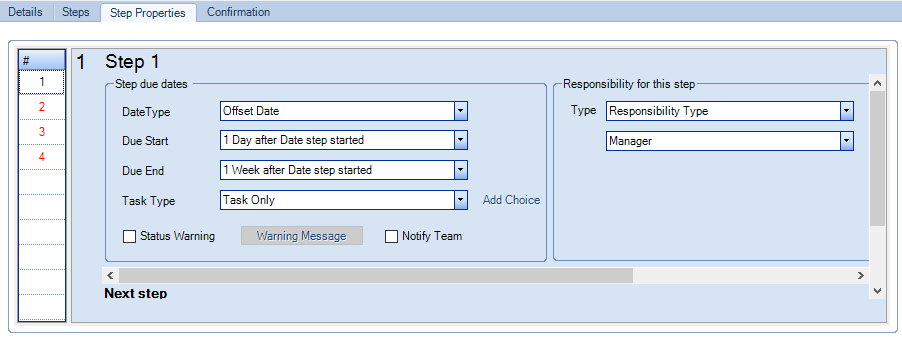
Note: The step number changes from red to black after validating all the properties.
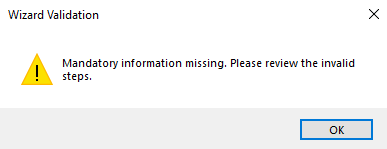
If the required properties are not set on all the steps, the user cannot proceed to the next step and the following message is displayed:
9. Click Next.
10. Step 4 is the Confirmation tab of the Workflow Wizard, where all the workflow steps are listed together with their main properties.
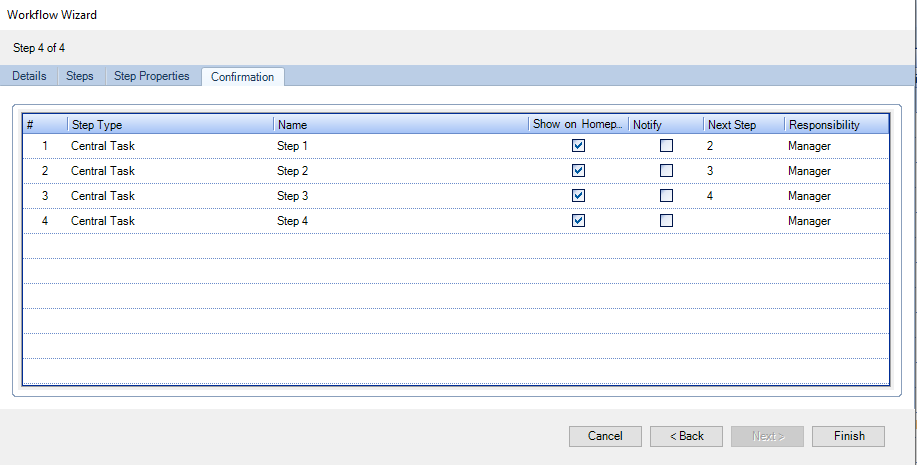
11. Click Finish to save the workflow template, or click Back if you wish to make any amendments.
The workflow template created with the Workflow Wizard will be displayed within the Standard Workflow screen, and can be edited like any other workflow.