Import/export templates

Importing from a file
To import a workflow template, (from either the same or a different database) click Import on the ribbon bar.
The following message box is displayed, which advises that the "ID" based values are cleared when importing a workflow template.
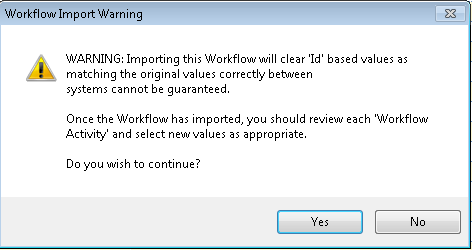
Click Yes to continue
|
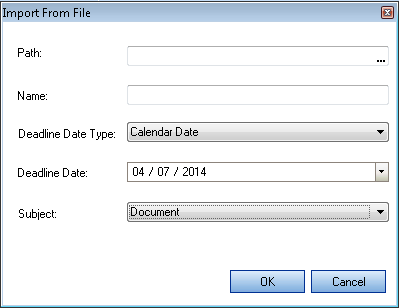
Path |
Browse to the location of the saved .xaml. |
|
Name |
Enter either an existing template name to overwrite or enter a new name to create a new workflow. |
|
Deadline Date Type |
Select either Calendar Date or Offset Date. |
|
Deadline Date |
Depending on the selection above, either a calendar or a selection of offset dates are displayed. |
|
Subject |
Select an available subject. The workflow subjects returned are dependent upon the products for which your practice is licensed. |
Enter details into the Import from File window, click OK to import workflow template.
The Workflow is automatically opened and the user is required to update all values with invalid entries. The workflow cannot be saved until all validations are addressed.
Export to File
To export a workflow template, highlight the template to export and click Export on the ribbon bar.
The Save As window is returned.
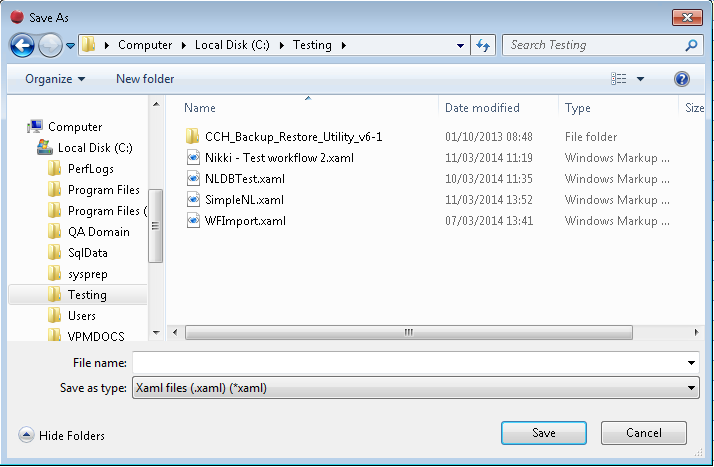
Enter a file name and browse to the location to save the XAML file.
Click Save
The workflow template has been successfully exported.
Note: Workflows exported from the Advanced Designer cannot be imported into Standard Workflows.