Linking addresses to clients and contacts

In CCH Trust Accounts the address of the Accountant or any other association (Solicitor/Banker etc) required to be added to the Synopsis/Trust Information page is added to the respective contact in CCH Central.
Managing addresses
To manage Addresses for a Trust (or other client type):
- In CCH Central, click on Clients, this will open the Find Clients tab below.
- Type in part of the Trust's name or Client Code
- Double click on the client's row in the list presented. This will open up a new tab for the client selected.
- Choose the Addresses tab.
To manage Addresses for a contact of the trust (Solicitor, Banker etc):
- In CCH Central, click on Contacts, this will open the Find Contacts tab below.
- Type in part of the Contact's name
- Double click on the contact's row in the list presented. This will open up a new tab for the contact selected.
- Choose the Addresses tab.
To add a new address
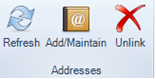
Click Add/ Maintain on the ribbon to view, add, edit, link, or delete an address, subject to task permissions.
To add a new address:
Toggle between the grid and card view by using the Card View option at the bottom of the screen.
- Using Card View: enter the address details in the relevant fields of the “Add a new address here” card.
- Using Grid View: enter the address details in the data entry row ensuring that you enter to the end of the row so that it drops into the grid.
- When the final field has been entered or clicked through, you will get a message: Do you want to link this new address to the current contact.
- Click Yes and choose the appropriate address type.

- The Main (primary) address will generally be the one which will be used for associations in the Trust Information/Synopsis page in the Accounts.
- If there is already a Main (primary) address for the contact or client then you will be asked whether you want to add an end date for the current address and a start date (1 day later) for the new address. Click Yes if you wish to do this, or select an alternative address type.
To select an existing address as a new address type
Click Add/ Maintain on the ribbon to view, add, edit, link, or delete an address, subject to task permissions.
Toggle between the grid and card view by using the Card View option at the bottom of the screen.
- Using Card View: Click in the blue heading to highlight in yellow the address you wish to use as a different address type.
- Using Grid View: Select the row containing the address you wish to use as a different address type.
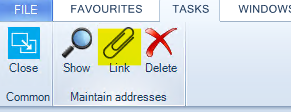
- Then click on the Paperclip in the Ribbonbar to select the Start Date and Address Type for the selected address.

- Click OK when finished. You will get a message: Linking Address Succeeded.
- Click OK.
An association may have an address e.g. the firm of accountants or a bank. The address will be linked to the contact record upon set-up and maintained thereafter.