Uploading Documents

Uploading Documents
Tick the documents you wish to upload, click Add in the Documents group in the ribbon.
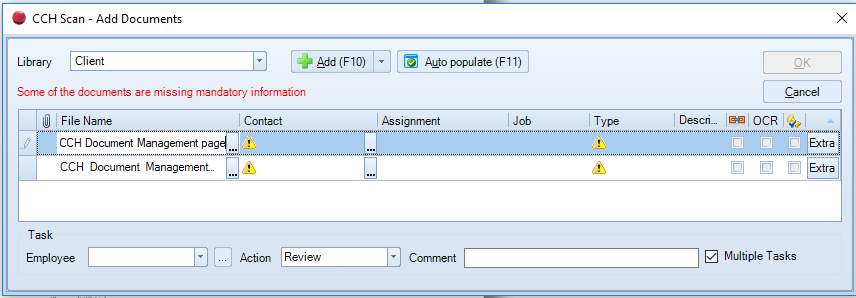
When filing to the Client library the following basic document profiling information is required, other fields may be populated according to your own company policies.
The following fields are mandatory:
- Filename - this can be amended if this was not changed in the preview screen.
- Contact - client or contact(s)
- Type - document type

- Click in the Contact field and enter the name/code of the client/contact that you want to upload the document to and then press Enter or Tab on the keyboard. If a client matching your criteria is found then it appears in the contact field, otherwise the Find Contacts dialog appears for you to search for the client/contact. Alternatively if the required client/contact is one of the last 5 used then use the dropdown arrow and select.
Note: when selecting other Libraries, the profiling options in the add document form will change to reflect the library chosen.
2. Complete the following:
- Assignment - optional depending on your own company policy
- Job - optional depending on your own company policy
- Document Type (mandatory) and the options available will reflect the assignment selected.
- Description - optional depending on your own company policy
-
Repeat action for each document row or use Auto populate
-
If required complete the task section to allocate the document(s) to a staff member in their Document Inbox.
Note: the Task option may be overridden by an automated workflow reflecting your companies document policies.
-
Click the 'OK' button
All documents selected for upload disappear from the Scan screen once the upload is complete.
