The Bill Amounts window

WIP Adjustments
In the Billing Main window, click Bill Amounts  to open the Bill Amounts window. This window also comprises Stage Two in the Billing Wizard.
For example, you can:
- bill the client for all time and expenses or only those entries associated with a particular assignment.
- charge a client for the work done by a particular employee
- bill for certain activities or tasks that have been carried out
The level at which outstanding WIP amounts are allocated to the invoice is entirely flexible.
If you do not want to bill the client the exact value of WIP entered against them in the system, there are four types of WIP adjustments you can make from within the Bill Amounts window:
-
write–off
-
write–on/up
-
Miscellaneous Charge
-
Estimate to Complete
There are a number of fields and buttons in the Bill Amounts window:
|
Button or Field |
What it does.... |
|
|
|
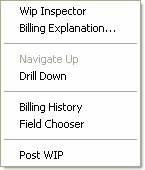
Navigate Up |
Click to drill back up through the WIP display levels after you have drilled down through the WIP items. The drill up and down path is determined by the order of the grouping as you have set it. You can also drill up and down by selecting the option from the right–click menu. |
|
|
Create Estimate |
Opens the Create new estimate to complete window from where you can add a new estimate to the bill. |
|
|
Create Miscellaneous Charge |
Opens the Create new billing charge window from where you can add a new miscellaneous charge or credit note to the bill. |
|
|
Add Assignment |
Click to open the Find Assignment window where you can select another assignment to add to the current bill. The outstanding WIP for the new assignment will be added to the current client's WIP total. |
|
|
Add Assignment for Client |
Click to open the Find Client window where you can select another client to add to the current bill. The outstanding WIP for all the new client's assignments will be added to the current client's WIP total. |
|
|
If you want to display WIP items up to a certain date, select this check box and use the drop-down calendar to select the required date. All WIP items entered after the selected date will be removed from the list. |
|
|
|
Right–click menu options (some of which are also available in the Task Bar) provide you with the following options:
|
|