Creating a draft bill

Ways to create a draft bill
Draft bills are created from the Billing Wizard option on the Task Bar. This option is available from the Client Search window, when you are in the Client page and the Assignment page for the client you want to bill.
Create a draft bill
-
Select the client you wish to produce a bill for and enter the Billing Wizard.

-
In the Billing Wizard – Stage One window review the Invoice Date, Number to be used, Tax Rate and Address/Email address.
If you do not want to accept the default invoice number (which will be allocated when an invoice is POSTED), overwrite it by typing a different number in the Invoice Number field.
The invoice date will default to today's date. If you want to amend this, click in the Invoice Date field and then select a new date from the calendar.
-
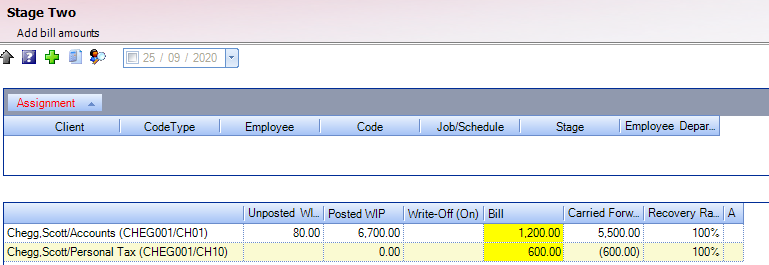
In Stage 2, enter the amount to be billed, written off/on and apply any Estimate to Complete and Miscellaneous Charge lines
-
In Stage Three, select the invoice template you want to apply to the bill from the Style field. Edit the bill text as necessary. Select a different fee template if required from the predefined styles in the list. The templates available in this drop-down list are Microsoft Word templates stored in a network directory. CCH Practice Management comes with a number of default templates. In addition practice specific templates may be available. These are configured for use by the system administrator via Maintenance > System > Document Styles...
NOTE
This Style field will only be available if you have the required security rights. See your system administrator about your security level.
-
Stage Four displays an overview of the bill. Click Submit
 and then Finish to exit the wizard and return to the Billing Main window. The bill is now in a submitted status awaiting review by the Bill Authoriser.
Note
You can select Finish at any point of the Billing Wizard. This will exit the wizard, return you to the Billing Main window and save the bill as Draft.