Authorising and posting an Expense Sheet

Authorise and Post an Expense Sheet
-
Open the Expense Sheet.
-
Click the Authorise
 button .
The Authorisation Status changes to Authorised. -
Click the Post
 button.
The Authorisation Status changes to Posted.
When moving from submitted to authorised mode, the input line is locked. Only the Analysis line is available for editing:

Revert authorisation status
When reverting back to either the submitted or draft mode the following message is returned:
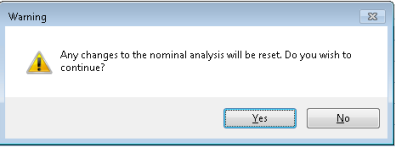
Yes – Deletes the nominal analysis and allows editing of the input line.
No – Leaves the user in Authorised mode.
At this stage the Corresponding Employee Purchase Invoice is also removed.
Deleting expense lines
Input lines can only be deleted when in Draft mode.
Corrections
When performing an expense sheet correction, users are only permitted to add additional input line entries. The adding of additional input line entries automatically creates a new employee purchase invoice entry when either the OK button or Corrections button is clicked.
The corrections button is hidden if the corresponding employee purchase invoice is partly or fully allocated.