Tax Returns

How to create a Tax Return
You can create a new Tax Return by using either of the two methods below:
-
In the Client tab, click the
 tab.
tab. -
In the Tax Returns for box, select the
 hyperlink alternatively you can select the green plus in the top left hand corner of the screen.

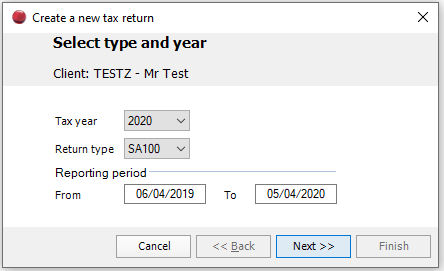
The Create new tax return wizard opens.
-
Specify the following:
-
Tax Year
This automatically completes the Reporting period dates. -
Return Type
Select the type of tax return you want to create. The Contact Type selected (person, partnership, or trust) determines the tax return choices that appear here.
Note: To change the Contact Type click  next to the Client Name on the Client tab. You may need to close and then reopen the client to update the information displayed.
Click Next. This displays three options relating to Roll Forward and creation of a statement of account. If necessary select the options that you want to use.
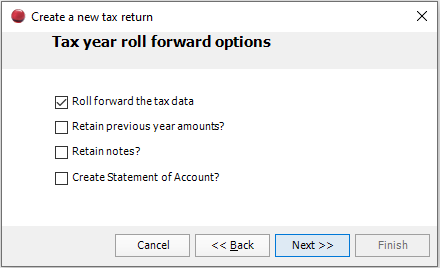
Note: You cannot select the roll forward options unless the client has a previously created tax return.
-
Click Next. If you want to use Workflows, then select a template from the drop-down.
-
Click Finish.
How to Preview a Tax Return
Before you can preview a tax return you must first open the tax return for the year that you want to view.
-
Select the client that you want to open the tax return for. The Client tab appears.
-
Click the
tab.
-
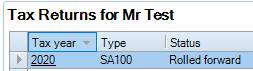
In the Tax Returns for box, select the tax return year that you want to view the data for.
-
The tax return Summary tab appears.
-
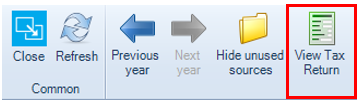
The tax return can be previewed by selecting the view tax return icon in the ribbon bar as shown below:
- Once you preview the tax return in a separate tab you can then use the toolbar to:
- navigate to specific pages
- zoom in or zoom out
- produce a .PDF copy
- send as email
- close
Note: It is also possible to interact with the data on the tax return. For example, if you notice a mistake you can quickly navigate to the data entry area using the actual Tax Return to make the correction. Double-click the section you want to edit when the mouse pointer changes to this 
How to Change the Tax Return Type
-
Select the client that you want to change tax return type. The Client tab appears.
-
Click the
tab. -
In the Tax Returns for box, click the tax year to select the tax return that you want to switch. The tax return Summary tab appears.
-
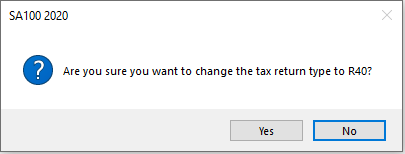
In the ribbon bar click the
 button. A message appears indicating what type the tax return will be changed to.
-
Click Yes to confirm the change.
Note: You can only change the tax return type for tax returns that has more than one tax return type.
Switch between Tax Returns
-
Select the client that you want to open the tax return for. The Client tab appears.
-
Click the Tax Returns tab.
- In the Tax Returns box, select the tax return year that you want to view the data for. The tax return Summary tab appears.

- You can return to the tax return tab in the client's central record at any point to open another tax return year. Alternatively once in the tax return summary screen for a particular tax year, you can switch between tax years using the previous year and next year options in the ribbon bar as shown below:

Roll Forward Types
There are three roll forward options to choose from:
- Roll Forward the Tax Data: Carries forward all narrative information from the previous tax return.
- Retain Previous Year Amounts: Carries forward monetary values entered in the previous year.
- Retain Notes: Carries forward all notes associated with the selected tax return.
Note: you can only Roll Forward the data for clients that have a previous tax return.
Simple Batch Roll Forward
You can roll forward the tax return data for several clients using Batch year creation and roll forward.

-
Select File > Tools > Batch year creation and roll forward year creation and roll forward. The Tax return selection wizard appears with the Select tax year step.

-
Select the tax return year from the Roll forward tax returns to tax year drop-down.
-
Click Next. The Filtering Clients step is displayed.
You can filter clients by:
- Company
- Department
- Office
- Partner responsible
- Assignment Manager
- Assignment Partner
- Manager
- Personal Tax Manager
- Personal Tax Partner
- Personal Tax Team Member
- Team Member
- Click Next. The Client Selection step is displayed.
Do one of the following to select clients:
-
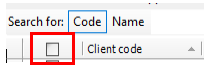
Click the check box next to Client Code to select all clients.
-
Click the check box next to individual clients.
Note: You can only Roll Forward the data for clients that have a previous tax return.
-
Click Next. The Tax return roll forward options appear.
-
Select the roll forward options that apply:
- Roll Forward the Tax Data
- Retain Previous Year Amounts?
- Retain Notes?
- Create Statement of Account?
-
If needed, add Workflow Defaults details. Choose a workflow template from the Select a workflow template to attach to the new tax returns drop down list.
-
Click Next. The Creating tax returns step is displayed showing a list of the selected tax returns including the Client Code, Name, Type, Status and Message details.
-
Click Finish. The Status changes as the tax returns are In Progress, Rolled forward, and then Completed. After the step completes, the Roll forward results list opens in a new tab. You can Print the list, Export it to PDF or Close the tab.
Batch Roll Forward using a Report
The Batch Tax Return Selection and roll forward wizard can also be run from Central’s Find Clients screen allowing improved filtering options.
To run the batch roll forward wizard via Central's Find Client screen:
- Use a relevant report or search criteria to list available clients.
- Select the required clients, either all clients or a sub set.
- In the Tasks Bar select the
 button to run the wizard.
Note:
The Filtering clients step is not used when running the wizard from Central's Find Clients screen. When filtering is required this must be applied in the Central report.
Not all clients selected in the Find Clients screen may appear in the wizard's Client selection step. Only clients with no tax return for the selected tax year appear in this step.
Errors and Exceptions

-
Click the summary text to access the section of the tax return that the information relates to.
What do the icons mean? The icons that appear next to the summary text denotes the following:
|
|
Further information is required to successfully complete and submit the tax return. |
|
|
Recheck the information entered |
|
|
Displays useful messages generated by CCH Personal Tax |


Click on the buttons that run along the top of Summary to filter the text shown. For example, click the Warning button to only display warnings.