VAT Workflow : Quick Start Guide

CCH Workflow
This guide will illustrate and explain how you can use CCH Central Workflow to manage your VAT returns using the standard out of the box CCH VAT Return workflow
CCH Central Workflow is installed as standard via the Central Suite Installer (CSI) install of CCH Central
VAT Workflow
All CCH standard workflows can be found in CCH Central by accessing File > Maintenance > Central Workflow > Standard Workflows
CCH VAT Workflow for your practice
To create a VAT workflow for your practice, open the workflow named '_CCH_VAT_Return', then select 'Save As' on the ribbon

Rename the workflow to reflect your practice name and click 'OK'

This ensures that if any changes are made to the standard workflows by CCH, your amended workflow won’t be overwritten. You can now amend the newly saved workflow
We recommend that for each step in the workflow, you consider changing the responsibility for the step type to be 'Responsibility Type'. This will ensure that when the workflow gets rolled forward to the next period, the tasks created will appear on the correct person’s task list.


Highlight each row to change the responsibility on each step (this should be changed on all 10 steps). Save the Workflow using the Save option on the ribbon.
Responsibilities
As the VAT Workflow relates to the VAT assignment, it reads the responsibility for the workflow at the assignment level. Before setting up the workflow, review the assignment responsibilities.
You can add the assignment responsibility during assignment creation, or by using the bulk update functionality if your assignment already exists. Alternatively, you can view/change the assignment responsibility on an individual level from the main tab within the assignment. This is accessed by selecting the assignment tab from within the client record.

Please note: if no assignment responsibilities exist, the workflow will default to the client responsibility
Add the VAT assignment and job
VAT Assignment Template
To set the VAT Workflow to be automatically available on the VAT assignment, browse to File > Maintenance > Assignment > Assignment Templates
Highlight the VAT assignment, then select the 'Workflow' tab
Move the VAT Return workflow to the 'Available' section
If required, this can be set as the default workflow for this assignment by ticking the 'default' box

The job frequency and algorithm should also be set here on the 'Main' tab

Select 'OK' to confirm the changes
Please note: for VAT, the template will typically be set as quarterly. For individual clients the assignment can be adjusted to monthly or annually depending on the scheme they are on.
If an assignment already exists before the algorithm and frequency are set on the assignment template then they will need to be set on the individual client's VAT assignment. This can also be done using the bulk update functionality
VAT Assignment
To use the VAT workflow, the VAT assignment needs to be added to the relevant client records. This can be done on a one-to-one basis or by using bulk update functionality with CCH Central
Add an assignment at client level
Open the client record and click in the row to add a new assignment

Choose your VAT assignment and click 'Next'

At this point you should check the responsibility set for the assignment. You can also add a job here

Bulk Update
On the client search screen, select the clients that you want to add the VAT assignment to, then choose 'Bulk Update'

- Choose 'Assignments/Jobs'

- 'Details' tab :- Tick the VAT Assignment

- VAT/VAT tab : Check assignment responsibility and add job details here if required

- Confirmation
Click 'Finish' to run the bulk update
VAT Job
Once your VAT assignments are setup, you can then setup a VAT job for each one (if they don’t already exist).
This can either be done on an individual basis by right clicking on the VAT assignment and selecting add job, or using the bulk update functionality in CCH Central (as above)

When using the CCH VAT Workflow, only the first job needs to be created. The workflow will automatically create subsequent periods.

Bulk update
If you already have the VAT assignment setup on your client records but not the relevant job, the process to update jobs on an assignment is very similar to the process described above for adding assignments.
Use the assignment search screen and search for the VAT assignment. Select all relevant clients with the VAT assignment and select 'Bulk Update' on the ribbon
Next, select 'Add Job' in the field name drop down.Run through the rest of the wizard as above to complete the job setup.
Add the VAT workflow to all relevant clients
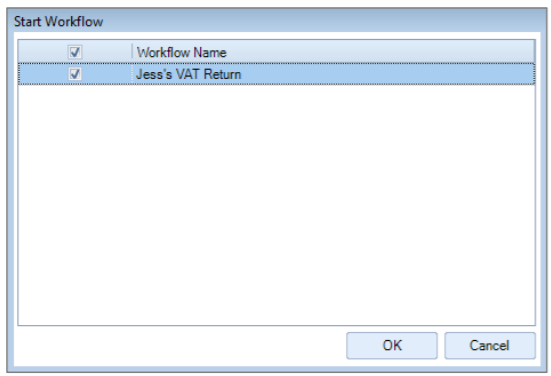
The VAT workflow can now be added to all relevant clients. On an individual basis, right-click on the job within the VAT assignment on the client and select 'Start Workflow'

Select the VAT workflow and click 'OK'
Homepage
- Once the workflow has been added to the job it will appear on the workflow homepage
- To add a workflow homepage, select 'View' on the ribbon and choose a blank view

- Next, select 'Edit' and rename the homepage

- Select 'Customise' and add the Workflows widget

- The workflow screen can be filtered to show only the new workflow that you've just created
- All active workflows for the type you’ve selected will be shown on this screen

- Once the workflow is started, right click on the cog under the relevant milestone to select either pass or fail

- Depending on the type of milestone, you may have the 'Complete Milestone' option here instead
Date view
- To change the view of the homepage, right click over one of the milestones and deselect 'Use Icons'
- The grid will then show the dates when the milestones were signed off and will show if they are overdue, complete, becoming due etc. using the colour scheme at the bottom of the homepage
How does the workflow for the next period get created?
- The workflow will automatically create the workflow for the next period once you get to that particular step in the workflow

- The algorithm and frequency for this is set within the assignment template as shown above
- The current workflow will only be removed from your homepage once you complete the End of Workflow milestone
Task list
- Each of the steps in the workflow becomes a task
- Tasks in the workflow will automatically be assigned to the appropriate person (as defined in the setup of the workflow)
- They will appear on the 'Tasks & Appointments' homepage
- This screen shows all tasks to be completed by that employee whichever workflow they have come from or any ad-hoc tasks that have been assigned

- Select the 'subject' of the task to view the details

- From here you can either mark the task as completed or use the reassign button to reassign the task to someone else
- In some cases where there is a pass/fail option, you will need to make a choice on the required options drop-down menu

- Once a task is complete, the next task in that workflow (if assigned to you) will appear on the task list
Further Guidance
Visit our support site for further information on standard out of the box CCH Workflows - click here
The majority of step types used within the VAT workflow are Central Tasks. Other step types within CCH Workflow can read client data and automate tasks
More detailed instructions for CCH Workflow can be found here