Checklist Completion

The main functionality of the software becomes available once you load a checklist. Select the Client management tab and the client in the client list to view its checklists in the lower grid. Either double click on the checklist to be completed or select it and click on Load checklist. The checklist will be loaded for completion.

When a checklist has been loaded, the ribbon bar tabs are replaced with the single completion tab whose title is the name of the client, the checklist in use and the period end date.
The area below the ribbon bar is divided in two, the area on the left is the navigation panel and the area on the right is the work area in which will be shown the details of the checklist being completed or reviewed.
The panel at the foot of the window is the status bar which shows the name of the user currently logged into the software, the current date and guidance on the control over which the mouse pointer is currently positioned.
Navigation Panel
The navigation panel on the left contains a tree view into the checklists loaded and shows details about the number of questions it contains and comments that have been entered.

Checklists shown in black are available for completion, those shown in grey are inactive, either because you have not yet answered all of the tailoring questions, or because the answers provided in the tailoring questions are such that it indicates that the checklist is not appropriate.
Each top-level checklist and subsection has a pointer to its left and clicking on this will expand or collapse the contents of the checklist.

There are two columns to the right of the checklist name:
Questions
The Questions column contains a progress bar that shows the progress of checklist completion. The numbers on the progress bar show the number of questions completed and the total number of questions. A green bar will indicate the proportion of questions answered in percentage terms.
The system is interactive, so as you answer questions other questions may be activated or deactivated based on the answer you have just provided. Hence, the number of total questions can increase or decrease, and the percentage of questions completed can go down as well as up.
The following image shows that for the Tailoring questions top-level checklist, 7 questions have been answered out of 55 active questions and for the Type of entity subsection, 6 out of 7 questions have been answered.

Comments
The Comments column shows the number of comments that have been entered against questions in the checklist, together with the number of “notes”, i.e. comments that need clearing, and the number cleared shown in brackets.
The following image is showing that for the Tailoring questions top-level checklist, 6 comments have been entered of which 2 comments need clearing and one of these has been cleared. The progress bar shows the percentage of comments needing clearing that has been cleared.

If there are no comments needing clearing, as for the subsection Type of entity, no progress bar is shown.
Icons will also be displayed by the checklists and subsections to indicate if they have been reviewed or if there are potential issues.
Potential issues
When the checklist was designed, some answers to questions may have been flagged as representing a potential issue. For example, if you answer No to a required disclosure. A warning icon will be displayed by the checklist and subsection in the navigation panel to indicate that the checklist contains answers which indicate there is a potential issue:

Review indicator
If a checklist has been reviewed, a red review tick will appear by the checklist:

Loading the checklist for completion
Clicking on the name of a top-level checklist or subsection will result in its contents being displayed in the work area panel. The displayed checklist or subsection will include all the subsections it contains. Hence, if you select a top-level checklist, you will see all the active questions contained with the checklist, e.g. UK GAAP, subject to any filters in place.
Review buttons
There is a panel at the foot of the navigation panel that contains 2 buttons:

These allow you to mark checklists as reviewed and their use is covered in Recording the review of checklists.
Work area
The work area contains the content of the checklist or subsection selected in the navigation area.

The top section of the work area contains a grid that includes headings, subsections and questions.
Subsections are shown in blue and have an arrow to the left of them. You can collapse or expand subsections by clicking on the arrow.
The lower panel of the work area will appear when a question that needs answering is selected. This shows the available answers for the question and you can answer the question by selecting a radio button with the mouse or using the keyboard key identified within the <> brackets.
The work area contains all the information relevant to the checklist, as follows:
Number - the number of the question. Questions are numbered based on the active questions within each top-level checklist. Hence, if you answer a question in a way that causes other questions to be activated or inactivated, the numbering will change. As numbers are allocated for each top-level checklist, the numbering will be consistent even if you are only displaying a subsection of a checklist.
Main questions are numbered starting from 1 and if a question has sub-questions, these will be numbered starting from 1 within the question, for example:

Parts of sub-questions are also numbered from 1 and are shown in the format 7.2.1, 7.2.2, etc.
Text - The text of the question. Hyperlink icons are also displayed following the text if the question has guidance available and if you are showing reasons for the question appearing:
 Displays the guidance, see Guidance for more details
 Displays the reason the question is included or excluded, see Show reasons for more details.
Reference - references relevant to the question.
Comment - this column allows you to enter and view comments and enter clearing text for comments that need clearing. See Comments for more information.
Answer - this column shows the answers provided for each question.
By - this column contains the name of the person who answered the question.
Date - this column shows the date the question was answered.
Two further columns can be displayed showing prior period’s answers. These appear when the checkbox Show previous answers is ticked.
Answering questions
A lower panel will appear in the work area when a question that needs answering is selected. This shows the available answers for the question and you can answer the question by selecting a radio button with the mouse or using the keyboard key identified within the <> brackets. When a question has been answered, the text of the question will appear in grey, the answer details will be displayed, and the selection highlight will automatically move down to the next unanswered question.
Potential issues
When the checklist was designed, some answers to questions may have been flagged as representing a potential issue. For example, if you answer No to a required disclosure. Answers which represent potential issues are flagged with a warning icon in the available answers panel:

In addition, if you answer a question in such a way as to indicate that there could be a potential issue, this will be indicated by the inclusion of the icon by the answer in the checklist display:

A warning icon will also be displayed by the checklist and subsection in the navigation panel to indicate the checklist contains answers which indicate there is a potential issue.

Guidance
Some questions and heading text have further guidance associated with them. This is indicated by the presence of the guidance icon appearing in the bottom right of the cell containing the text. Simply click on the icon to view the guidance:

You may select text within the guidance and copy this using the right mouse click popup menu to enable you to use this text in comments or other documents.
Click OK to close the guidance dialog before proceeding.
Comments
The system allows you to enter comments against any heading or question. You can do this on the face of the checklist by clicking in the comment’s column of a highlighted question. On doing this the comment cell becomes an entry field:

Type the comment and use the Tab key to close the entry field. You can also use the Ctrl + Enter key sequence or click on a question with the mouse to close the edit field. Using Enter within the edit field inserts a line feed in your typing.
The system includes spell checking on the comments you type and, assuming spell checking is active – see Settings, the system will check your typing on closing the edit field. If any errors are found it will display the Spell-checker dialog, showing the text of the comment and a list of suggested corrections:

You can select one of the suggestions, or manually enter the correct spelling in the Change to edit box and click Change to move on, ignore the error or add the word to the dictionary. Your instruction will be accepted, and the system will move on to the next incorrect word, or the dialog will close if there are no further errors. You can also ignore all or change all using the supplied buttons.
After the comment is accepted, a checkbox called Needs clearing appears at the foot of the comment:

If you leave this checkbox without a tick, the comment entered remains a simple comment, however if you wish the comment to be considered a note that someone has to consider and provide an answer or other clearing explanation, tick the checkbox. On doing this the text of the question will turn red to indicate that there is an uncleared comment that needs attention.

In addition, a clearing icon  appears in the bottom right of the comment cell.
Clearing a comment
To clear a comment, click on the clearing icon and the Clear comment dialog will appear:

Enter the text responding to the comment and click on OK. As for comments, the text will be checked for spelling errors if the option is active. The clearing text will be shown together with the person who cleared the comment and the date:

If you have cleared comments you will see the clearing icon on any comments you cleared and you can select this, change or add to your clearing comment. Other users will not be able to do this.
Questions filters
A number of filters are provided to allow you to restrict, or expand, the questions displayed to make completion and review easier and further your understanding of the content of the checklists.
Show excluded questions
In normal use, the system will only show questions that are active for the client and need answering, filtering out inactive questions. The full checklist may contain hundreds of questions that have not been deemed relevant to the client as a result of answers made to the tailoring questions. Indeed, some questions in the tailoring are inactivated if other tailoring question answers indicate they are not relevant.
To enable you to understand the full content of the checklist, and review the questions that have been excluded, tick the Show excluded question checkbox. This deactivates the excluded question filter and hence includes inactive question in the checklist displayed. These are shown in green text and will result in the question numbers being reallocated.

Show questions with comments
Ticking this filter will restrict the display to only include questions with comments attached to them.

Note: when this and other filters that restrict the contents displayed are active, a filter icon is displayed by the checklist in the navigation panel as a reminder that 32 CCH IC – March 2020 you are not seeing all the active questions within the checklist.
Comments for clearing
Ticking this filter will restrict the display to only include questions with comments that need clearing, and which have not yet been cleared.

In this case, question 16 included in the previous screenshot is not shown, although it had a comment associated with it as the comment did not need clearing.
Show unanswered only
Ticking this filter will restrict the display to only include questions that have not yet been answered. For this purpose, not answered includes questions that have been answered but contain a comment that needs clearing. When this filter is in place, questions will be removed from the checklist display as you answer them.
Show reasons
By default, the system does not show the icon that gives you access to the reason why the question was included. Ticking this filter causes the reason icon  to be displayed.

Click on the icon to display the reason in the Why asked dialog:

If you have selected to show excluded questions and show reasons, the reasons icon for excluded questions will show the reason why the question was not asked:

Review aids
A number of aids are provided to assist you in reviewing the checklist. We have covered two of these above, the filters Show questions with comments and Comments for clearing however, there are two other ribbon groups providing review aids, Answer filters and Previous years.
Answer filters
Yes
Ticking this filter will restrict the display to only include questions that have been answered Yes.
No
Ticking this filter will restrict the display to only include questions that have been answered No.
N/A
Ticking this filter will restrict the display to only include questions that have been answered Not Applicable.
Other than above
Ticking this filter will restrict the display to only include questions that have been answered with an answer other than Yes, No or Not Applicable.
Potential issues
Some answers to questions within a checklist may have been flagged as representing a potential issue. For example, if you answer No to a required disclosure. Ticking this filter will restrict the display to only include those questions which have been answered in such a way as to indicate that there may be a potential issue.
Different to prior year
If you have prior year answers recorded on the system, this filter will restrict the display to only show those questions which have been answered differently in the prior and current period. This is best used in conjunction with the Show previous answers option referred to below to include the previous period's answer in the display.
Previous periods
Show previous answers
If you tick this option, the system will include additional columns showing the answers provided in the previous one or two periods:

This option may not be available until you have answered all questions in the checklist. This is controlled by the system manager in System settings.
Show previous comments
Ticking this option will result in the display of the prior period’s comments within the Comments column appended to any current period’s comment and headed with Comment dd/mm/yyyy to show the period end date the comment related to.

Copy previous year answers
This option allows you to copy the answers from the prior year for any question that has not yet been answered in the current year. It will also copy all comments and prefix them with [Copied from prior year]. The “needs clearing setting” is also replicated in the current year.
On selecting the option, you will be asked to confirm your instruction:

If you indicate that you wish to continue the answers will be copied and will appear in the display:

Notes: the copy is only carried out for the displayed questions so it can be used on a subsection of the checklist only. It is anticipated this facility would normally only be used to copy either tailoring questions or the main checklist but not both.
Find
The Find option in the Search group of the ribbon bar allows you to search for text in either questions or references. The search is carried out within the checklist details currently displayed in the work area. Click on Find and the following dialog will be displayed:

Enter the string of characters to search for in the Find what field. The system will search for this in question text by default, if you wish to search in question references, select this from the dropdown list. Click on Find next to commence the search. The system will search for the string from the position of the currently selected question and highlight the first question found containing the string. The Find dialog will remain on the screen to allow you to click on Find next if the question highlighted is not the one you are looking for. If you have found the question you are seeking, click Cancel.
Find next
Having carried out a find, the text last searched for appears in the status bar:

If this is displayed, you can select Find next in the ribbon bar, or press F3 to commence a new search for the text. As with find, the search will commence at the currently selected question.
Jump to next unanswered question
The Jump to next unanswered question option allows you to bring into view and select the first unanswered question following the question that is currently selected. This can be used, for example, to select the first unanswered question when you open a checklist.
From here, as you answer questions the system will automatically move to the next unanswered question.
Report
The Report option in the Other section of the ribbon bar allows you to preview a report containing the data currently displayed in the work area and print or export the data.
Select the checklist and any filters appropriate to the data you wish to report on and select Report. The system will display a dialog asking if you wish to include all active checklist, a manual sign off sheet and offer the default completion and review text for this.

If you wish to only include the displayed checklist questions in the report, do not tick the option Include all active checklists. If you wish to include all active checklists, e.g. Tailoring questions and the FRS 102 checklists, tick this option.
If you wish to include a manual sign off sheet, tick Include manual sign off sheet, amend the default text if this is not appropriate and select OK. The system will generate and display the report. The report will contain all of the information requested, including comments and answers. If you have included inactive questions, these will be shown with “Inactive” in the comment column if one or more question has been answered in the checklist.

The toolbar at the top of the window provides buttons to allow you to navigate through the report:

When displayed the report will be in Print Layout mode paginated as it would be if printed. You cannot search the text of the report in this mode. If you wish to search the contents of the report, click the Print Layout toolbar button to deselect it.
Exporting a report
To export the report, select the drop-down arrow next to the export icon. This will present 3 export options:

Select the format to be exported to, enter the name and location of the file to create and click Save. The file will be created and opened in the associated program.
Producing a copy of the full checklist for documentation or manual completion
If you wish to produce a copy of a checklist containing all questions, create a new checklist and load it for completion. The main checklist sections, e.g. FRS 102 will be shown in grey as tailoring questions are not fully answered. Select the checklist and noting will appear in the work area however if you select Show excluded questions, all of the questions in the checklist will be displayed in green. Select Report to produce a report containing these. In this case, as no questions have yet been answered, “Inactive” will not appear in the comment column against the questions.
Recording the review of checklists
Two review buttons are present in a panel at the foot of the navigation panel:

The Filter review button  allows you to filter the checklist tree to only show checklists and subsections that have not yet been reviewed and the Review button,
  allows you to record your review of a checklist or subsection. The Review button will only be active if the selected checklist or subsection has been fully completed, or if you select a checklist or subsection that you have marked as reviewed.
Recording your review
On completion of your review, select the top-level checklist, or subsection you have reviewed and click on the Review button. A red tick will appear by the checklist or subsection in the tree. If the item you marked as reviewed has subsections that are not yet marked as reviewed, these will also be marked as reviewed by you.
From this description, you will appreciate that it is possible to have different users record their review of different sections of the checklist.
Reversing review
If you wish to reverse your record of a review, select a checklist or subsection that you have marked as reviewed and click the Review button. The system will ask you to confirm your action:
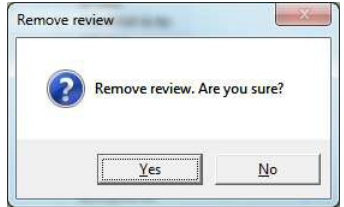
If you click Yes, the record of your review will be removed.
Display checklists and sections needing review
Click on the Filter review button and the checklist tree in the navigation area will be refreshed to only include checklists and subsections that have not yet been reviewed. Click on the button again to remove the filter.
Displaying review details
Details of reviewers and the date of review are included in any reports created using the Report option. It is also possible to view the review details in a dialog by selecting the hyperlink shown in the Reviewed by column of the list of checklists:

On selecting the hyperlink the Reviewers dialog will be displayed:

If only one person has recorded review details in a checklist group, their name will be shown in the text of the hyperlink in place of Reviewers.
Close checklist
Select this option in the ribbon bar to close the loaded checklist and return to the client list.