Integration with CCH Accounts Production

Data transfer between CCH Accounts Production and CCH Audit Automation where the nominal codes match
Import TB from CCH Accounts Production into CCH Audit Automation
If the nominal codes in CCH Accounts Production and CCH Audit Automation match then the Update from CCH Accounts option can be used to update the trial balance in audit.
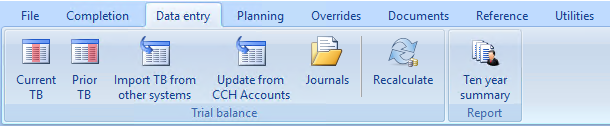
If any nominals codes have been created in accounts prodution the user will be promted to set up the additional codes in audit as part pof the update process.
Update journals (created in CCH Audit Automation) into CCH Accounts Production
To transfer journals to CCH Accounts Production that have been posted in CCH Audit Automation the Update Journals to CCH Accounts button on the Utilities menu can be used

The user will be promoted to select if they want to include the journals as journals or audit journals in accounts production.

Other case of data integration between CCH Accounts Production and CCH Audit Automation
When the nominal codes in CCH Accounts Production and CCH Audit Automation do not match, the process is as below:
Initially both CCH Accounts Production and CCH Audit Automation need to be configured for manual Trial Balance transfer.
Once this is done any Trial Balance can be transferred using the route in C below and journals can be posted back from CCH Audit Automation as described in D.
One off task in Accounts Production - Create structures for the file that needs to be exported and imported
Export file structure
1. Run Central with Accounts Production and log in.
2. Select Maintenance > Accounts > Import/Export definition > File structure
3. Ensure that the radio button 'Create Mapping Structure' is selected.
4. Enter a name for the mapping file “Audit Automation Export”.
5. Make sure Trial Balance is selected in the 'Mapping Structure Type' and the 'Comma Separated' radio button is selected.
6. Enter 7 in the 'Number of fields' box using the scroll buttons.
7. Select the Accounts Production Field Names from the drop down for each column so that they match those shown in the following screenshot.

8. Once the screen appears with the same information as above, click on 'Save' and then close the screen.
Import file structure
1. Enter a name for the mapping file “Audit Automation Import”.
2. Make sure Transactions is selected in the 'Mapping Structure Type' and the Comma Separated radio button is selected.
3. Tick the 'Has headers' checkbox and enter 1 in the edit box to the right of this.
4. Enter 6 in the 'Number of fields' box - using the scroll buttons.
5. Select the Accounts Production field names from the drop down for each column so that they match those shown in the following screenshot.
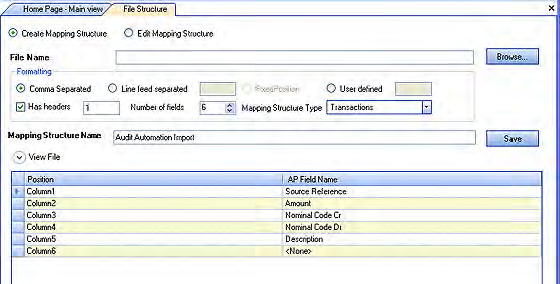
6. Once the screen appears with the same information as above, click on 'Save' and then close the screen.
One off task in CCH Audit Automation
1. Load CCH Audit Automation and log in as a system manager.
2. Select File > System options then the complete the third-party import options as follows:
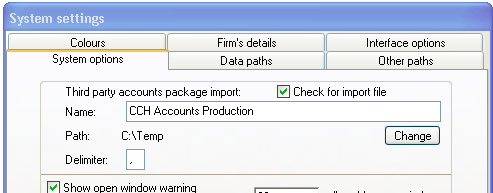
3. The Path is the link path that you will use to store the Trial Balance and journals to be transferred between CCH Accounts Production and CCH Audit Automation and should be a path all users can access.
4. Click on 'OK'.
When you wish to export a Trial Balance to CCH Audit Automation in CCH Accounts Production
1. Open the client to be exported in CCH Accounts Production 2.0. Select the current accounting period.
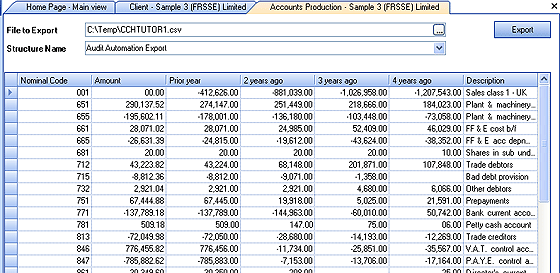
2. Click on 'Export' in the functions panel.
3. Click in File to Export, browse to the path provided for the link “C:\Temp” in the above example. Enter the code of the client in the File name. CCHTUTOR1 in the example below and click 'Save'.
4. Enter “Audit Automation Export” in Structure name by selecting it from the drop down.
5. The details of the file that will be created will be displayed. Click on 'Export' and the file will be created. Click on 'Add CCH Audit Lock' in 'Actions' to lock data entry.
In CCH Audit Automation
1. Open the client for which the data has been exported and the system will display:
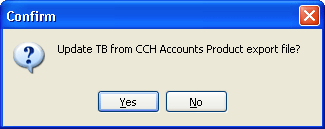
2. Click on 'Yes' and the Trial Balance will be imported.
3. Once the Trial Balance has been imported the Trial Balance transfer file will be renamed so it will not be offered again.
If there are any errors during the import, you will be advised of these and any difference will be taken to suspense. You may then correct the error and either manually re-allocate suspense, or repeat the export/import process.
Transferring journals from CCH Audit Automation to CCH Accounts Production
1. Enter the journals and mark them as agreed with the client.
2. In the Utilities menu select 3rd option CCH Accounts Production journal posting file… This option is named using the third-party product entered in B so if you entered a different name there this option will be named accordingly.
3. The system will create the export file and ask you to confirm that you are happy to mark the entries as exported. Provided that you did not receive any errors click on 'Yes'.
4. This process will create a file in the link folder, C:\TEMP, in our example in B above, named with the code of the client and an extension of “.PRO”.
In CCH Accounts Production
1. Load the client and accounting period to which the journals are to be posted.
2. Click 'Import' in the functions panel.
3. Select Transactions as the import type.
Note: This is very important as importing transactions appends the entries to those that currently exist. If you leave this as Trial Balance then running the import would clear the trail balance, deleting all existing transactions, before importing the journals.
4. Leave the 'Mapping' name as <None>.
5. By Structure Name select Audit Automation Import from the drop down.
6. Click on the 'Browse' button to the right of File to Import and select the file that you have exported from CCH Audit Automation. This will be in the link folder and named with the code of the client and a suffix of “.PRO”. The file will be loaded and displayed in the grid.
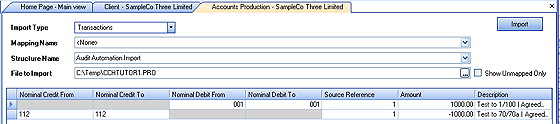
7. If any codes using the export file to do match existing codes in Accounts Production, the 'Nominal Credit To' or 'Nominal Debit To' will be blank and you can either enter an existing code that the amount should be posted to, or abort the process, create the missing codes and run the import again.
8. Finally, click on 'Import' to complete the process.