Themes

Introduction
CCH Accounts Production is shipped with a theme, which displays the styles available when printing or previewing the Financial Statements.
The CCH theme cannot be amended, but a copy may be taken; this may then be amended to suit the organisation and assign it to all or some clients. There are twenty extra styles available for use to setup if required. Once a theme has been created it will then be applied to a client or many (all) clients through the Job Themes screen.
To view or create a Theme
To view the CCH default theme, create a bespoke theme or view a bespoke theme, navigate to: File > Maintenance > Accounts > Themes
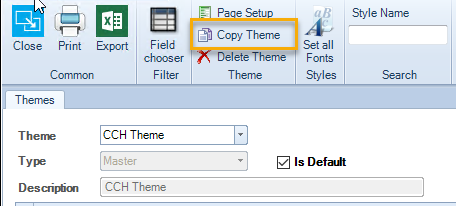
Choose the Theme, e.g. CCH Theme
- Select Copy Theme from the Ribbon.

- Rename Theme to that required e.g. your organisation's name
- Type will display 'Practice' for your global bespoke theme or “Client” for a client specific theme.
- Rename Description.
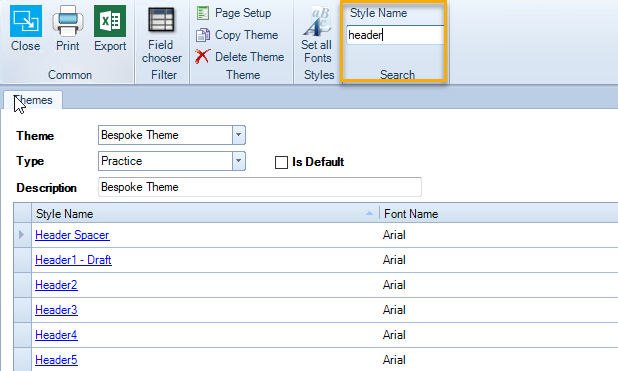
Once done, the hyperlinks may be accessed to change attributes. There is a search box on the ribbon to filter according to the search word.

Click on the hyperlink of the Style Name that is to be changed, make the required changes, repeat for all Styles to be amended. Click OK when finished.
To define a default Theme
One theme may be specified as the default theme using the checkbox shown below:

This default theme will be selected during the accounting period creation step of the new Client Creation Wizard.
Applying a Theme to a client / clients
Once a theme has been created it will then be applied to a client or many (all) clients through the Job Themes screen. link: Job Themes and Themes
Useful Information! Print company name exactly as input to Statutory Database - see below
Print company name exactly as input to Statutory Database
The CCH Master formats present the company name in the format header in upper case by default. Sites that wish to present the name exactly as typed in the Statutory Database (#cd2 and #cd3) may do so as follows:
Input a configuration key via Maintenance > User Defined > Configuration
Key Name = CD2CD3PrintAsTypedInStatDB
Value = 1
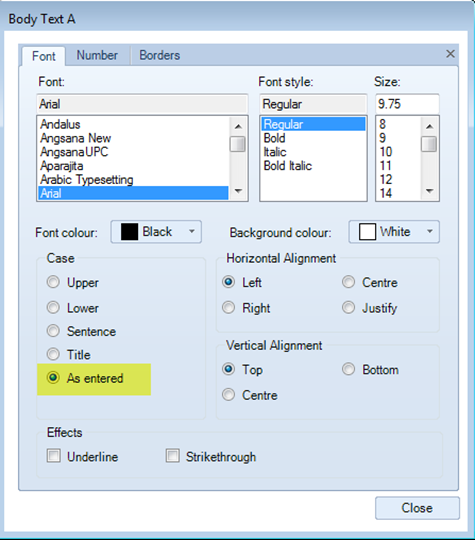
Within Maintenance > Accounts > Themes, ensure the Style being used is set to Case = "As entered"

