The Associated tab

The Associated tab on the Supplier page is where you can view and create links between suppliers and contacts in your database. From here you can create a link from the selected supplier to an existing contact, or create a new contact as you define the relationship. For example, if you add an organisation to the database as a supplier, you will probably want to add an association to an actual person who will be your contact point for that organisation, or create a link to the director. These associations will then appear for selection when you create a letter, bill or mail merge for the organisation so you are addressing it to a person.
Note: if you are using the CorTAX SA link, you need to create an association that you can specify to ensure that only the contacts linked to the supplier by that association are available for selection
When you first access the tab, you will see a series of cards, one for each contact associated with the selected supplier. You can click the double arrow  on each card to expand or shrink the card. Click this icon to expand the field to view the nature of the relationship.
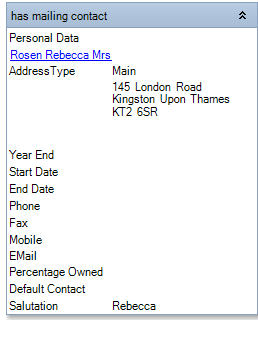
When a link is made for a contact in this tab, a reciprocal entry is made in the Associated tab of the contact you have defined as an association. You can click the name of any listed associate to jump directly to their Contact page.
When viewing the associations in this tab you can filter the associations displayed by changing the selection in the Relationship Types list box. For example, if a supplier has a long list of associations, you may choose to select 'has bank...' link/'is bank of...' link from this list to view only the associations that fall within this relationship category.
The Add button allows you to add a relationship with a contact already in the system. This displays the Associate Existing Contact window. When adding a new association you need to select the contact to associate with, and then define the relationship between the two parties.
Clicking the Add New button allows you to add a relationship with a contact that does not exist in the database. This displays the Associate New Contact window.
If you want to view the address of the associations, check the Show Addresses field. Check the Show Notes field if you want to view the notes that have been added to the association in the Main tab of their Contact or Client page. If you have the notes displayed you can click them to open the note.
Note: to view the addresses and notes you must have the associates expanded.