Set up Extra Fields

How to setup an Extra Field
- On the main menu click File > Maintenance > User Defined > Extra Fields
-
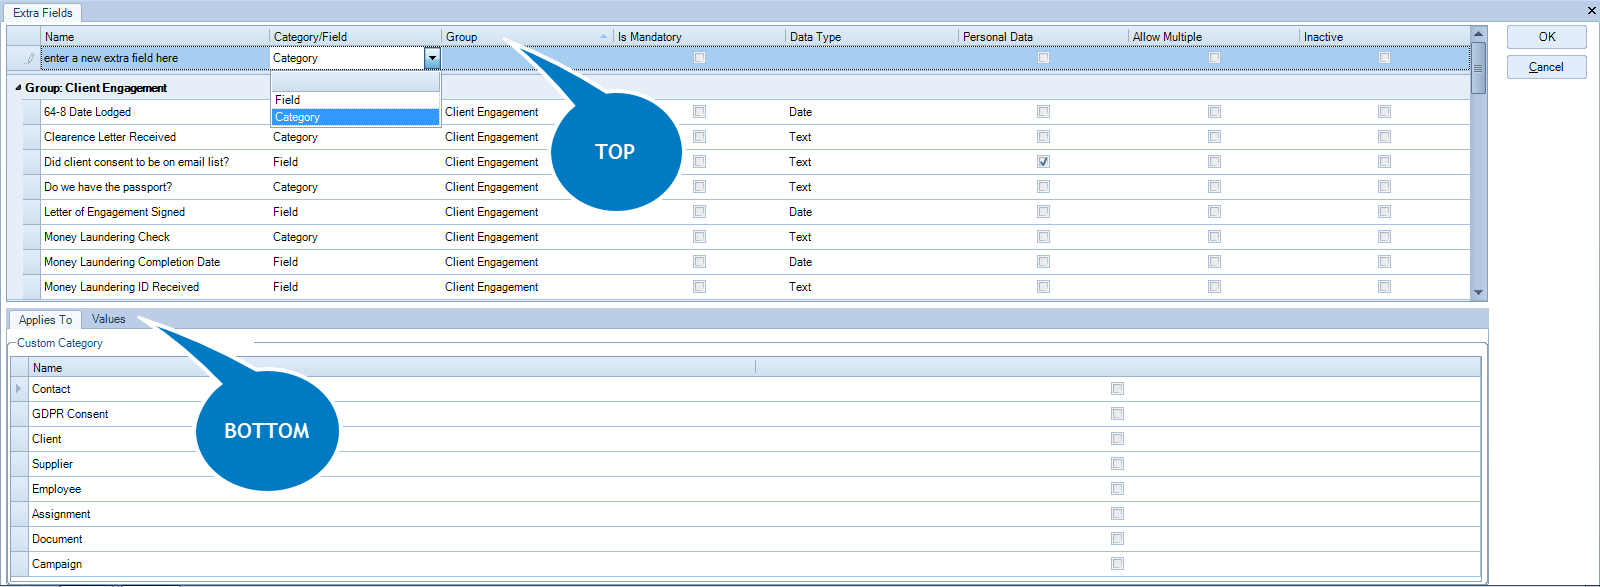
The window is split in two grids as shown below.
-
At the top row add the name of the Extra Field, for example PAYE reference or Pension provider
-
Click on the Category/Field column, from the drop-down list choose whether it is a Field or a Category:
-
A Field records one piece of information.
-
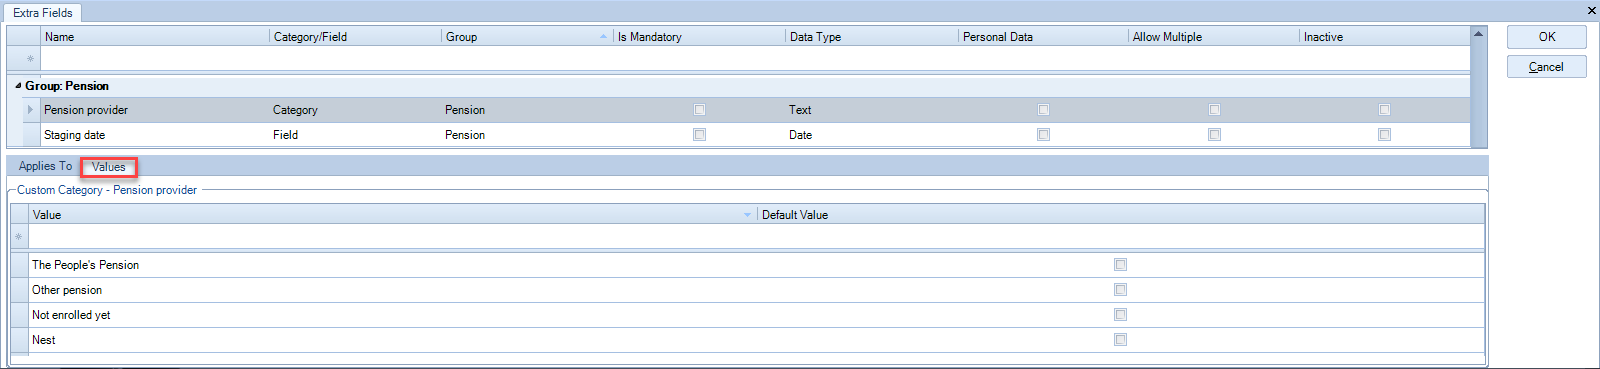
A Category records a list of options set up by you. For example: if the extra field is Pension Provider, the category will define values for this field which could be: Nest, The People's Pension, Not Enrolled, etc.
5. Click on the Group column, from the drop-down list choose which Extra Field Group the Extra Field belongs to.
6. Select the check box in the Is Mandatory column if you want the field to be mandatory in all areas where it is displayed.
7. Click on the Data Type, from the drop-down list choose the type of data which will be recorded:
-
A Field records one piece of information which can be set as a flag, a text, a date or a number.
-
A Category records a list of options which can be set as a flag, a text or a number.
8. Select the check box Personal Data when the Extra Field relates to personal data. The icon  will appear when the field is displayed.
9. Select the check box in the Allow Multiple if you want to allow the user to choose more than one option under the category field. Following the example above: if Allow Multiple is checked then the user could choose more than one option.
10. Select the check box in the Inactive when the extra field is not in use.
11. At the bottom grid, on the tab Applies To, select the boxes of the areas where you want to display the Extra Field. You must choose Contact and the other areas you want it to be displayed.
12. If the Extra Field is a Category, at the bottom grid, on the tab Values, add the options of the Category at the top row as below. If you want to have one of the values as default check its box.
13. Press enter to save the setup of the Extra Field.
14. Click  to save the data and close the Extra Fields windows.
15. To set up additional fields repeat steps 1 to 14.
Caution! You must be careful when editing or deleting an existent Extra Field to prevent loss of information.
When an Extra Field is not in use, check its Inactive box to hide the field from the areas where it was setup to be displayed