CCH Central Suite 2023.1 Update Guide

Introduction
This guide explains how to update an existing install of the CCH Central Suite to the latest version 2023.1 (including Service Packs and Hotfix) using the Central Suite Installer (CSI).
Note: It does not describe how to add an additional product to an existing CCH Central Suite. If you are licensed for any additional Central Suite products that you have not yet installed, it is recommended that you complete this update and then follow the CCH Central Suite: Install New Product Guide which describes how to add a new product.
Microsoft .NET Framework 4.8
CCH Central Suite 2021.3 and above requires Microsoft .NET Framework 4.8 on all servers and computers that host or run the software. The CSI will check for the presence of Microsoft .NET Framework 4.8 when it is started and if it is not found will offer to install it.
-
Further information on installing the framework, including preparation and how to install it directly from Microsoft, is available in our knowledge article CCH Central : .NET – Updating to Microsoft .NET Framework 4.8
SQL Server Native Client 2012
Note: If you are licensed for CCH Audit Automation SQL then all client devices require SQL Server 2012 Native Client be installed in order for the module to function. If you have previously installed the SQL Server 2012 Native Client, then no further action is required.
Microsoft SQL Server 2008/2008 R2/2012/2012 R2 not supported
The following SQL Server versions are end of life:
- Microsoft SQL Server 2008/2008 R2: 9th July 2019
- Microsoft SQL Server 2012: 10th Oct 2022
Before installing this update, you should ensure that the version of Microsoft SQL Server you are running is a supported version.
Further information is available here:
- Retirement of Microsoft SQL Server 2012 FAQs
- Retirement of Microsoft SQL Server 2008 and 2008 r2 FAQs
- Check the version of Microsoft SQL Server installed
- Upgrade SQL Server Using the Installation Wizard
Useful Information! Click here for further details on Microsoft SQL Server 2012
Microsoft SQL Server 2017/2019 & CLR Strict Security
SQL Server 2019
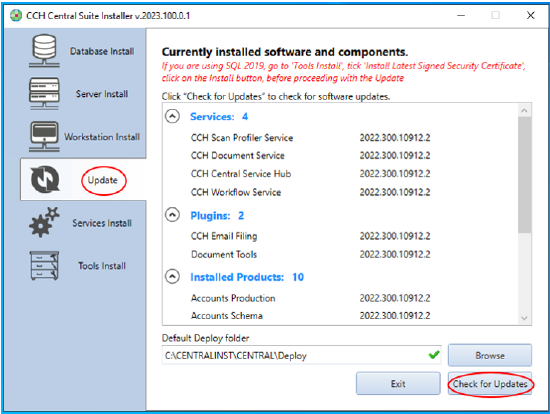
From the release of 2022.2 Service Pack 1 and onwards the process for installing the CCH Central security certificate for CLR signing has changed and is now prompted for when installing the update via the Update tab of the CSI. If you are using SQL Server 2019 and have previously installed the certificate for CCH Central CLR assembly signing via the Database Install tab of the CSI then the option to install the certificate has now moved to the Tools Install tab of the CSI.
Note! The "Cer_CCH_Central" Signed Security Certificate installed by 2022.1-2022.2 into the Master database expires on the 5th of August 2022. If you are using SQL Server 2019 you must install the Latest Signed Security Certificate issued in the 2022.2 Service Pack 1 and later releases. This must be done once you have completed/secured your SQL Server database backups and before the normal CCH Central update process to ensure the certificate is in place before any database upgrade is performed. Once installed the new Cer_CCH_Central certificate will expire on 07-06-2025 at 14:58:41.000. This process only needs to be performed a single time between now and 08-06-2025.
To read how to install the latest Signed Security Certificate, click here.
Useful Information! Click here for further details on CCH Central and SQL Server's CLR Strict Security feature
SQL Server 2017
We are not currently supporting the CLR Strict Security feature within the CSI. Please view the link above in Useful Information for more details.
Database Upgrade
As usual, a database upgrade will be required when starting the software for the first time. For 2023.1, the nature of the upgrade means it will take a reasonable amount of time to complete. Please allow for this and do not interrupt the process once it has started.
Before You Begin
Checking your CCH Central suite version
The CSI can update any version of the Central Suite from version 2022.1xx and above. To confirm the version of your Central Suite proceed as follows:
- Start the CCH Central Suite
- From the Home page click the File > Help > About

- The About CCH Central windows will appear with the version number shown at the top. The image shows version 2023.100.10404 as an example
Ensuring the CCH Central suite is not in use
- Ensure all users are logged out of the CCH Central Suite
- If you make use of the CCH Microsoft Office plug-ins, you must close all Microsoft Office suite products (such as MS Word, MS Excel, MS Outlook etc.) on computers that use the CCH Central Suite, before proceeding with this update
- Ensure you allow enough time for carrying out the update including the CCH Central database upgrade, which depending on the size of your database, may take a significant amount of time
Securing Database Backups
- CCH Central and CCH Document SQL Server databases
Note: It is essential that these backups be time synchronised, with the Document database backup taken immediately after the Central database backup and whilst CCH Central and any related CCH plugins are not in use, and therefore no data is being added to the system.
Where to Run the Central Suite Installer (CSI)
The CSI MUST always be run on the server / computer that holds your CCH Central program folder (by convention named Deploy). If you do have more than one CCH Central program folder then each one must be updated in turn, before moving on to the database upgrade.
In addition to program folders, the CCH Central Suite includes a series of components referred to as services. If the CCH Central Windows services are on a server / computer that is different to the on hosting the program files, you will need to run the CSI a second time on that computer / server, and on any other server hosting a CCH Central Windows service(s). Typically, these services will be on the computer / server that holds your SQL Server Central database, so if you have a separate dedicated SQL Server it is likely that the services will reside there.
Note: You do not need to run the CSI on every workstation (end-user device/computer) that runs the Central Suite unless the Deploy folder is held locally (very rarely) or unless the Microsoft pre-requisites are to be updated (the initial launch of the CSI will deploy any pre-requisites and then it can be closed). Further, if the workstation is already making use of the Accounts Productions/Audit Automation Travel feature, then updates are deployed via the Central Loader mechanism and therefore use of the CSI on these devices is not required.
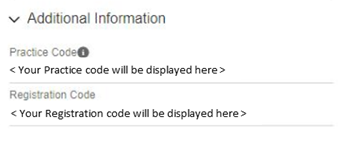
Customer Code and Registration Code
In order to download the latest Central Suite Installer you will need to know the Customer Code and Registration Code of the account that you are registered for. These details should be known by your system administrator(s) and were supplied in your Welcome Pack when the software was first purchased. In the unlikely event that you do not know what these are and they cannot be located in your practice, you may log a case and ask Support.
Connecting to the CSI
- Login to our Support Portal
- Click on the Software Releases tile
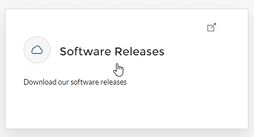
- You will see
then Click on the CCH Central Suite Installer (CSI) tile
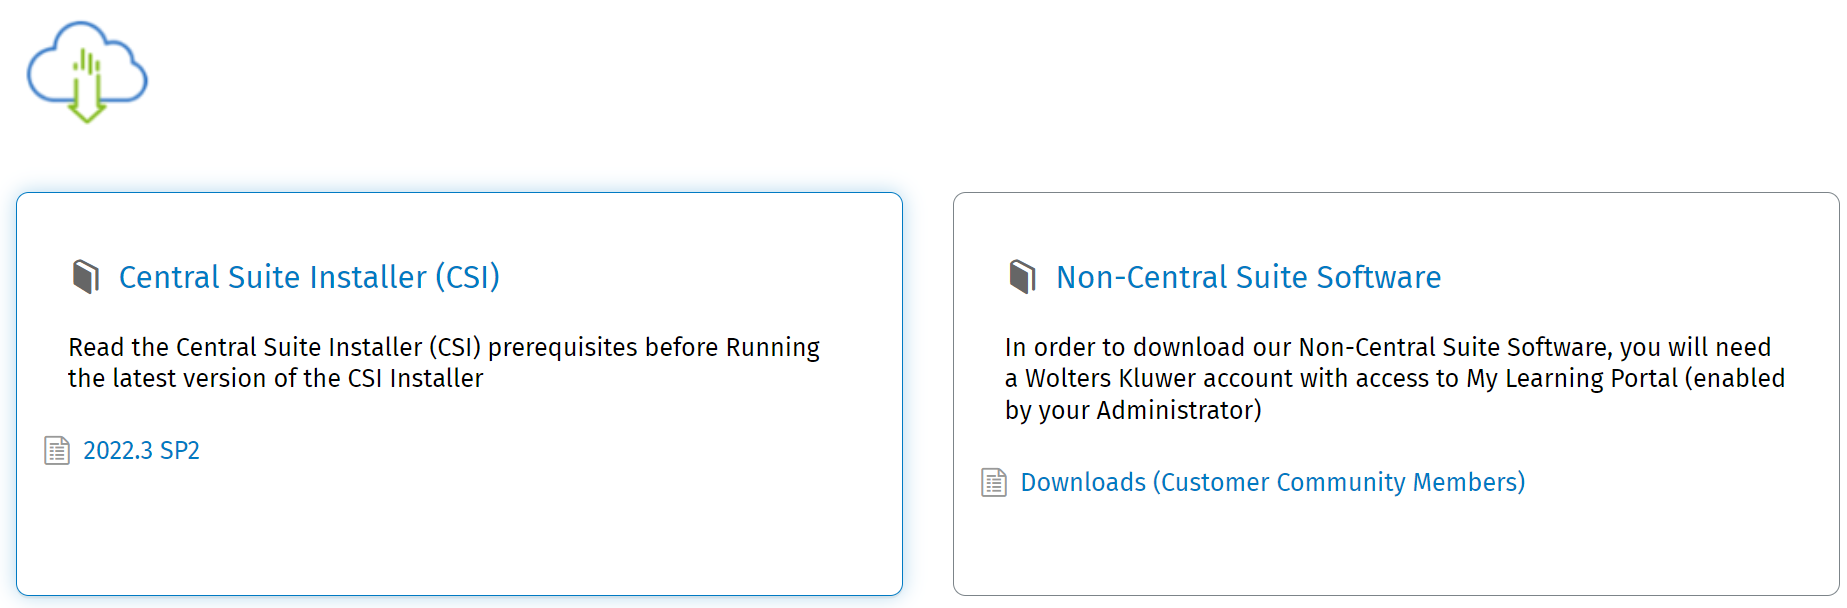
- The Latest Central Suite Releases page will appear ( note: version number will be different)

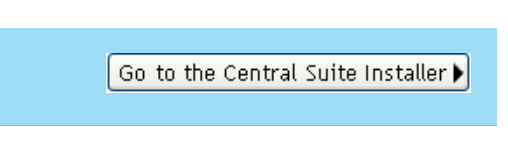
- Click the Latest version and the CCH Central Suite Installer (CSI) page will appear.
- After reading the page information, Click on the 'Go to the Central Suite Installer > ' button in the bottom right-hand corner of the screen
- The setup.exe file will be downloaded
- The setup.exe file will be downloaded
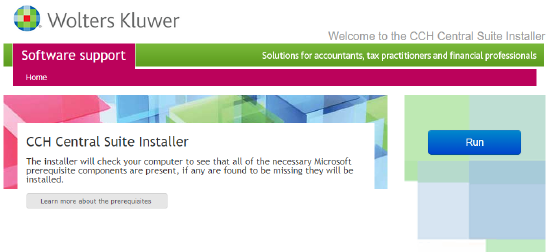
- Launch the setup.exe
- > The main CCH Central Suite Installer welcome screen will appear:
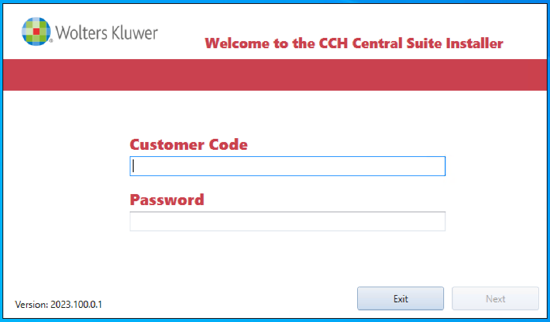
- Enter your Customer Code (previously 'Client Code' ) and Registration Code (also know as 'Password') and click Next to Login to the CSI
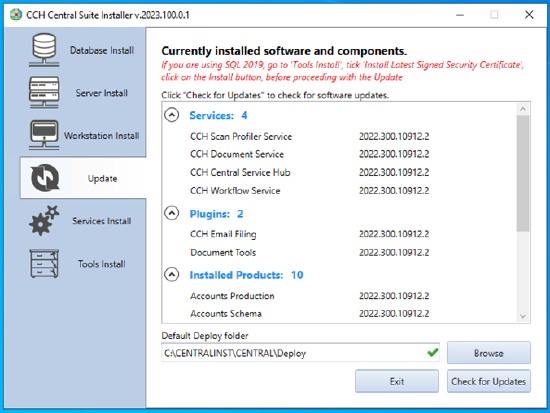
- > The CSI will start and the Update tab will be presented:
Installing the Update
Note: this section must be completed regardless of which products you are licensed for and regardless of your Central Suite installation configuration.
This section describes how to install the update starting from the position of the CSI Update tab being displayed, having logged in with Practice Code and Registration Code.
Updating the CCH Central Suite Programs
The CCH Central Programs update must be carried out on the server / computer that holds your CCH Central Suite program folder, by convention usually referred to as the Deploy folder.
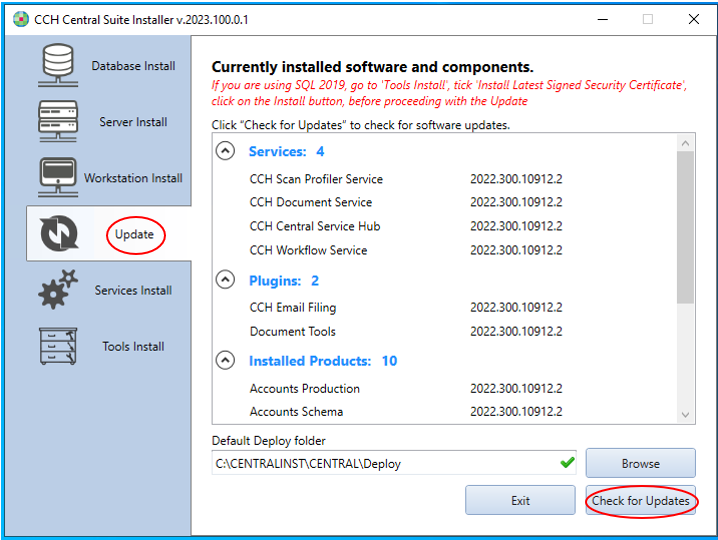
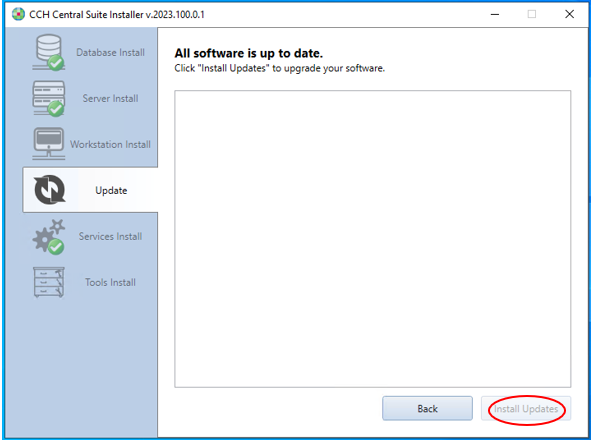
- From the Update tab, click Check for Updates
- > A list of the new updates will be presented:
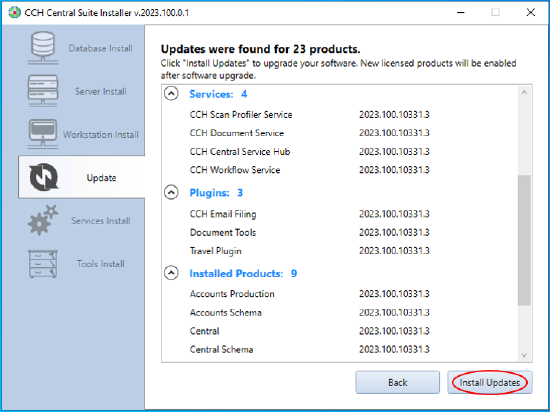
Note: in the image above the products and product version numbers are for purposes of illustration only and will not match the products and product versions presented by your system.
Products for which you are licensed but are not currently installed will show at the top of the window under the heading of New Licensed Products. If you have any products in this category, it is recommended that you complete the update and then follow the CCH Central Suite guide that describes how to add a new product.
- Ensure any New Licensed Products are not ticked / selected for installation
- Click Install Updates
- If the question 'Are you sure you want to skip the installation of these products?' is presented, answer Yes
- > The install will now begin. The window changes to display progress information
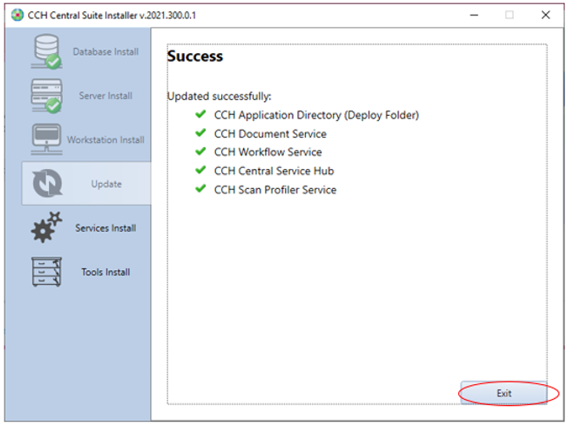
- When the update is complete the progress information will be replaced by the Success window:
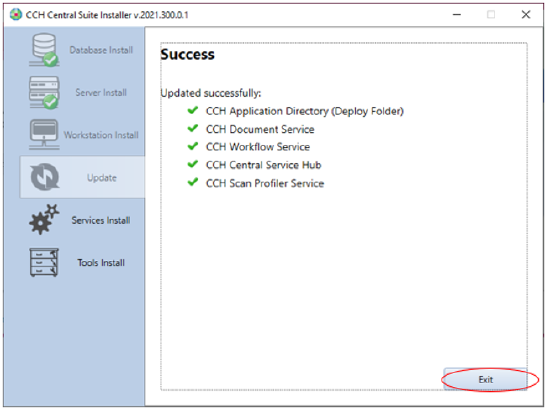
- Click Exit, and then Yes when asked ‘Are you sure you want to exit?’
- Finally, close the web browser session that is still displaying the home page of the CSI
Important: if you have a separate SQL Server that holds your Central database continue with section Updating the Central Suite Services, otherwise go to section CCH Central Database Upgrade
Updating the CCH Central Suite Windows Services
Note: Complete this section only if you either have a separate SQL Server hosting your CCH Central Suite databases and CCH Central Suite Windows services or a dedicated application server to house your CCH Central Suite Windows services.
The CCH Central Suite Services update must be carried out on the server / computer that holds your CCH Central Suite database(s) and, if CCH Scan is present, the computer that holds your OCR Service, and any dedicated application server whose sole purpose is for the hosting of the CCH Central Suite Windows Services. In some cases, this will be multiple computers.
Start the CSI as described in section Connecting to the CSI
Note: The message Please specify the location of your Deploy folder should be ignored and the location left blank.
- From the Update Tab, click Check for Updates
- > A list of the new updates will be presented
- Click Install Updates
- > The installation will now begin. The window changes to display progress information
Note: the product and product version numbers in the provided screenshots are for purposes of illustration only and will not match the products and product versions presented on your system.
- When the update is complete progress information will be replaced by the Success window:
- Click Exit, and then Yes when asked ‘Are you sure you want to exit?’
- Finally close the web browser session that is still displaying the home page of the CSI
CCH Central Database Upgrade
An automatic database upgrade is required by the 2023.1 update. This upgrade runs as a result of the first CCH Central login following the CCH Central Suite update. Follow the process outlined below:
- Start CCH Central and login as a superuser
- Click Yes to continue with the automatic database upgrade
- Click Yes to accept the recommended database backup that will take a backup of the Central database only. If you have already secured a set of database backups (if you have a Document database then a Central only backup will not represent a set of database backups) by following the section Before you Begin > Securing Database Backups then Click No. A restore point is ESSENTIAL to ensure recovery of the system in the event of a failure during the database upgrade
- Click Yes to continue with the database upgrade
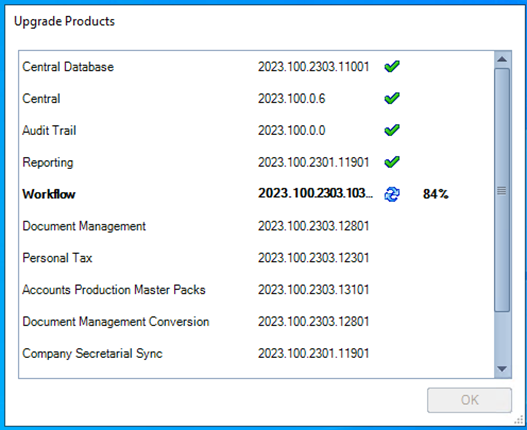
During the upgrade, the application that is being upgraded is displayed with a  and a progress percentage, once the application has reached 100% one of the following symbols is returned:
- Upgrade was successful

- Upgrade failed

- Upgrade has script errors

Where no errors are detected, the success icon is returned.
Note: if script errors or upgrade failed are reported, please contact CCH Software Support to investigate the matter before using the software.
Warning: Errors encountered during the Database Upgrade are potentially fatal and may prevent you from continuing without reverting your system to the previous version. You should evaluate the time taken to resolve any database upgrade errors and the potential business productivity impact that may ensue if the system cannot be utilised and/or a rollback is required. If you wish to revert to a previous version of the system then we recommend you follow the process outlined in the Failure section.
Office Plugin Update
Note: This section only needs to be completed if you are licensed for CCH Document Management and are using the Microsoft Office Document Management and Email Filing plugins.
The plugins are installed locally and therefore this section must be carried out on each end-user device/computer where the CCH Central application is run from:
- Logon to the workstation using an account that has local administrator rights
- Ensure that all programs, including Microsoft Office, are closed
- Using the desktop icon start the CCH Central Suite
> The following window will briefly appear:
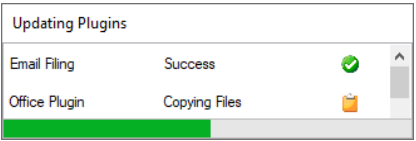
The update will complete in around 30-60 seconds before displaying the the CCH Central Login or Home page.
Travelling Laptops Update
Note: This section only needs to be completed if you are licensed for CCH Accounts Production and/or CCH Audit Automation and making use of the the Travel feature.
Laptops that use the CCH Accounts Production/CCH Audit Automation Travel feature maintain a local copy of the CCH Central Suite. Providing the Windows Desktop shortcut is correctly configured to use the CentralLoader executable, updating this local copy of the CCH Central Suite is carried out automatically the first time that the application is used following an update to the CCH Central Suite program files on the server hosting them.
The automatic update can only take place if no jobs are currently Travelled Out to the laptop. If Travelled Out job(s) are detected when starting the CCH Central Suite, the message shown below will appear indicating that the update will not take place until such time as all jobs are Travelled back:
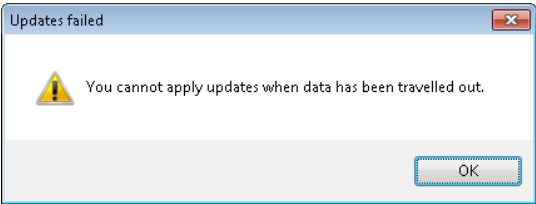
With Travelled Out jobs detected, click OK and the existing version of CCH Central Suite will then start.
To resolve this issue, proceed as follows:
- Travel all jobs back into the main system
- Exit the CCH Central Suite
- Restart the CCH Central Suite to begin the update
Warning: do not use the CSI Workstation Install option to update the Travelling Laptop. This will cause the local program folder to be deleted and replaced with a fresh copy and will negate the automatic feature that synchronises the server copy of CCH Central Suite with the local laptop version.
CCH OneClick
Note: This section only needs to be completed if you are licensed for CCH OneClick.
The following steps must be performed in the order prescribed below:
- Database upgrade performed by the administrator
- Ensure all "Deploy" folders are updated with the latest version (applies to customers using additional local Deploy folders outside of the master Deploy folder).
- A Full Synchronisation from File > Maintenance > OneClick > SyncWorker Console > SyncWorker Management Console (as depicted below) is performed by the administrator.
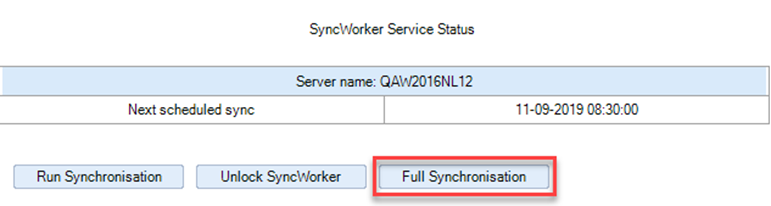
Note: if users report that their Client List and Client Area do not display as expected when accessing Making Tax Digital, Open Integration or Digital Data Review, then steps 2 and 3 need to be performed.
CCH Practice Management
Note: This section only needs to be completed if you are licensed for CCH Practice Management and you have not previously added the BillingDefaultFont and BillingDefaultFontSize configuration keys during an earlier release.
CCH Practice Management 2021.1 or above required two specific configuration keys to be present. This section explains how to check for the presence of these keys and, if they are not present, how to add them.
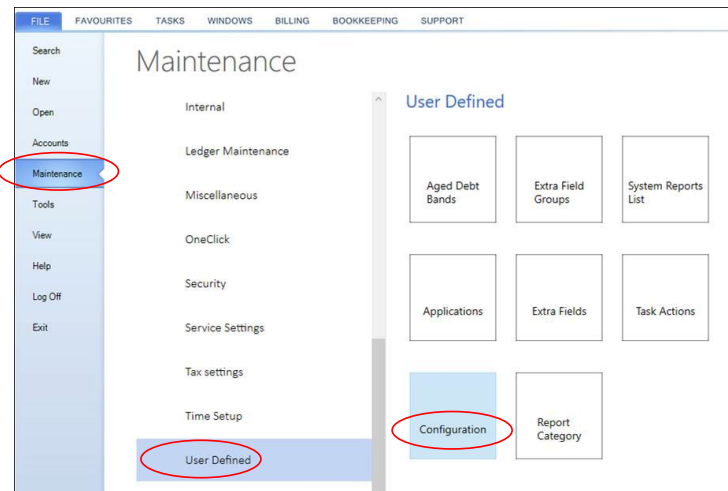
- Whilst logged in as a superuser, Click File
- From From the left menu bar select Maintenance > User Defined Configuration
> The Maintenance window will appear
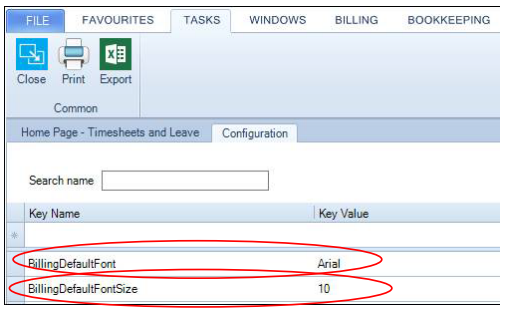
- Use the Search name box to look for the two keys: BillingDefaultFont & BillingDefaultFontSize
If the keys are found, no further action is necessary, and the Configuration tab can be closed.
Otherwise, proceed to the next step:
- In the first row, denoted by '*', the data entry row, enter BillingDefaultFont in the Key Name Field and Arial in the Key Value field, then press Return to add the new configuration key
- Repeat this process for the second key, entering BillingDefaultFontSize in the Key Name field and 10 in the corresponding Key Value field, then press Return to add the configuration key
- Click OK to close the Configuration tab and save the changes
Completion
After completing your software update, we recommend you check the system version and perform a sanity check of core system functionality
Checking the System Version
To confirm the version of your CCH Central suite, proceeed as follows:
- Start the CCH Central Suite
- Select File > Help > About
> The About CCH Central window will appear with the version number shown at the top:
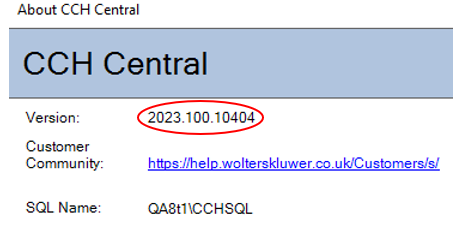
For the 2023.1 update, the version number should be 2023.100.10404 The version shown above is an example only and may not match the 2023.1 release version you have installed.
Checking Core System Functionality
- It is recommended you test the core functionality of the suite to ensure it is functioning as expected
With the system version verified and the core functionality tested, your CCH Central Suite update is now complete.
Failure
If the Database Upgrade fails then you should record as much detail as possible concerning the failure, the modules and errors that are reported. In cases where CCH Central Suite Windows services are not running during the database upgrade then these can be quickly resolved by ensuring the services have been updated, are running and can be communicated with during the process of performing the database upgrade. In cases where the actual database upgrade has failed and there are errors returned by the Database Upgrade then you can retrieve additional information from the system by following the process outlined in the following knowledgebase article:
If you wish to rollback the system to a previous version then you should perform the following steps:
- Record as much detail about the failure as possible, as well as retrieving the Database Upgrade errors as outlined above
- Secure any database backups that may need to be provided for a subsequent investigation by the CCH Software Support Team
- Rollback the system using your own defined rollback process or by following the guidance here.
Appendices
Installing Microsoft .NET Framework 4.8
To install Microsoft .NET Framework 4.8 using the CSI proceed as described below.
- Start the CSI
- Click the large blue Run button
If Microsoft .NET Framework 4.8 is not installed on the particular computer or server the CSI will offer to install this:
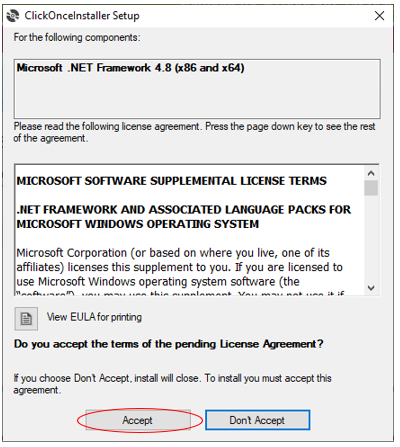
- Click Accept.
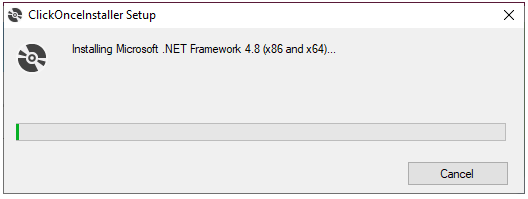
The ClickOnceInstaller Setup for Microsoft .NET Framework 4.8 progress bar will appear:
Followed by a request to reboot:
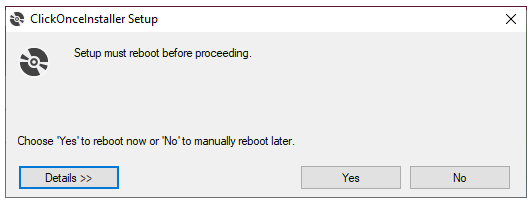
Note: before accepting the reboot ensure that all users are logged off, that all programs are closed, and all work saved on servers and end-user devices/computers where the Microsoft .NET Framework 4.8 update is being deployed.
- Click Yes.
The computer will reboot and after login after which the CSI login will reappear.
Microsoft .NET Framework 4.8 is now installed and the CCH Central Suite update will now proceed as usual.
Troubleshooting
Failure: File In Use
"File In Use: The action can't be completed because the file <path and name of file> is being used."
During the Downloading and installing components step in the Update process the CSI may fail to gain exclusive access to a file that needs to be replaced. The file can be a member of one of the following areas:
- A Program folder
- One of the CCH Central Suite Windows services
Resolving exclusive access to program folder areas:
If the location specified is a program folder area then ensure all users have exited the software to ensure no open file locks are being held for areas of the system that are being replaced during the update process.
Resolving exclusive access to Windows Service locations:
If the location specified is a path to a CCH Central Suite Windows service then the operation will have stalled having attempted to stop the service in question. The CSI will attempt to retry a stop service command for a total of three attempts during the update process, over a period of around 120 seconds, and if the service in question cannot be stopped to ensure exclusive access to the underlying program files in this location then the following error will be displayed:
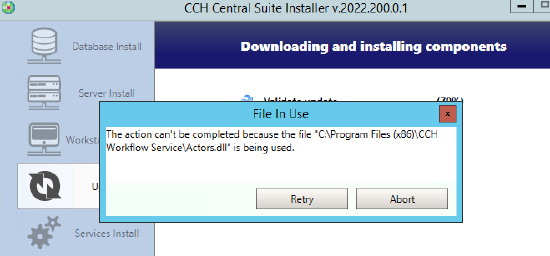
Note: the image above depicts an error for a single file that is in use for the CCH Workflow WCF Service. A File In Use error may be displayed for any of the CCH Central Windows services, with the File in Use error being displayed for any file in the underlying Windows service directory.
You can attempt to manually stop the underlying CCH Central Suite Windows service at this point by following the instruction here, or you can terminate the underlying process using Task Manager, with a full list of CCH Central Suite Windows services, and their associated process executables available here. You can quickly establish which Windows service is impacted by reading the sub-directory folder name underneath "Program Files (x86)" directory from the error message displayed.
Warning: Unsupported Operating System
"When running the CSI an Unsupported Operating System message is presented"
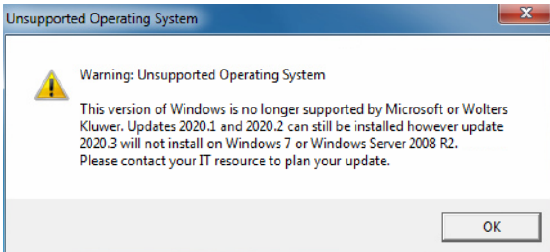
Warning: At this time (July 2022) the message is advisory and the CCH Central Suite update will install, however some features of the software may not operate as expected, in particular, within CCH Practice Management. It is recommended that the workstation and server operating systems are updated as a matter of urgency.
Note: the image above is an example, the exact wording and image will vary according to the operating system, version of the operating system and version of the CCH Central Suite.
Files in Use (when updating the Office Plugin)
"When logging on as an administrator to update the Office Plugin, I get a message Files in Use."
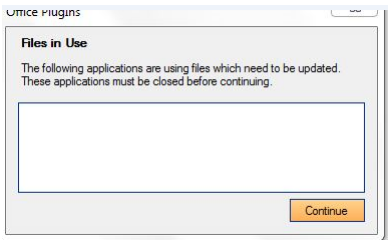
This message occurs if the Office Plugin cannot be updated. The most likely cause of this error is that either a program in the Microsoft Office suite is open (Outlook, Word, Excel, etc.) or the Document Management Watch Folder is open and in use.
Proceed as follows:
- Close the CCH Central Suite
- Close all Microsoft Office Suite programs
- Look in the system tray for the Watch Folder icon, as shown in the image below:
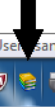
- Right-click on the icon and select Exit
- Start the CCH Central Suite and complete the Office Plugin update
- Exit the CCH Central Suite and restart the workstation
Large Database Warning
"During the update I receive a Large Database Warning message"
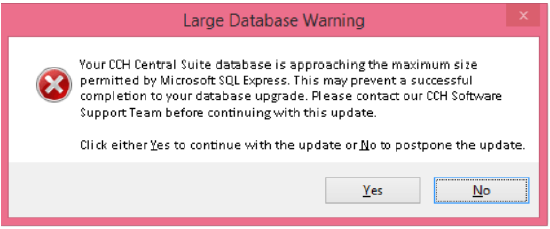
This message may appear either when running the CSI to update the CCH Central Suite or when first logging into the CCH Central Suite after an update, at the start of the database upgrade. The message indicates that your Central database is approaching the maximum size that Microsoft SQL Server Express edition is capable of maintaining.
The Large Database Warning appears when the database data size is above 6.5 GB, with the database no longer accepting new content under a SQL Server Express instance when the data size breaches the 10 GB threshold. The appearance of this message should be invesitgated to ensure that sufficient space within the 10 GB data size limit is available for any new data added to the system and requires knowledge of both system usage as well as data growth over time. Neither of these areas are the responsibility of CCH Software Support and it is recommended that any guidance in this area is facilitated by your local IT support team. Further information in this area is contained within the following KB article: CCH Central : Technical Database - What can I do if my CCH-Central database is approaching the 10 GB data limit under SQL Server Express?. CCH Software Support is unable to resolve issues where the capacity limits of SQL Server Express are being approached. Once the 10 GB limit is breached then the system will become inoperable.
Should you receive such a message, delay the update / upgrade and discuss that matter with your local IT support team.
Error Code 49
"During the database upgrade I get an Error Code 49 message"
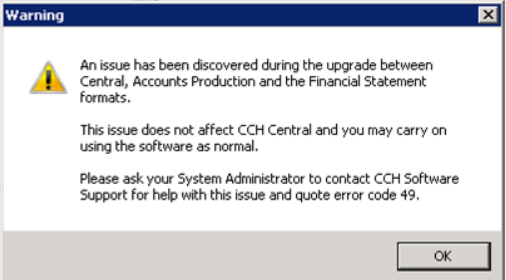
This message means there is an inconsistency in the documents or formats stored in your database. Please Create a Case with the CCH Software Support team to enable the matter to be investigated.
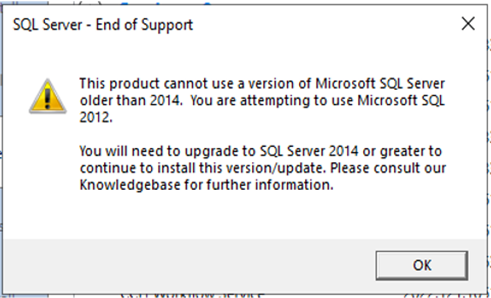
SQL Server 2008/2008 R2/2012 not supported
"This product cannot use a version of the Microsoft SQL Server older than 2014. You are attempting to use Microsoft SQL Server 2012."
The below screen will be displayed if you are running one of these unsupported SQL Server versions:
- Microsoft SQL Server 2008/2008 R2
- Microsoft SQL Server 2012
CCH Central Logon Failed error messages
Unsupported version of SQL Server (2012 and earlier)
"Conversion failed when converting the nvarchar value 'The Central database resides on an unsupported version of SQL Server, CCH Central login terminated. Access to CCH Central will resume once the database resides on a supported version of SQL Server.' to data type int."
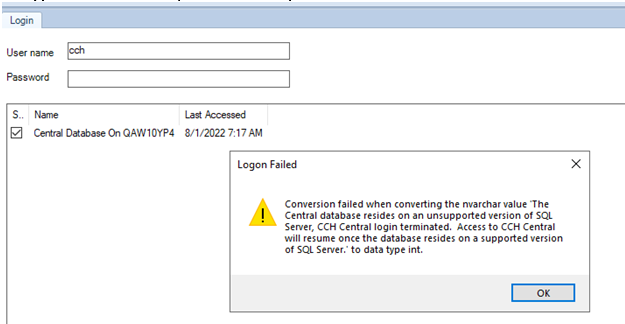
This error appears when you attempt to login to Central when using an unsupported version of SQL Server.
OCR Service Change: Updated terms and conditions
There are a few changes made to the OCR Service’s terms and conditions. But if you have completed this part in a previous update then this part can be ignored.Read the new terms when prompted by the screenshot below:
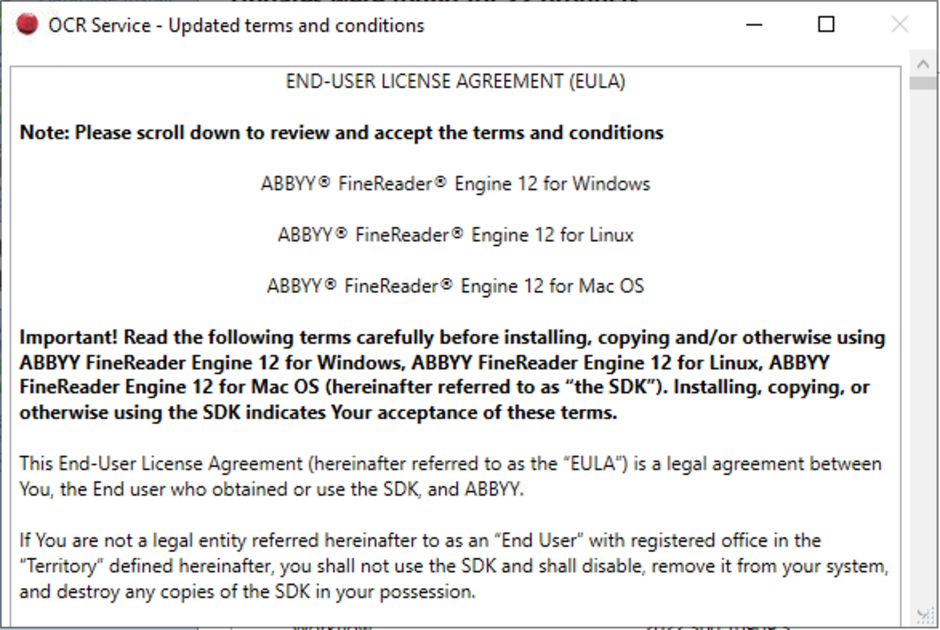
Place a tick by the “Accept terms and conditions”:
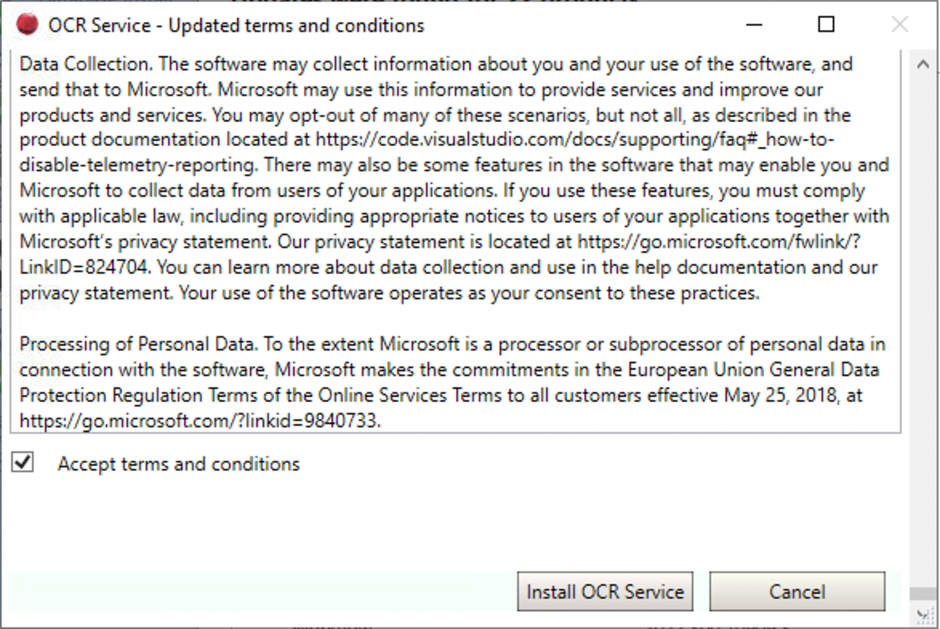
Now accept the terms and Click on the Install OCR Service button.
If V12 Is deployed / upgraded to for the first time, a licence upgrade is also required.
Refer to Abby V12 Licence Application Article on the process
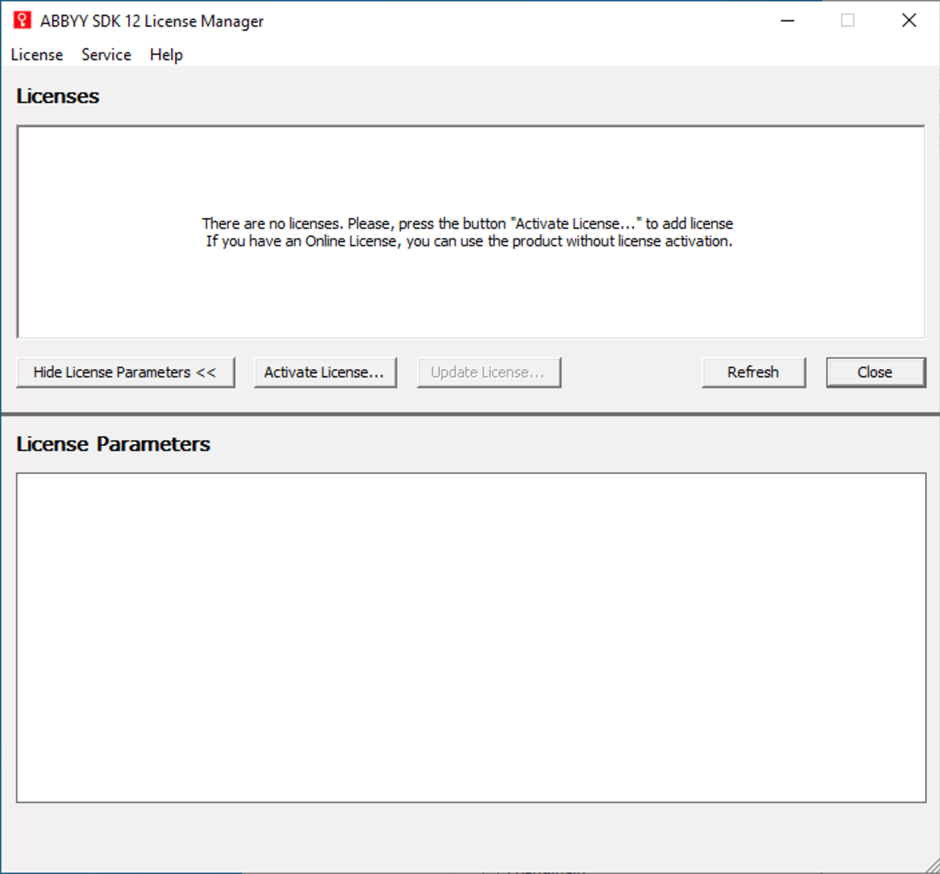
Click on the close button now complete.
CCH Central CLR Strict Security certificate is not present
"Conversion failed when converting the nvarchar value 'The CCH Central CLR Strict Security certificate is not present. Access to CCH Central will resume once the Cer_CCH_Central certificate has been installed (search Support Portal for 'Cer_CCH_Central'), or the SQL Server clr strict security feature has been disabled' to data type int."
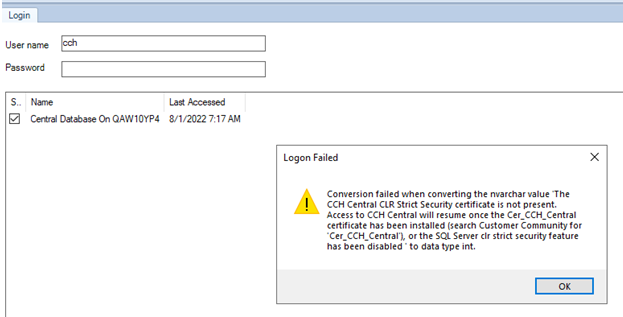
This errors appears when the SQL Server feature CLR Strict Security is enabled but to Cer_CCH_Central certificate has been installed into the Master Database. There are two options, either install the certificate using the Tools Install tab of the CSI (SQL Server 2019 only) or disable the CLR Stricit Security feature.
CCH Central CLR Strict Security certificate has expired
"Conversion failed when converting the nvarchar value 'The CCH Central CLR Strict Security certificate has expired. Access to CCH Central will resume once the Cer_CCH_Central certificate has been updated (search Support Portal for 'Cer_CCH_Central), or the SQL Server clr strict feature has been disabled' to data type int."
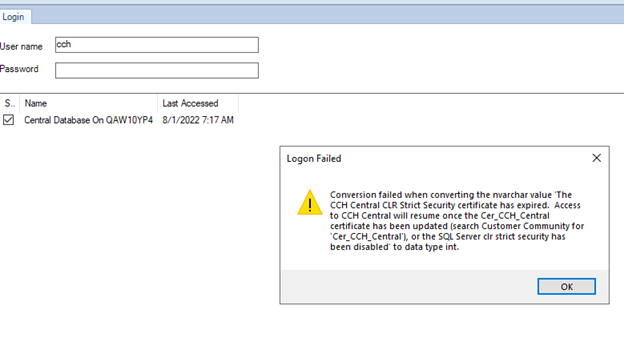
This error appears when the Cer_CCH_Central certificate installed into the Master Database to facilitate the signing of CLR assemblies in CCH Central has breached it's expiry date. There are two options, either update the certificate using the Tools Install tab or disable the CLR Strict Security feature.