Creating a New Report

How to create a new Report
Create a new Report
- From the Reports tab, select the category and subcategory you want the new report to be in.
- From the task bar click the button Create to create a new report based on the subcategory. The New Report window opens ready for you to assemble the required fields.
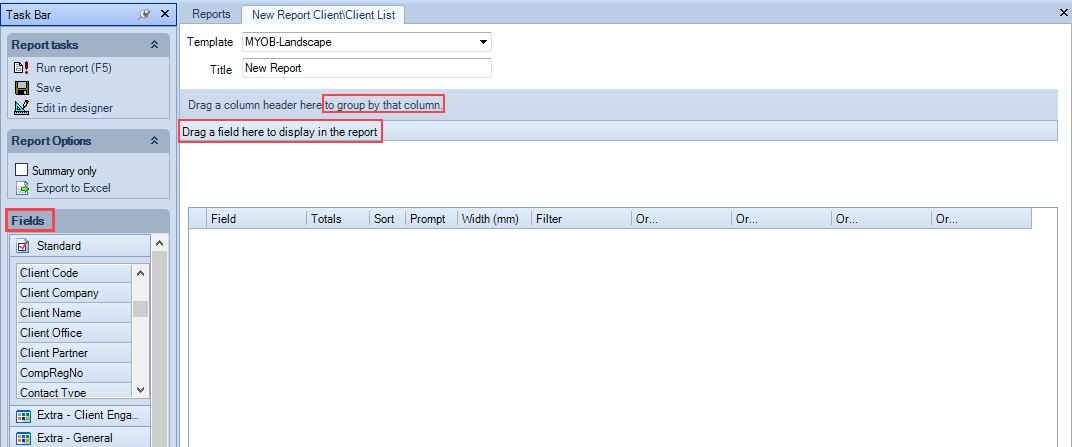
- In the New Report window, choose a template from the template drop-down list.
- Enter a name for your report.
- Enter the end date of your report when this is required.
- From the left pane where the Fields are listed, click and drag, for example, the Client Partner field, which you may want to use to group data in your report, into the horizontal bar just below the report title field.
- From the Fields list, click and drag the fields that you want into the field bar just below the grouping bar. A new field can be placed before or after any pre–existing field. A A new field can be placed before or after the fields already on the bar. When dragging or change the order of the fields, the red arrows provide a visual guide to locating items in the field bar.
- You can run your report once you have selected fields to include.
Note: Grouping is optional in a report; you can group by a single field or by several fields.
Note: the red arrows provide a visual guide to locating items in the grouping bar. When multiple fields are selected for grouping the grouping bar increases in size, like that shown below, to allow the fields to display in a tree-like hierarchy.
Note: ensure you save your report regularly if you expect to reuse it. If its an ad hoc query, then you can run it without saving.